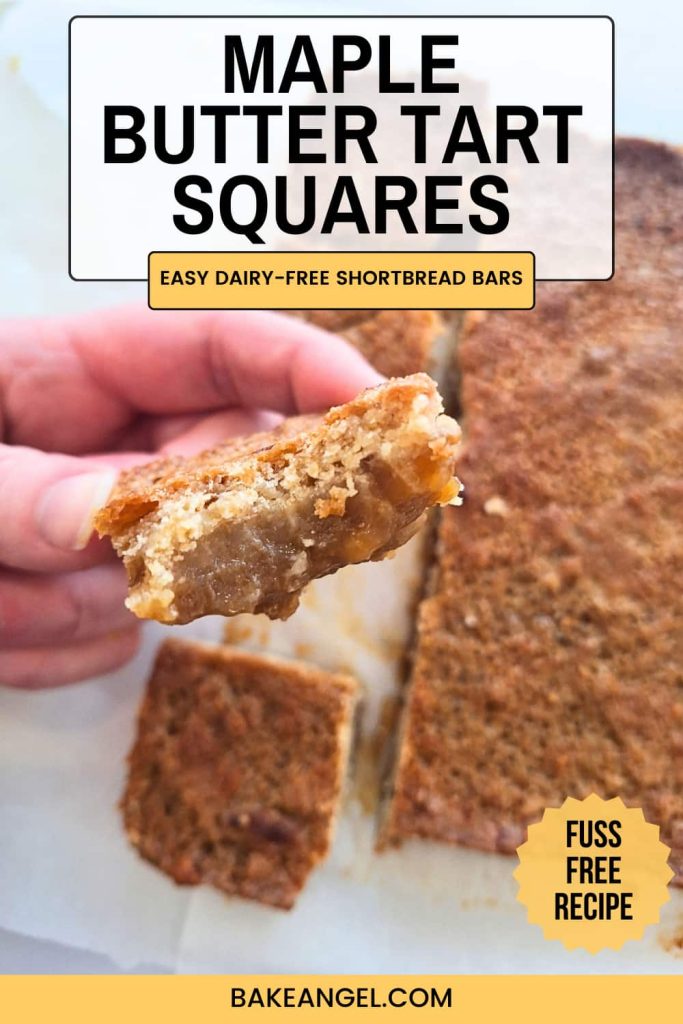
Love butter tarts but don’t love the faff of making pastry? These maple butter tart squares give you all the rich, gooey caramelized flavour of the classic Canadian dessert in an easy bar form. Ideal for Canada Day celebrations, Thanksgiving and cozy weekend treats.
Why I Made This Recipe
Since emigrating to Canada, our family has really embraced Canadian culture – especially anything made with maple syrup. Based on a classic butter tart recipe and paired with my dairy-free brown sugar shortbread, this combination truly oozes Canadiana.
Fun Fact: the first published butter tart recipe dates back to 1900 and appeared in the Women’s Auxiliary of the Royal Victoria Hospital Cookbook, in Barrie, Ontario – proof that this beloved dessert has been part of Canadian kitchens for over a century!
Why You’ll Love This Recipe
These dairy-free maple butter tart squares are rich, gooey, and indulgent, and will satisfy all your sweet cravings. Using simple 10 ingredients, this one-pan recipe has all the flavour without the fuss.
Easy to portion for bake sales or gifting, this recipe is a great option if you’re not a fan of making pastry. Trust me, if you love maple syrup, you will love these.
Ingredients and Substitutions
This is a dairy-free recipe with easy substitutions to make it gluten-free and vegan. There’s also one easy switch if you do consume dairy. For different flavour combinations and tips, check out my flavour suggestions and FAQ sections.
For the Shortbread

Sugar: the brown sugar used in the shortbread base will compliment the filling perfectly. I have also made this recipe with white sugar and it turns out perfectly.
Butter: I am using plant-based unsalted butter. This needs to be cold for the shortbread to create a lighter, crumbly consistency. Use dairy butter if you prefer.
Flour: the heavier protein content in all-purpose flour helps to create the right consistency for the shortbread. To make this gluten-free, sub with gluten-free 1-to-1 baking flour. I have had great success with Bob’s Red Mill blend.
For the Filling

Sugar: brown sugar is a must for butter tart fillings. Sub with white sugar if you prefer a cleaner sweetness.
Maple Syrup: use pure traditional maple syrup. There are different ‘colours’ available, such as dark, medium, amber and light. We usually buy a local medium syrup during maple syrup season but use whichever you can find. The key is ensuring it is real maple syrup, not pancake syrup.
Butter: a small amount of melted butter adds richness to the filling. Use dairy butter if you prefer.
Apple Cider Vinegar: this almost seems like a secret ingredient but is essential to the filling. Use white vinegar if you don’t have ACV.
Vanilla: I’m hooked on vanilla bean paste whenever I add flavouring to desserts. Use vanilla extract if you prefer.
Eggs: for stability and structure, this recipe uses 2 eggs. I recommend subbing with 2 flax eggs if you are vegan or follow an egg-free diet.
Flour: This helps stabilize the filling. Sub with your preferred gluten-free flour if required.
How to Make Maple Butter Tart Squares
This recipe has a couple of steps that will give you time to put your feet up and enjoy a cup of tea while you are waiting (at least, that’s what I did!). Gather all of your ingredients and equipment. The butter should be cold and the eggs need to be at room temperature. Take them out of the fridge as soon as you’re ready to start the recipe and they’ll be ready by the time you need them for the filling.
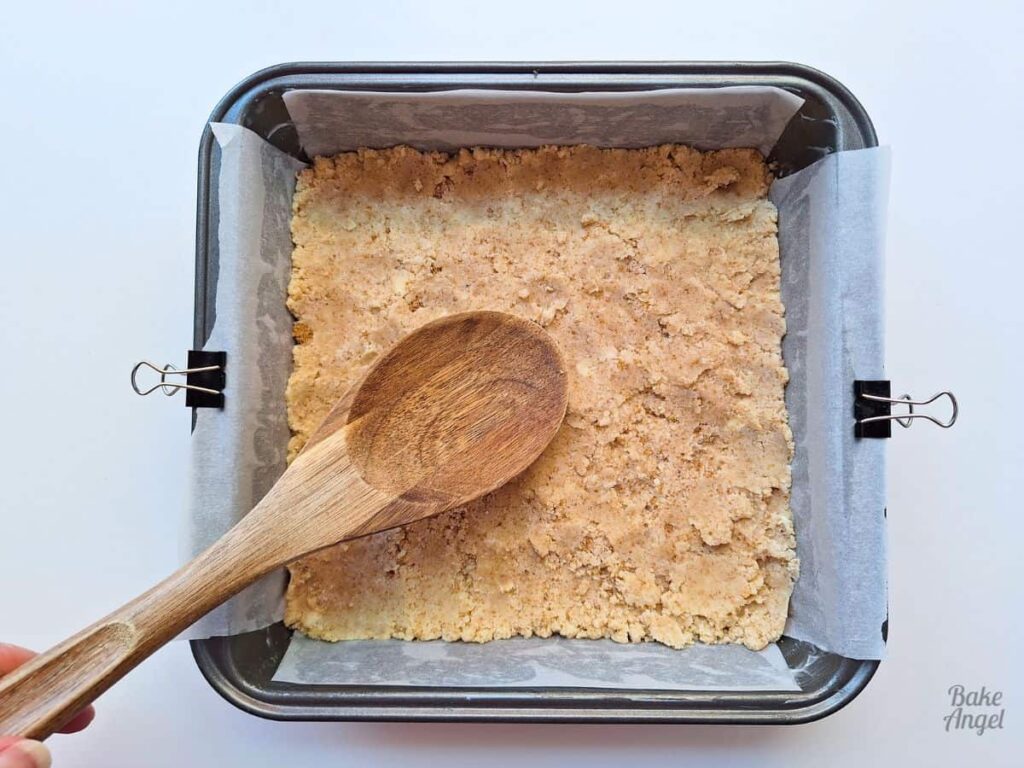
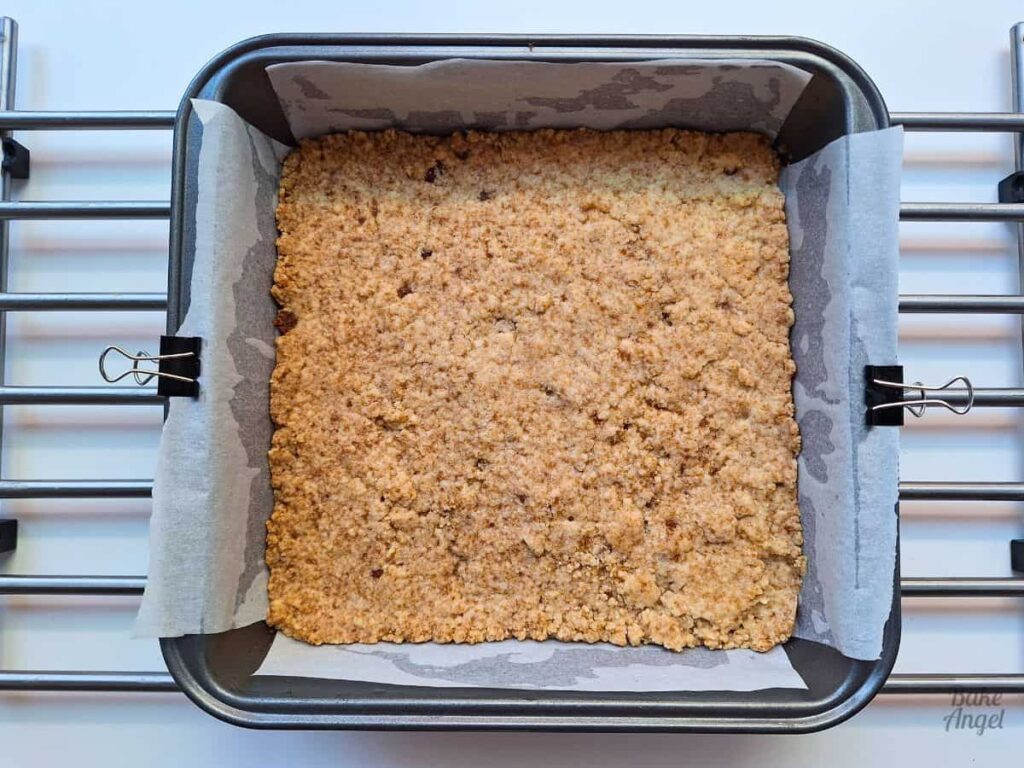
Grease and line an 8 x 8 baking pan with parchment paper that overhangs on two sides. Use clips on the side of the pan to hold the overhanging paper in place. This is a great hack that I have recently started doing, as I noticed that sometimes the overhanging paper blows on top of ingredients while they are baking! Just be mindful not to touch the clips once they are hot. Why do I use an overhang? It’s much easier to grab hold of it to lift out the shortbread once it’s baked.
Preheat your oven to 350F / 175C. I baked this recipe in our toaster oven as it fits perfectly. A great option if you don’t want to turn your regular oven on.
To make the Shortbread Base
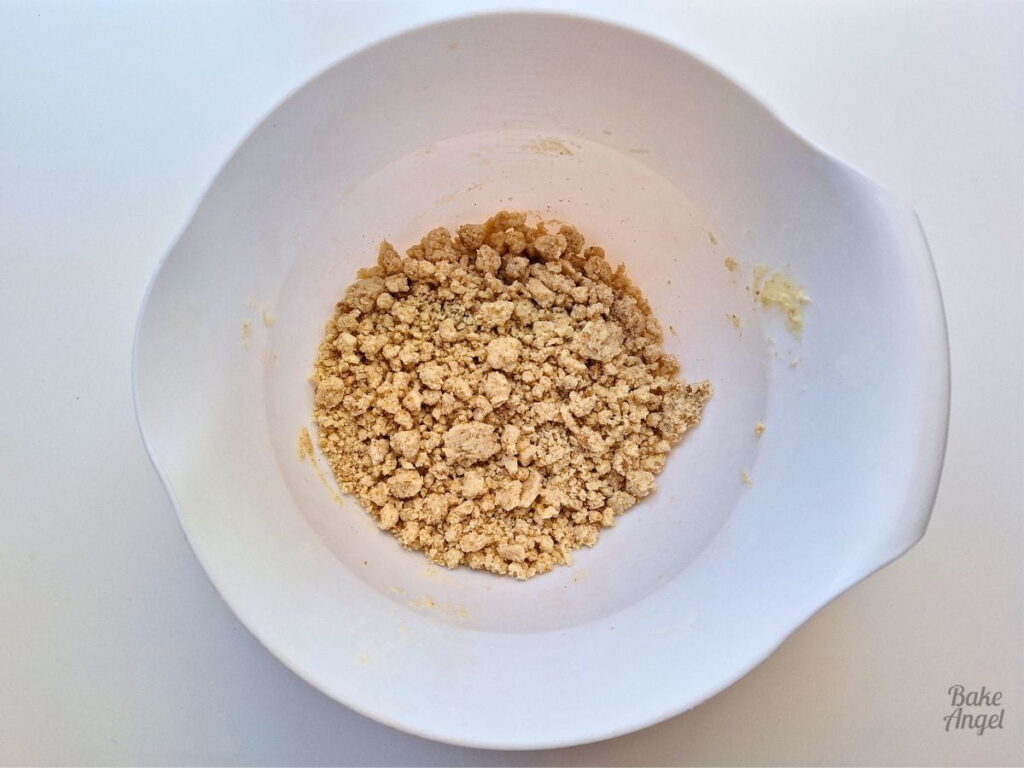
Start by combining the brown sugar and all-purpose flour in a bowl.

Cut in the cubed cold butter until a crumbly mixture forms. You can also do this by hand if you prefer. And honestly, I don’t worry if there are still small pockets of butter remaining. That adds to the melt-in-the-mouth consistency of the shortbread.
Add to shortbread mixture to the prepared baking pan and flatten with a wooden spoon.
Bake for 20-25 minutes at 350F / 175°C until lightly golden.
To Make the Filling:
A few minutes before the shortbread base has finished baking, go ahead and start making the filling. Add the brown sugar, maple syrup, melted butter, apple cider vinegar and vanilla bean paste to a jug or mixing bowl and stir to combine until the sugar has dissolved.

Add in the two eggs and flour and stir until fully combined.
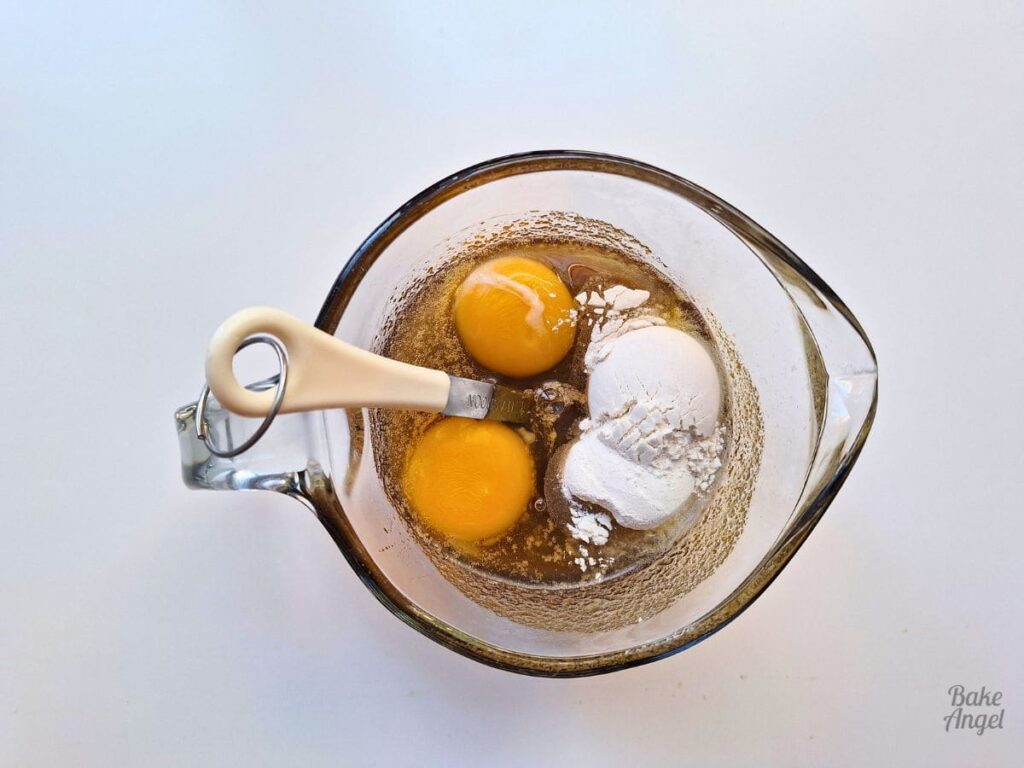
This creates a wonderful gloopy filling that smells so maple-y.

Pour the filling over the shortbread base as soon as it is baked and carefully place the pan back in the oven.

Bake for 22-25 minutes, depending on how jiggly you prefer the filling.

Let’s Talk About the Jiggle
To jiggle or not to jiggle? This is a well-debated topic among Canadians. And honestly, there is no wrong answer here. If you prefer a more gooey, runnier filling, bake for a couple of minutes less. As the filling firms up once it cools, you can remove the pan from the oven when there is still some jiggle in the middle. This would be around the 22-minute mark but keep a close eye on it.

Once your butter tart is baked, remove the pan from the oven and place on a cooling rack. Allow to cool for 30 minutes before removing the tart from the pan.
This process is essential to ensure that the filling is firm enough to cut, without running all over the place when you take it out of the baking pan.
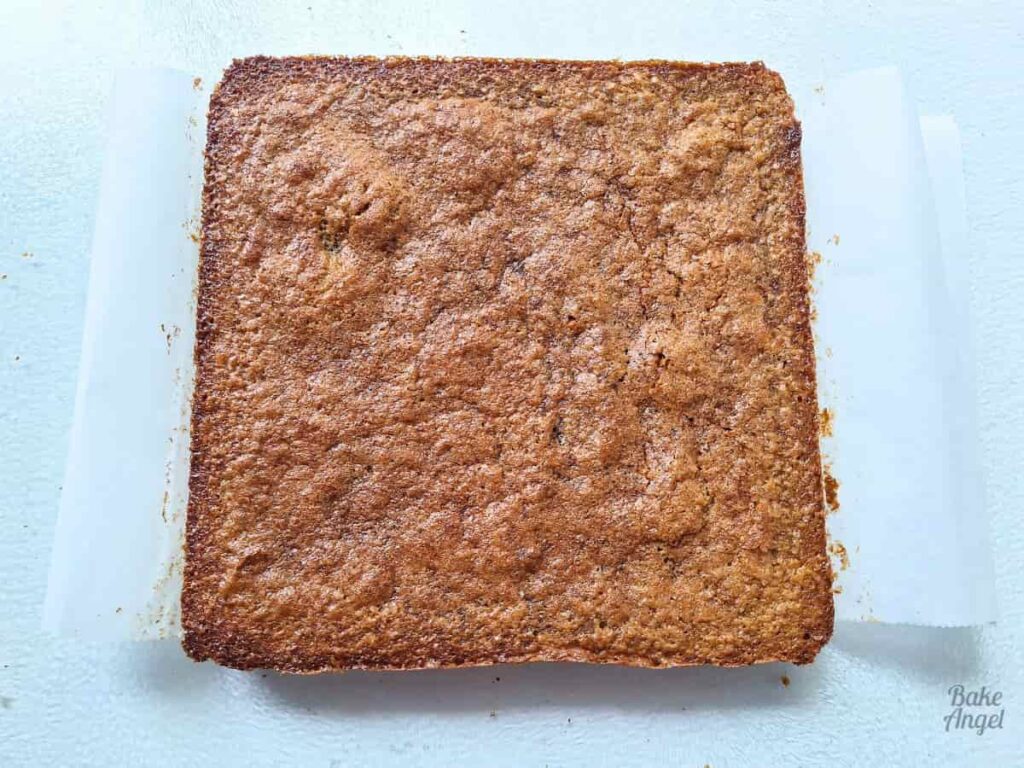
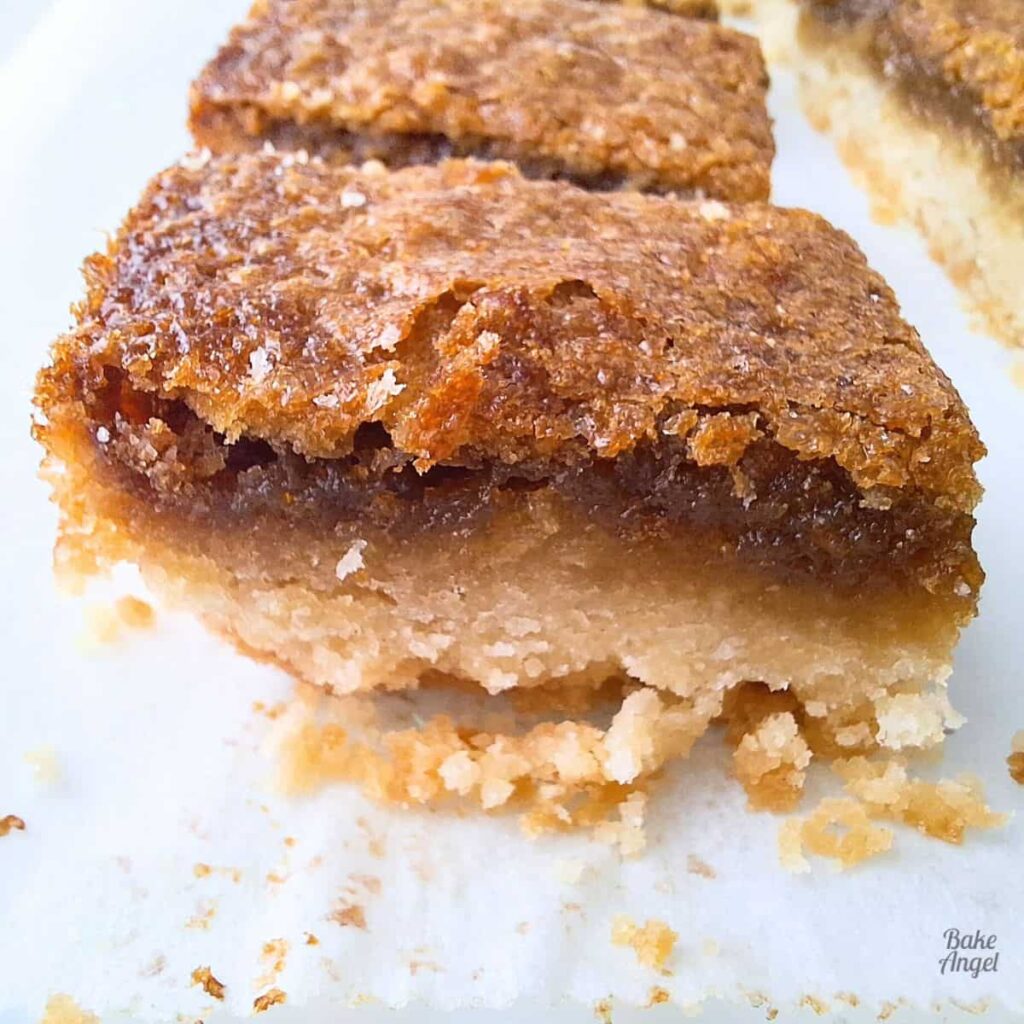
And finally, go ahead and cut up the squares. Oh my – look at the caramelization of the filling.

Flavour Suggestions
Canadians are passionate about butter tarts and whether they should include raisins. I’m not a fan but for those who are, add 160 grams (1 US cup) of raisins to the filing.
We love adding dried cranberries, raspberries (the tartness is so good against the sweet filling!) or chocolate chips. Let your imagination go wild and experiment with whatever you like. And of course, let me know in the comments what your favourite flavour is.
I mean, look at those layers. This is sweet Canadian perfection! We can’t get enough of these maple butter tart squares and I hope you’ll enjoy them as well!

Serving Suggestions
These maple butter tart square bars are delicious served warm, especially with a scoop of plant-based vanilla ice cream. They pair perfectly with tea or coffee for a cozy afternoon snack, or can be sliced into small squares for bake sales, parties, or gift boxes.
Maple Butter Tart Squares FAQs
This recipe makes approx 16 2-inch squares. I recommend cutting it into squares once it has cooled for at least half an hour.
There is just 1 substitution needed. Replace the all-purpose flour in the shortbread base with gluten-free 1-to-1 baking flour. No other changes are required.
To make this recipe vegan, replace the 2 eggs in the filling with 2 flax eggs. To make 2 flax eggs, combine 2 tbsp ground flax with 6 tbsp water and allow to sit for 5-10 minutes. Continue with the recipe as per the instructions. No other changes are required as long as you are using plant-based butter, as per the recipe.
To store any leftover squares, pop them in an airtight container in the fridge for up to 1 week. Bring back to room temperature before serving. If you need to freeze them, wrap the individual squares in parchment or plastic wrap before placing them in an airtight container and freeze them for up to 3 months. Defrost at room temperature before unwrapping.
This is a hot topic in Canada and a valid question. I’m not a fan of raisins so I leave them out. If you want to include them, add 160 grams or 1 US cup to the filing. Check out more flavour suggestions further up in this post.
Craving More Small Bites?
If you’re putting together a dessert table, these recipes pair perfectly with your maple butter tart squares:
- Caramel Millionaire Shortbread (Vegan) – another match made in heaven.
- Allergy-Safe Rice Krispie Treats (Dairy-free) – Kids and adults will go crazy for them.
- Air Fryer Churro Bites (Vegan) – easy, golden, and delicious.
- Strawberry, Marshmallow and Donut Kabobs (Dairy-Free) – quick to assemble and fun to eat.
For more Canadian-inspired treats, try these favourites:
- Canadian Maple Loaf Cake (Dairy-Free) – enjoy a slice of pure maple goodness.
- Maple Honeycomb Candy (Vegan) – a classic sweet treat.
- 30 Minute Cinnamon Rolls (Vegan) – start your day with a cozy breakfast.
- Tim Hortons Inspired Blueberry Burst Muffins (Dairy-Free) – perfect for grab-and-go mornings.
Have you ever tried butter tart squares? Let me know in the comments – I hope you love this recipe as much as we do!
Happy Baking!


Maple Butter Tart Squares – Dairy Free Canadian Bars
Equipment
- Wooden Spoon
- Small measuring jug
Angela’s Top Tip
Weigh your dry ingredients in grams with a scale for best results!
Ingredients
For the Shortbread Base
- 50 grams Brown Sugar (1/4 US Cup)
- 100 grams Plant Based Butter (unsalted) (cold and cubed – * see note)
- 150 grams All Purpose Flour (1 & 1/4 US Cup)
For the Filling
- 160 grams Brown Sugar (3/4 US Cup)
- 60 ml Maple Syrup (1/4 US Cup)
- 2 tbsp Melted Plant Based Butter (30 ml)
- 1 tsp Apple Cider Vinegar (5 ml)
- 1 tsp Vanilla Bean Paste (5 ml)
- 2 Eggs
- 2 tbsp All Purpose Flour
Instructions
Prep
- Gather all of your ingredients and equipment. The butter should be cold and the eggs need to be at room temperature.
- Grease and line an 8 x 8 baking pan with parchment paper, Use clips on the side of the pan to hold the overhanging paper in place (see main post).
To Make the Shortbread Base
- Combine 50 grams Brown Sugar and 150 grams All Purpose Flour in a bowl.
- Cut in the cubed 100 grams Plant Based Butter (unsalted) until a crumbly mixture forms.
- Add to the prepared baking pan and flatten with a wooden spoon.
- Bake for 20-25 minutes at 350F / 175°C until lightly golden.
To Make the Filling:
- While the base is finishing baking, make the filling. Add the 160 grams Brown Sugar, 60 ml Maple Syrup, 2 tbsp Melted Plant Based Butter, 1 tsp Apple Cider Vinegar and 1 tsp Vanilla Bean Paste to a jug or mixing bowl and stir to combine until the sugar has dissolved.
- Add in 2 Eggs and 2 tbsp All Purpose Flour and stir until fully combined.
- Pour over the shortbread base and carefully place back in the oven. Bake for 22-25 minutes, depending on how jiggly you prefer the filling (see main post).
- Allow to cool for 30 minutes then remove from the pan and cut into squares.
Video
Notes
- Yield: This recipe makes 16 butter tart squares (2-inch sized).
- Flavours: For additional filling suggestions, check out the main recipe post.
- Butter: for US measurements, use just under 1/2 cup, 7 tbsp or 7/8 of a stick of butter.
- Gluten-Free: To make this gluten-free friendly, replace the all-purpose flour with gluten-free 1-to-1 baking flour. No other changes are required.
- Vegan: To veganise this recipe, replace the 2 eggs in the filling with 2 flax eggs (2 tbsp ground flax with 6 tbsp water – see main post for instructions). No other changes are required.
- Storage: To store, pop the slices in an airtight container in the fridge for up to 1 week. Bring back to room temperature before serving.
- Freezing: If you need to freeze them, wrap the individual squares before placing them in an airtight container and freeze for up to 3 months. Defrost at room temperature before unwrapping.
- Looking for more Canadian recipes: check out our Maple Honeycomb Candy, Easy Cinnamon Rolls, Maple Loaf Cake, and Tim Hortons Inspired Blueberry Burst Muffins.


I’ve never made anything with maple before, and that is a big mistake on my part. These are FANTASTIC! So delicious and comforting, definitely a new favorite!
I’m so pleased that you enjoyed these Nathan. You’re right that they are a real comfort treat.
I loved these! They made a perfect dessert last night.
Happy to hear that Chenee.
These look so good. I’m looking forward to trying them!
They’re so good! I know you’ll enjoy them.
OMG, if there was heaven in dessert form, this is it. These were so good. The steps were so easy to follow that I had my daughter do most of the work. A keeper recipe.
I love how you described them Melissa. They are heaven, for sure! Glad you all enjoyed the recipe.
What an amazing flavor combination! These treats are out-of-this-world delicious! Thanks for sharing 🙂
Thanks so much Holley. Pleased that you enjoyed them.
For the shortbread base, the 100 grams of butter equals what in the U.S.? 1/2 cup?
Ah, thank you for catching that Linda – I have added the equivalents to the recipe. Its just under 1/2 cup or 7 tbsp. Happy baking!
Thank you! I’m looking forward to trying them next week for company ????
You’re so welcome Linda. I hope you all enjoy them!
DEFINITELY going to try these! Our last butter tart square attempt was a flop, lol! And we love the idea of maple syrup instead of corn syrup 🍁🇨🇦❤️❤️🇨🇦🍁
Eggs are dairy. This is not dairy free.
Hey Sherry! Quick science check: eggs aren’t dairy – they come from chickens, not cows 🐔🥚. So yes, this recipe is dairy-free! Easy mix-up, but now you’re in the know 😉
Eggs are considered dairy. I’m vegan and this recipe is not dairy free.
HI Sherry, I can see where the confusion may come from as eggs are often stocked with dairy in grocery stores. They are definitely not dairy though as dairy is made from the milk from mammals, whereas eggs are from birds. I hope that clears up the confusion.