Once you’ve made your own shelf stable strawberry jam, you’ll never buy store bought again! Here’s my step by step guide to canning strawberry jam, showing the entire process from picking the berries to processing the jam on a bbq side burner. We love making our own jam every Summer and this shelf stable recipe ensures that we have enough in our pantry to last until late Spring.

Why I Made This Recipe
Our kids would live on strawberry jam if we’d let them and we go through so much jam every year! It’s now become a family tradition for us to go strawberry picking every summer and pick an enormous amount of berries to turn them into jam. I am following the proper canning directions from Bernardin to ensure that our jam is shelf stable and safe to eat. If you are not familiar with canning and would like more information about the process, check out their site: https://www.bernardin.ca/en/stepbystep.htm
Why You Need to Make This
There is nothing more satisfying than enjoying your own freshly made jam with breakfast or including it in your favourite desserts. Making your own jam is also more cost-effective than buying store-bought jam. Each jar works out at least half the price of the store alternatives and you can control the ingredients in your jam more easily as well.

A Little Bit about Canning
Canning preserves the freshness of food so that you have fresh-tasting produce throughout the year. It’s a great way to save fresh local produce that has a short growing season, especially if you live in a country that has snow on the ground for 6 months of the year, like here in Canada! Food is stored in mason jars and sealed with two piece metal lids – a disc, which acts as the seal, and a ring to hold it in place while it is processed in a canner (water bath).
You can usually find canning supplies in a grocery store. I purchased this kit from Walmart several years ago and you can also find all of these items in my Amazon store canning list. To can jam, you will need a large canner with rack, tongs, mason jars, metal rings and metal lids.

Heat processing jam in a water bath is an essential part of the process to ensure that there is a strong seal on your jars which will preserve the quality of the contents. Essentially the ‘processing’ stops any molds and bacteria developing from the decaying process that naturally occurs when food is in its natural state, thus prolonging the life of food. Done correctly, you can enjoy fresh food far beyond its normal seasonal life.
Ingredients and Substitutions
This shelf stable strawberry jam recipe is straight from the leaflet that comes in the box with Bernardin liquid pectin and converted to grams for accurate measurements. As such, there are no substitutions to ensure that the recipe is safe for canning. Check out my FAQ section for some common jam questions.

Strawberries: we picked fresh strawberries from a local organic farm. You could also use store bought berries if you prefer. I highly recommend bathing your berries in cold water and vinegar before using them, to remove any dirt and impurities. Check out my short ‘how to’ video on this.
Sugar: white sugar is added for sweetness and also to help the jam form its jelly consistency.
Lemon Juice: the acidity from the lemon juice aids the canning process and helps to preserve the jam.
Pectin: I am using liquid pectin. If you can not find liquid pectin, follow the instructions that come with the powdered version.
Side note: If you prefer to freeze your jam, check out my 2 ingredient strawberry jam which does not use pectin and is not processed in a water bath. For more information about canning and heat processing, visit: https://www.bernardin.ca/en/sciencebehindheatprocessing.htm
How to Make Shelf Stable Strawberry Jam
First, gather up all of your ingredients and equipment to make the jam. Once your strawberries are prepared, the cooking and canning happen fairly quickly so you want to ensure that you have everything on hand. Add the mason jars to the canner rack and fill them and the canner with water, ensuring there is at least 1 inch of water covering the jars. Heat up the water until the water has a slow boil. This takes a while so start to heat it up while you are preparing your fruit. Soak the lids in hot water until required.
Slice the tops off the strawberries and crush them. Leave pieces of strawberries if you prefer a slightly lumpy jam.

Cooking the Jam
Add 900g crushed strawberries, 60ml lemon juice and 1400g white sugar to a large saucepan.

Stir together and bring to a rolling boil over a high heat. Note – A rolling boil means that you can’t stir it down.
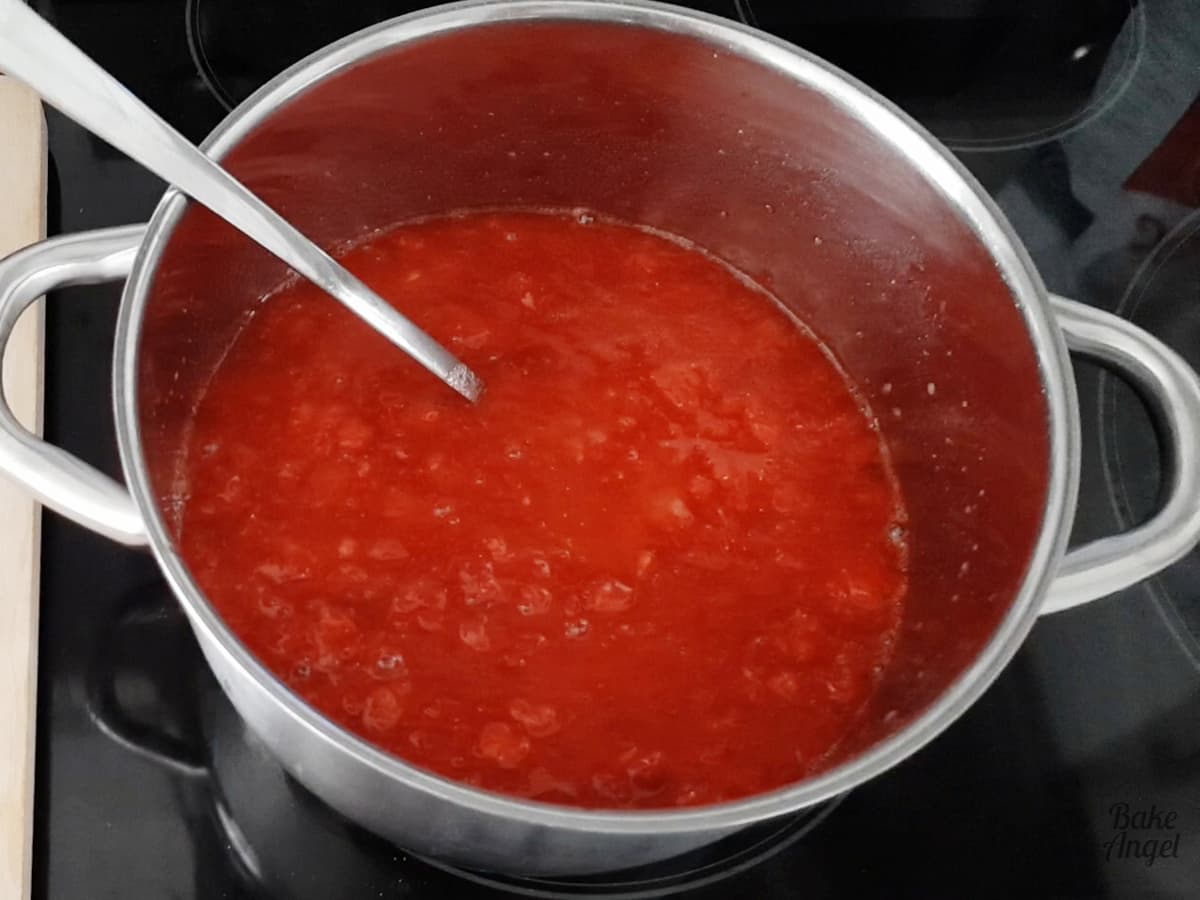
Add the pouch of liquid pectin then stir continuously for 1 minute.

Remove from the heat then skim off any foam (we like to keep this to eat on ice cream).
Processing the Jam
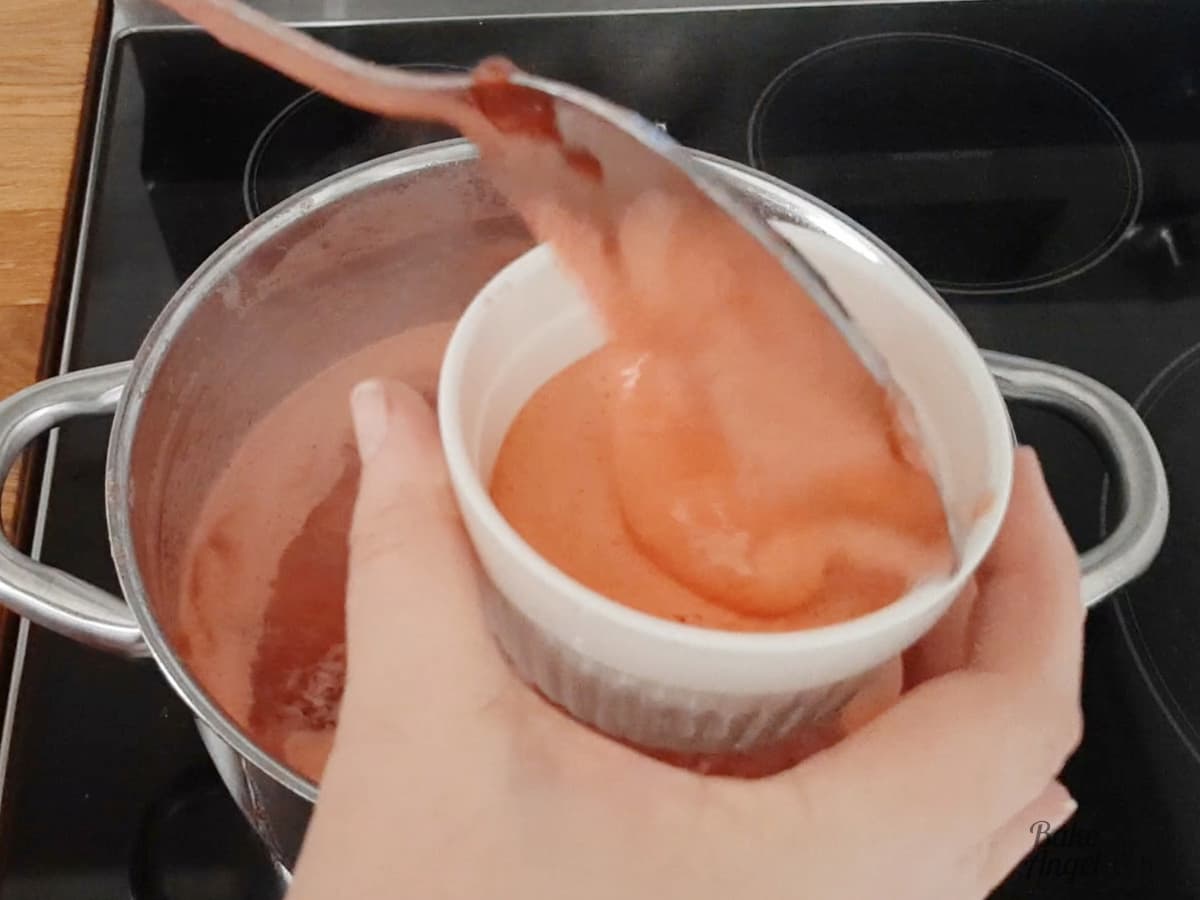
One at a time, remove a mason jar from the canner using the tongs, pouring the water back into the canner. Ladle the jam to almost full, leaving about 1/4 inch of headspace. In my setup below, you can see that I have everything that I need close at hand. We decided to can the jam on our BBQ side burner as it was such a lovely day. Check out the video for this recipe (below) to see how we stabilised everything. I recommend putting your saucepan and mason jars on a wooden board to protect your surface.

Wipe off any spillages from the top of the jar then add the lid and ring. Do not fully tighten the ring. It only needs to be fingertip tight.

Place the jar back in the canner using the tongs and repeat until all of the jars have been filled.

Bring the canner back to a full rolling boil, then cover with the lid and process for 10 minutes. DO NOT skip this step as this is the most important part of canning.

After processing, turn off the heat and remove the lid. Let the canner sit for 5 minutes before carefully removing the jars. Place the jars on a flat surface and allow to cool for 24 hours. DO NOT shake or agitate the jars while doing this. We did this outside so I placed them on a wooden board. I like to use a towel if I am placing them inside to protect my countertop. You will hear the lids ping as the air is released.
A quick side note about the separation of the jam in the photo below. This is completely normal for jam and nothing to worry about. When you open the jars, just give the jam a quick stir to evenly distribute the fruit.
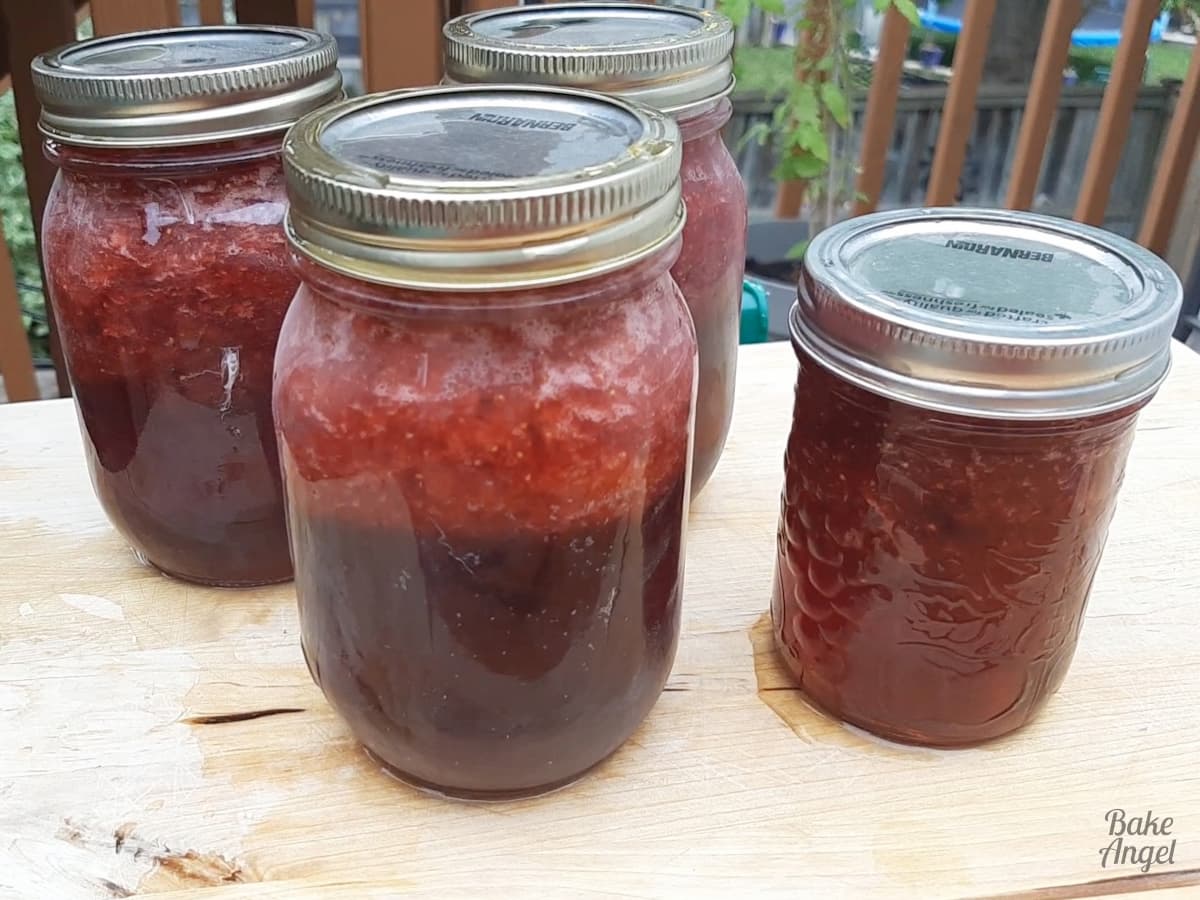
Check the jar seals before storing the jars in the pantry. If any seals move when pressed, either reprocess the jars or store in the fridge and use within 2 weeks. For pantry jars, remove the rings and use the jam within 12 months.
To use the jam, carefully remove the lid with a flat knife and replace with a screw-on lid. Store opened jars in the fridge for up to 2 weeks. Doesn’t it look wonderful on this toasted bagel. Such a simple breakfast that just brings back the taste of Summer with every mouthful.

Common Jam Questions
This recipe yields 7 x 250ml mason jars.
If you do not have liquid pectin available, follow the directions that are included on the powdered pectin packaging.
This is a shelf stable recipe so you can store it in your cupboard or pantry. Once the jars have cooled for 24 hours, remove the rings. Check that the seals are still firm – they should not depress when you touch them. If any seals have not processed properly, you can either reprocess them or store the jar in the fridge for up to 2 weeks.
Yes! Pectin is a natural substance made from fruit and as such this recipe is completely vegan and gluten free.
This jam is wonderful as a breakfast spread and also in a variety of baked goods.

Check out this list of desserts where I have included strawberry jam:
- Strawberry jam is the perfect filling in my mini Victoria sponge cakes
- Add a layer of jam to this wonderful Summer Fruits Sable Breton Tart
- Indulge with some Jam Splits Welsh cakes

Shelf Stable Strawberry Jam
Equipment
- 7 Mason Jars (250 ml jars)
- Large Saucepan
- Ladle
Angela’s Top Tip
Weigh your dry ingredients in grams with a scale for best results!
Ingredients
- 900 grams Strawberries (Crushed – 3.75 US Cups)
- 60 ml Lemon Juice (0.25 US Cup)
- 1400 grams White Sugar (7 US Cups)
- 1 pouch Liquid Pectin (85 ml)
Instructions
Prep
- Gather all ingredients and equipment. Add the mason jars to the canner rack and fill them and the canner with water, ensuring there is at least 1 inch of water covering the jars. Heat up the water until the water has a slow boil. This takes a while so start to heat it up while you are preparing your fruit. Soak the lids in hot water until required.
- Slice the tops of the strawberries and crush them. Leave pieces of strawberries if you prefer a slightly lumpy jam.
To Make the Jam
- Add 900g crushed strawberries, 60ml lemon juice and 1400g white sugar to a large saucepan. Bring to a rolling boil over a high heat. Note – A rolling boil means that you can't stir it down.
- Add the pouch of liquid pectin then stir continuously for 1 minute. Remove from the heat then skim off any foam (we like to keep this to eat on ice cream).
Processing the Jam
- One at a time, remove a mason jar from the canner using the tongs, pouring the water back into the canner. Ladle the jam to almost full (leaving about 1/4 inch of headspace), wipe off any spillages from the top of the jar then add the lid and ring. Do not fully tighten the ring. It only needs to be fingertip tight. Place back in the canner using the tongs and repeat until all of the jars have been filled.
- Bring the canner back to a full rolling boil, cover with the lid and process for 10 minutes.
- After processing, turn off the heat and remove the lid. Let the canner sit for 5 minutes before carefully removing the jars. Place the jars on a flat surface and allow to cool for 24 hours. DO NOT shake or agitate the jars while doing this. I like to use a towel to protect my countertop. You will hear the lids ping as the air is released.
- Check the jar seals before storing the jars in the pantry. If any seals move when pressed, either reprocess the jars or store in the fridge and use within 2 weeks. For pantry jars, remove the rings and use the jam within 12 months.
Video
Notes
- This recipe makes 7 x 250ml jars of shelf stable jam.
- To ensure safety, DO NOT skip any of the processing steps.
- To use the jam, carefully remove the lid with a flat knife and replace with a screw-on lid. Store in the fridge for up to 2 weeks.
- If you are not familiar with the science behind canning, check out the Bernardin site for more information: https://www.bernardin.ca/EN/
- This is a vegan, nut free, soy free and gluten free recipe.
- Nutrition information is based on 1tbsp serving size with approximately 16 servings per jar. Please note that nutrition information is calculated based on the ingredients in this recipe. It is an estimate only and is provided for informational purposes. You should consult your health care provider or a registered dietitian if precise nutrition calculations are needed for health reasons.


I love the simplicity of this recipe. It’s a family favorite!
Very easy and delicious. I’ll surely make this in the weekend. Thanks for sharing!
You’re so welcome. Enjoy the jam!
Hello! Do you use fresh lemon juice in this recipe?
You can use either fresh or bottled lemon juice.
It is simply awesome, Thank you
Thanks Suja!
This strawberry jam was so delicious! I wanted to spread it over EVERYTHING!!!
I love that Paula 🙂
I’ve made this jam several times and it always turns out perfectly! Your post makes the process so easy
So happy to hear that Tayler!
My mom used to can all the berries in her garden, plus more! Happy to have found this recipe so I can try making my own jam!
Thanks for sharing. I hope you’ll enjoy this recipe as much as we do!
Will the jam set properly if I substitute Stevia for sugar or use half of each?
I’ve never experimented with stevia so can’t offer any advice, sorry. Do let me know if you try it!