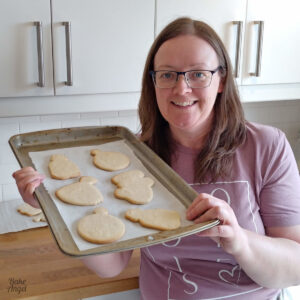
Welcome to the magical world of cookie decorating! Cookies are a delightful treat that can be enjoyed by people of all ages. Whether it’s for a special occasion or just to satisfy a sweet tooth, decorating cookies can be a fun and creative activity. However, for those new to cookie decorating, the process can seem overwhelming. With the help of top-notch cookie decorating tutorials, even beginners can create beautiful and delicious treats. In this post, we will introduce you to my top 15 cookie decorating tutorials, covering a range of techniques and skill levels.

Learning the fundamentals of cookie decorating will set you up for success and help you feel more confident in your cookie decorating adventures. So let’s get started and bring your cookie decorating skills to the next level! Where full posts are not linked, please click on each thumbnail for a more detailed video about each tutorial (posts will be added soon).
Cookies
First, it is important to start with a great cookie recipe. My vegan sugar cookie recipe is no spread and no chill, which means that you don’t have to wait around for your dough to be ready before you can bake your cookies. For more information about the science behind why cookies spread and how to check whether the consistency of your dough is correct, check out my detailed sugar cookie post for step-by-step instructions.
Once your dough is ready to roll, you’ll want to ensure that your cookies are nice and even. I highly recommend using my inexpensive rolling hack that guarantees even depth every time. I also prefer to roll between parchment paper as it prevents the dough from sticking or picking up additional flour or humidity.
Icing Tips
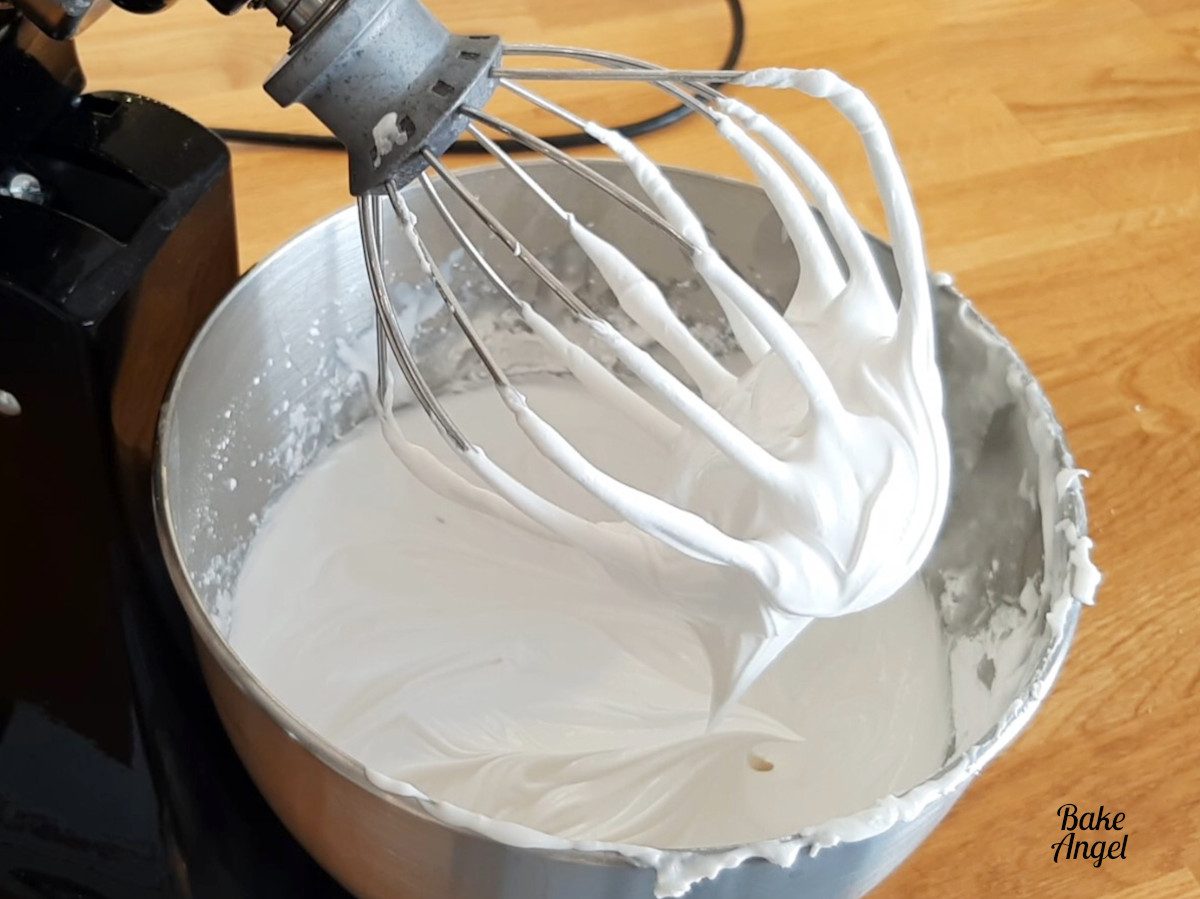
Now let’s talk about icing. There are many mediums that you can use to decorate sugar cookies. The most popular is royal icing, which can be made with or without egg whites. I will be sharing my fondant and buttercream recipes and decorating ideas soon.
Aquafaba is used to make vegan royal icing and is very easy and inexpensive to make as it only requires 2 ingredients. If you’re not vegan and don’t have an egg allergy, you can make a meringue-based royal icing or use egg whites to make traditional royal icing. Both vegan and traditional royal icing work equally as well for cookie decorating and can be coloured and stored in the same manner. The printable recipe for my traditional royal icing will be added soon.
Royal Icing Consistencies
Consistency really is everything when you are decorating with royal icing. There are 4 main consistencies of royal icing that are used in decorating:
- Flood: used to cover cookies and dries with a smooth finish.
- Hybrid: a thicker flood that has a puffier finish.
- Medium: perfect for adding details, writing, creating royal icing transfers and softer flowers.
- Stiff: the best consistency for piping detailed flowers, such as roses, intricate string work and 3-dimensional designs.
When I am making up a batch of royal icing, I generally mix it to a medium/stiff consistency icing. If you need to flood cookies, add a little water to it to thin it down. I recommend using a spray bottle to thin your icing so that you can control the amount of water added. If you need a stiffer consistency, add more icing sugar. For a more detailed look at icing consistencies, check out my detailed Royal Icing Consistencies 101 video.
How to Colour Icing
Are you perplexed by how to colour icing? There are certainly a lot of different types and shades of food colouring available. These are the three main groups:
- Water Based (Liquid & Gel) Food Colouring
- Powdered Food Colouring
- Oil Based Food Colouring
You can learn more about colour mixing in my basic colour mixing video. I used oil-based food colouring in the video but the same principles apply for water-based colour mixing as well. The type of food colouring that you choose to use should be determined by the type of icing that you are colouring.
For example, if you are colouring an oil-based icing such as buttercream, it is advisable to use an oil-based food colouring so that the colour will not be repelled by the colouring. Trust me, water-based icing will also work with buttercream but is more likely to separate and create a huge mess of your decorations.
I highly recommend sticking to water-based and powdered colours for royal icing. Oil will ruin your royal icing, causing it to split so avoid oil-based food colouring at all costs when using royal icing.
Red and Black Icing
Before we move on to piping, let’s talk about two colours that can cause the most frustration for decorators: red and black. I’ve got you covered with two comprehensive guides showing how to make these colours quickly. In my red icing video, I compared 3 different types of food colouring to show which gave the best results. I wonder if you can guess which one was my favourite?

And for black icing, if you’re fed up with waiting overnight for your icing colour to develop, you will love my 15 minute hack for perfect black icing. Read more about that in this detailed post. You won’t believe how easy it is! This is my most watched technique on Youtube with over 130k views to date!
I love using this hack when I want to make up a small batch of black icing in a rush and don’t have time to wait for it to develop. In case you want to try it in other icings and mediums, my hack also works with buttercream, fondant, meringue and cream.
Piping Bags
Ok so our cookies and icing are made. Now what? Let’s take a moment to talk about piping bags. There are dozens of different types of piping bags available: disposable, reusable, featherweight, textured, tipless, precut and even biodegradable. I recommend that you try a few to see which ones suit you better.
When I attended a royal icing class in the UK with the British Sugarcraft Guild, I learned how to make parchment paper bags. These are cheap to make, recyclable, and handy in a pinch if you need a small bag for a tiny amount of icing. They also work well for chocolate work and I do love that you can use piping tips in them as well.
My preference is to use tipless bags. These are great for detailed precision work as you can cut the tip to whatever size you like. You can even replicate a leaf tip with them. And if you prefer you can also use tips and couplers with them. I highly recommend YoTipp tipless bags, available from Amazon, as they are slightly thicker and have a slight texture to them. Great if you prefer extra grip on your bags and in the two years that I have been using them, I’ve never had one burst on me.
Speaking of bursting, check out my handy video showing how to easily fill tipless bags without making a mess.
Bubbles
How many times have you piped your royal icing, only to realize that it is full of bubbles? In my traditional royal icing recipe, I recommend using a paddle attachment to avoid adding too much air into your icing. There are a couple of other things that you can do to reduce the number of bubbles in your icing once it’s made.
- cover your icing with cling film / plastic wrap and let it settle in a bowl before bagging it up. The bubbles will rise to the surface.
- helicopter your icing (wait, what?).
- use a scribe tool to remove the bubbles from your icing once you’ve decorated your cookie.
Let’s talk about helicoptering. If you follow me on social media or have seen my cookie videos on Youtube, you may have already heard about this crazy technique. I call it my icing de-stressor as it’s a great way to relieve some of your own tension while also removing bubbles from your icing.
Once your icing is bagged, and (this bit is important) before you cut the tip off the end, you want to twist or tie the open end, hold the bag tightly and swing it around. Swing it above your head if you like. Pop some music on and give that bag a good old swing. It will also loosen up your shoulders and you’ll have a good laugh at the same time. My kids love doing this for me whenever I am bagging up royal icing. Trust me, it’s a lot of fun.
Just make sure that you do not do this on an open bag. I can not stress this part enough. It will make a huge mess and you’ll be finding stray icing in the weirdest places for years! If you need a visual to see what this crazy technique looks like, check out my short video. I find that once I’ve done this with my icing, I have very few, if any, bubbles left in my icing.
Fixing problems
Before I let you loose on having a go at making cookies and icing, I wanted to cover a few more tutorials that will come in handy on your cookie journey. Things don’t always work out right and these are a few tips that I have picked up over the years when I ran into some decorating issues.
Dried out tips
Royal icing, especially if you make it with meringue powder, has a tendency to dry out quickly in the tips of your piping bags. Whilst decorating, I recommend either covering the tips with a damp cloth or kitchen paper or using my quick tip saver trick.
Quite often when I am decorating, I’ll get distracted (kids!) so I simply push the end of my piping bag back into itself. It’s kind of hard to explain so check out this short video instead. It’s a great icing saver and will save you wasting dried-up bits of icing.
Separated Icing
It happens to all of us. You finish decorating and leave your bagged icing on the counter and forget about it. This isn’t usually a problem as royal icing can be stored at room temperature for several weeks. But you may notice that your icing might separate over time as the water and colours split.
Take a breath if this happens to you. It is completely normal. And very easy to fix. In fact, if you are a baker that sells cookie kits, I highly recommend popping these instructions in with your kits so that your customers can use this technique if their icing has separated.
Broken cookie
How many times have you been working on a cookie and you’ve dropped it? Or perhaps your kids have accidentally knocked your workstation and a cookie broke in half? Some cookie shapes are more delicate than others (like the sunglasses cookie in the video thumbnail) and breakages are inevitable.
Don’t panic! There is an easy way to fix them. Use your icing sugar (in a colour that matches the cookie) to glue it back together and let the cookie dry for as long as possible before moving it. You can speed up the drying process by using a dehydrator.
Want to learn more?
And that wraps up my Top 15 Cookie Decorating Tutorials. I hope you will find these useful as you embark on your cookie decorating journey. Knowing these fundamentals will definitely help you get through a lot of the pitfalls that I encountered when I started making cookies.
Look out for more specific cookie decorating tutorials coming soon. If you can’t wait to get started, check out my Youtube channel where I already have over 60 cookie decorating videos. And here’s three to give you a taste of what’s available.
Flood Icing Tips
The basics of flooding a cookie with royal icing.
Wet on Wet Design
Learn how to create a simple wet on wet design with royal icing.
Rainbow Cookie
Learn how to create 3 different rainbow cookie designs with royal icing.
Enjoy reading my top 15 cookie decorating tips? Want to learn more? Let’s chat if you would like to learn more specific techniques and schedule a 1-on-1 virtual lesson.
You can also check out my tutorials page for even more decorating tips.


love your vegan icing idea and tutorial. How can I do marbling on a cookie to create eg a sun effect and how to add glitter to sparkle.
Thanks so much! For a sun effect, you can use the marbling technique by placing small dots or lines of different coloured icing on your base and then swirling gently with a toothpick or scribe tool. For glitter, make sure your icing is dry then sprinkle edible glitter on top or dust it on carefully with a dry brush – it will stick and sparkle beautifully.