Step into the world of magic and sweetness with our latest copycat recipe – a dairy-free recreation of the Disney Floridian Hotel Chocolate Chip Cookies. These soft, chewy, and indulgent treats are a beloved favourite among Disney enthusiasts, and now you can bring a piece of the magic into your own kitchen. Best of all, they’re allergy-friendly, easy to adapt for vegan or gluten-free diets, and guaranteed to put a smile on everyone’s face.

Behind the Recipe: A Little Disney Magic
During our last trip to Disney, we stopped by the Grand Floridian and were instantly tempted by the warm aroma of their famous chocolate chip cookies. They were picture-perfect – golden brown, gooey, and larger than life. Sadly, they weren’t dairy-free, so my kids couldn’t enjoy them. That moment stuck with me.
As soon as we got home, I started testing different versions using plant-based butter and icing sugar until I found the perfect balance. The first time I pulled them from the oven, the smell was identical to the ones at the Floridian. My kids took one bite and said, “It tastes just like Disney!” That’s when I knew this recipe needed to be shared.
Now, this has become one of our go-to cookie recipes for family movie nights and rainy days when we just want a bit of magic, and it’s 100% dairy-free.

Why You Need to Make These
There’s something truly magical about baking a batch of warm chocolate chip cookies that fill your kitchen with that classic Disney aroma. Whether you’re a lifelong Disney fan or simply love a great chocolate chip cookie, this recipe brings a little bit of that park magic home. Here’s why you’ll love making (and eating!) these dairy-free delights:
- Soft, chewy, and slightly crunchy: These cookies hit all the right textures and are incredibly comforting.
- Quick and easy: Minimal prep, simple ingredients, and fewer dishes.
- Magical nostalgia: Perfect for family baking, movie nights, or sharing with friends – even Mickey would approve!
Ingredients and Substitutions
This is a dairy-free recipe that is easily adaptable for other dietary needs and works well with both weight measurements and US cups. Check out the FAQ below for more tips on substitutions and adjustments.
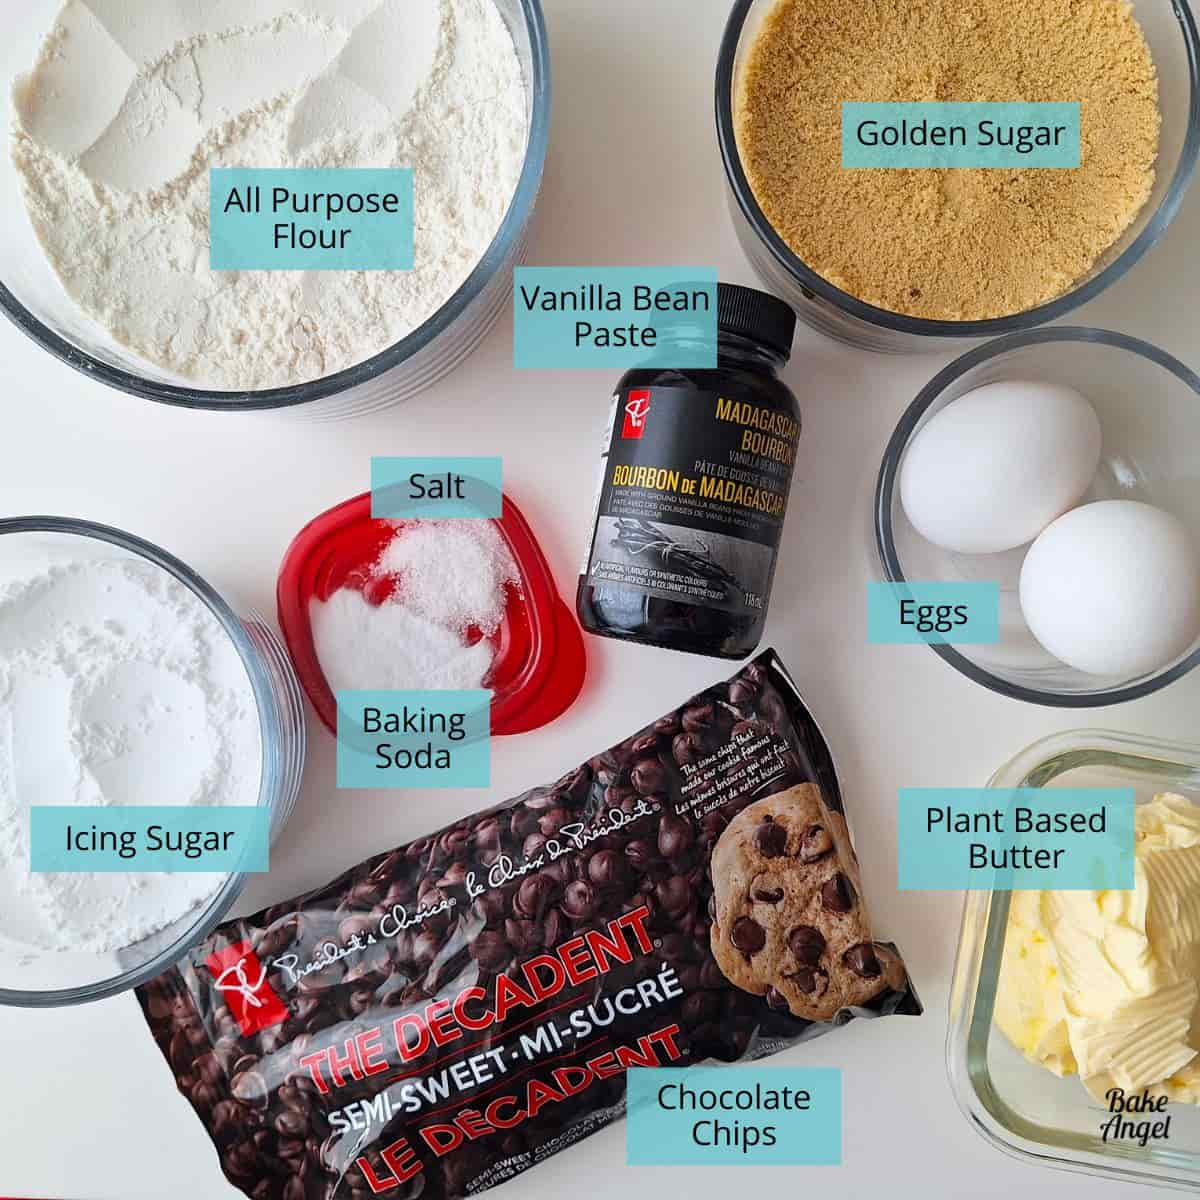
- Plant-Based Butter: Unsalted. If using salted butter, omit the additional salt.
- Golden (Light Brown) Sugar: Adds a caramel undertone. Can sub with dark brown or white sugar in a pinch.
- Icing Sugar (Powdered Sugar): Essential for that soft, melt-in-your-mouth texture – don’t skip it!
- Eggs: Sub with 2 flax eggs or 100g applesauce for a vegan version.
- All-Purpose Flour: Swap with a 1-to-1 gluten-free baking flour if needed.
- Baking Soda: Helps cookies rise and spread evenly.
- Salt: Balances sweetness and enhances the flavours.
- Vanilla Bean Paste: Adds a rich, aromatic flavour. Use extract if preferred.
- Chocolate Chips: I use a whole bag (naturally dairy-free). You can also chop your favourite chocolate bar if you don’t have a bag of chocolate chips on hand.
How to Make Copycat Disney Cookies
To start your magical baking experience, gather your equipment and ingredients. The eggs and butter need to be at room temperature, so bring those out of the fridge right away while you get everything else ready.
Step 1: Cream together the butter, brown sugar and icing sugar in a mixing bowl until light and fluffy.
Step 2: Add the eggs, one at a time, then stir in the vanilla bean paste.
Step 3: Add the flour, baking soda and salt and mix until fully combined.
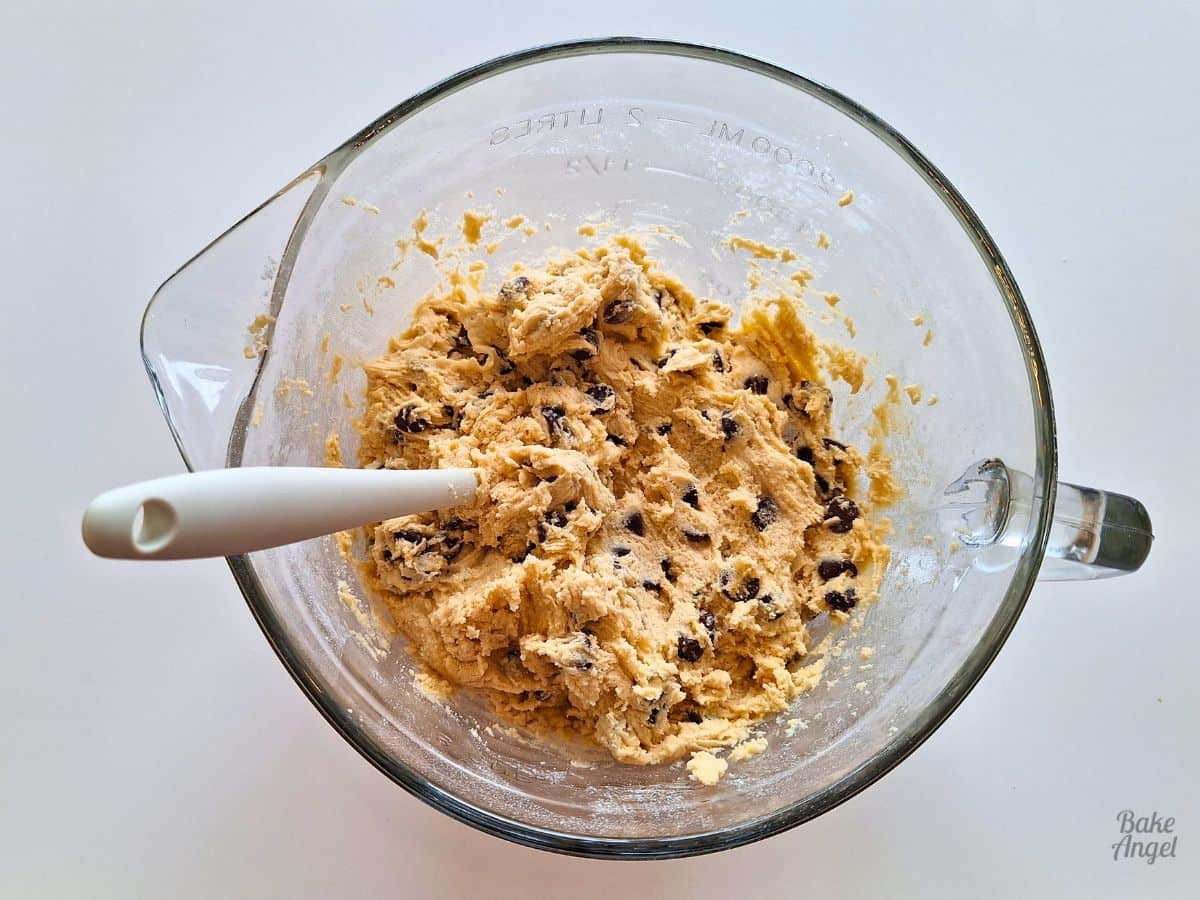
Step 4: Fold in the chocolate chips with a spatula.
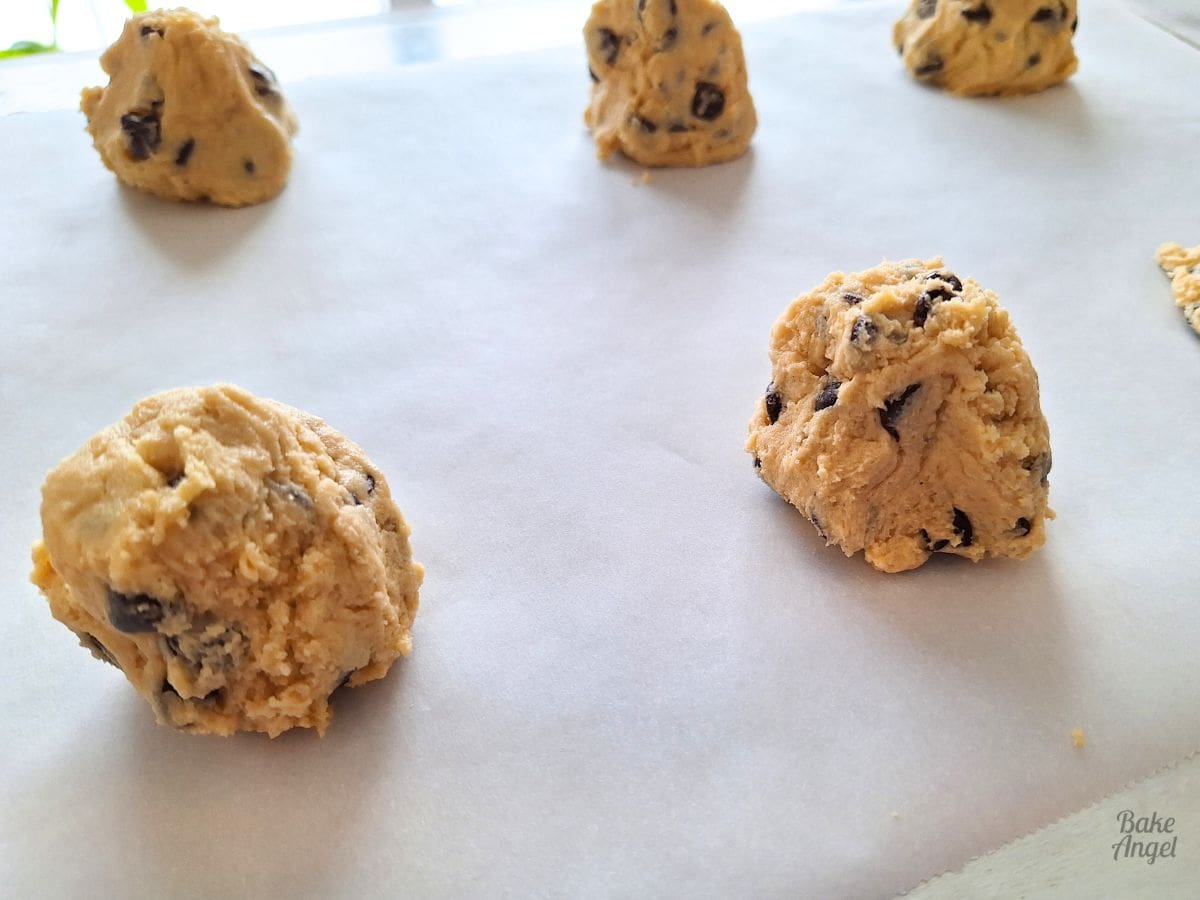
Step 5: Using an ice cream scoop, add the cookie dough to the prepared trays, leaving space between them to spread. I usually add 6 to each tray. Shape the dough so that it is more peaked than rounded – this helps reduce spread.
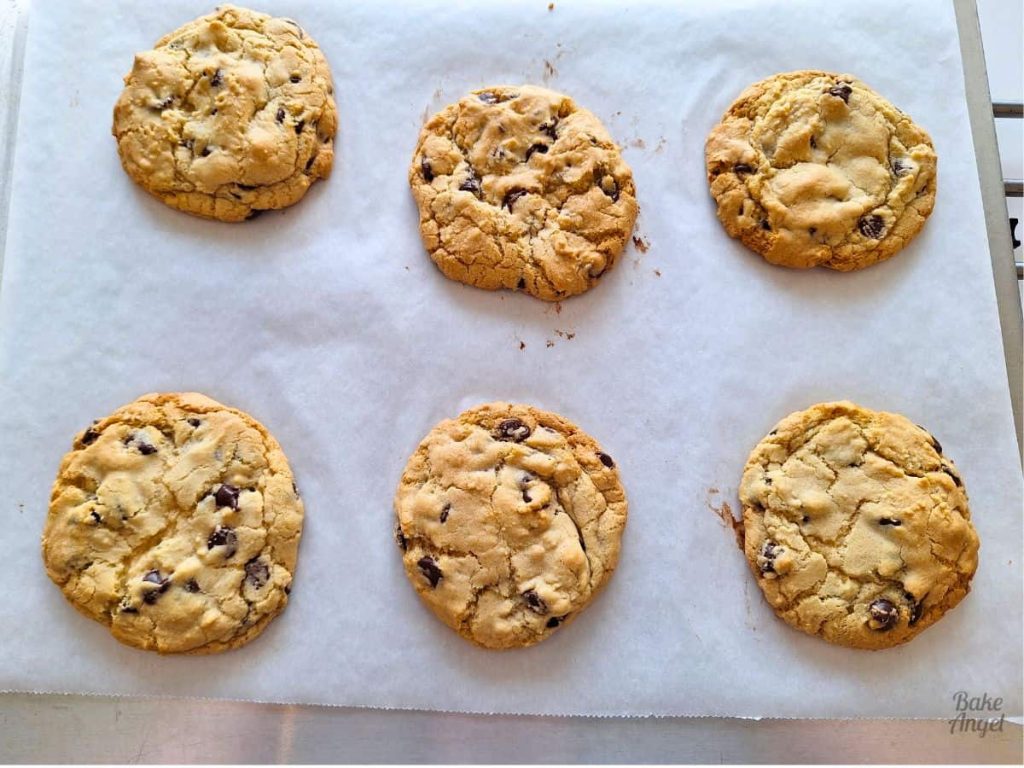
Step 6: Bake at 330F / 165C for 12-14 minutes. I recommend baking two trays at a time, one tray per oven shelf. Let the cookies cool on the baking tray for a few minutes, then transfer to a cooling rack.
Step 7: Repeat with remaining dough, then enjoy warm with a glass of milk!
Pro Tip: If cookies spread more than expected, use a round glass or bowl to reshape them – works like magic every time!

Baking Secrets from a Pro
After nearly two decades in the baking world, I’ve learned that it’s the small things that make the biggest difference when it comes to perfect cookies. Always take the time to properly cream your butter and sugars together – this step creates air pockets that make the cookies soft and chewy.
Using a mix of golden sugar and icing sugar is another trick I swear by. The golden sugar gives that deep caramel flavour, while the icing sugar softens the dough and helps achieve that signature melt-in-your-mouth texture.
And my favourite tip? Bake one test cookie first! Every oven behaves a little differently, so a single test batch helps you adjust baking time perfectly without risking the whole tray.
How to Make Perfect Dairy-Free Cookies Every Time
- Choose the right butter substitute: I love using plant-based butter sticks with higher fat content, as they behave most like traditional butter. Avoid margarine-style spreads, which contain more water and can make cookies greasy.
- Measure by weight: Especially in dairy-free baking, accuracy is everything! Too much flour can make your cookies dense.
- Mix gently: Once the flour goes in, stir only until combined. Overmixing toughens the dough.
- Don’t skip the cooling step: Letting your cookies rest on the tray for a few minutes before moving them helps them finish baking gently for that chewy texture.
FAQs
Makes 24 large dairy-free cookies. Use a smaller scoop for mini cookies and reduce the baking time by 1-2 minutes.
Yes! Reduce the baking time by 2 minutes – remove when edges are just starting to brown.
Yes! Replace the all-purpose flour with a 1-to-1 gluten-free blend.
Substitute eggs with 2 flax eggs or 100g applesauce. These work beautifully in this recipe. For more info about egg substitutions, check out my handy guide to eggs in baking.
Absolutely! Chilling for 12–24 hours deepens the flavour and improves texture. Let the dough sit at room temperature for 10–15 minutes before scooping.
Yes. Scoop and freeze raw dough balls on a tray, then transfer to a container for up to 2 months. Bake straight from frozen, adding 1–2 minutes to the baking time.
Pop one in the microwave for 10–15 seconds, or warm in a 300°F oven for 3–5 minutes. They’ll taste freshly baked again!
Serving and Storage
These cookies are best enjoyed slightly warm, when the chocolate chips are still soft and melty. Pair them with a glass of your favourite dairy-free milk or crumble one over a scoop of vegan vanilla ice cream for an extra indulgent treat.
To store, keep them in an airtight container at room temperature for up to 5 days, or freeze for up to 2 months. Reheat in the microwave for 10–15 seconds for that fresh-from-the-oven taste.
If you’re planning to share them, bake a double batch as these disappear quickly!
Why These Taste Like Disney
The combination of golden sugar, icing sugar, and dairy-free butter creates that iconic soft, chewy texture with slightly crispy edges – the hallmark of the Disney Grand Floridian Hotel cookie.
The vanilla bean paste adds a depth of flavour that’s pure magic, and the generous handfuls of chocolate chips make every bite feel like a treat straight from Main Street Bakery.
Just look at that gooeyness inside. I hope you can’t wait to try these!

Share the Magic
If you bake these cookies, I’d love to see your creations! Leave a comment, tag me on Instagram, Facebook, or save this on Pinterest, and share the joy with your friends and family.
Other Cookie Recipes You’ll Love
Craving more cookie recipes? Check out these favourites:
- Small Batch Strawberry Lemonade Cookies – dairy-free
- No Spread, No Chill Sugar Cookies – vegan
- Lucky Charms Drop Cookies – dairy-free

Copycat Disney Chocolate Chip Cookies
Equipment
- Hand Mixer (you can also use a stand mixer)
- 2 Air Bake Cookie Tray (see notes for other options)
Angela’s Top Tip
Weigh your dry ingredients in grams with a scale for best results!
Ingredients
- 140 g Plant Based Butter (unsalted) (Roughly 10 tbsps – room temperature)
- 213 g Golden Sugar (1 US Cup)
- 90 g Icing Sugar (3/4 US Cup)
- 2 Eggs (Medium or Large – room temperature)
- 2 tsp Vanilla Bean Paste
- 300 g All Purpose Flour (2.5 US Cups)
- 1 tsp Baking Soda
- ½ tsp Salt
- 1 bag Vegan Chocolate Chips (I used 300g – slightly more or less is ok)
Instructions
Prepare your ingredients and equipment:
- Bring the butter and eggs to room temperature before starting. Line your baking trays with parchment paper and preheat your oven to 330°F / 165°C.
Cream the butter and sugars:
- In a large mixing bowl, combine 140 g Plant Based Butter (unsalted), 213 g Golden Sugar, and 90 g Icing Sugar. Beat until the mixture is light and fluffy – this helps create that classic soft and chewy texture.
Add wet ingredients:
- Mix in 2 Eggs, one at a time, followed by 2 tsp Vanilla Bean Paste (or extract). Scrape down the sides of the bowl to make sure everything is evenly combined.
Add dry ingredients:
- Add 300 g All Purpose Flour, 1 tsp Baking Soda and 1/2 tsp Salt to the butter mixture and mix until fully incorporated.
Fold in the chocolate chips:
- Stir through 1 bag Vegan Chocolate Chips (or chunks). The dough should be thick and studded with chocolatey goodness.
Scoop and shape:
- Using an ice cream scoop, portion the cookie dough onto your prepared trays – 6 cookies per tray. Leave space between them to allow for spreading. Gently reshape each scoop so it’s slightly peaked rather than round to help control spread.
Bake the cookies:
- Bake for 12–14 minutes, rotating trays halfway if needed. I recommend baking two trays at a time (12 cookies total), one on each oven rack. The edges should be lightly golden while the centres remain soft.
Cool and enjoy:
- Let the cookies cool on the trays for a few minutes before transferring the parchment and cookies to a wire rack. Bake the remaining cookies and enjoy warm with your favourite dairy-free milk. Top Tip: If your cookies spread too much, use a glass or bowl to circle around each cookie right after baking – this helps reshape them perfectly!
Video
Notes
- Yield: This recipe makes 24 large cookies. For mini cookies, use a smaller scoop and reduce the baking time by 1–2 minutes.
- Baking Tip: If using a regular cookie tray, bake for about 12 minutes. I like to remove the cookies as soon as the edges start to turn golden – they’ll continue to bake on the tray as they cool.
- Gluten-Free Option: Substitute the all-purpose flour with a 1:1 gluten-free baking blend. The cookies will still be soft, chewy, and delicious.
- Vegan Option: Replace the eggs with 2 flax eggs or 100g unsweetened apple sauce. Both work beautifully. I often use apple sauce in my own cookies for an extra soft texture.
- Storage: Store cooled cookies in an airtight container at room temperature for up to 5 days. For that fresh-baked texture, pop them in the microwave for 10–15 seconds before enjoying.
- Freezing: These cookies freeze wonderfully! You can freeze the baked cookies for up to 3 months or freeze the dough balls and bake straight from frozen – just add an extra minute to the baking time.


So easy to make!
Well, I have never been do Disney, but these chocolate chip cookies are AMAZING!! THANKS for the tip on icing sugar!
You’re so welcome. So happy that you enjoyed them.
That was awesome recipe. Thank you
Glad you enjoyed them Suja.
These chocolate chip cookies look delicious. Thanks for sharing.
Thanks Kushi!
Super quick and easy, so tasty! I love the smell of baking cookies in the house 🙂
It’s such a comforting smell isn’t it! Glad you enjoyed them.
I’ve never been to Disney, so I haven’t had the original, but these were very good. I assumed that they could be made with actual butter, and that worked really well, in case anyone is wondering. Great recipe!
Thanks for sharing Donalyn. I appreciate you letting us know that they worked well with dairy butter as well ????