Inspired by Season 13 of the Great British Baking show, my allergy friendly red velvet layer cake has an amazing cream cheese buttercream frosting and 6 layers of chocolate cake. Perfect for any occasion, this decadent GBBO inspired dairy free red velvet layer cake is a real showstopper.

Why I Made This Recipe
I am a huge fan of the Great British Bake Off tv show (known as the Great British Baking Show in North America) and decided to take on a challenge from each episode of the show again this year. Each week I’ll be taking a recipe from the show and adding a few tweaks to make them allergy friendly. I love the challenge of making new desserts and hope you’ll enjoy following along. If you love the show, check out my youtube channel playlist to see last season’s ‘Bake Angel takes on the Bake Off‘ challenge videos. You can find the video for this recipe in the recipe card below. For the original Paul Hollywood recipe, visit the Bake Off website.
Why You Should Make this
Red velvet cake is a great dessert recipe to have in your back pocket AND it’s actually a lot easier to make than you may think. When paired with cream cheese buttercream frosting, it is decadent, colourful and the perfect treat after a long day. Kids and adults will love this cake which makes it an ideal dessert for any occasion.
The post includes my step by step video in the recipe card AND a detailed decorating guide. You can also read my FAQ for some common questions about this bake.
Ingredients and Substitutions
This is a GBBO inspired dairy free red velvet layer cake recipe that is filled and frosted with a vegan buttercream. Read on for my ingredient suggestions for other dietary requirements.
For the Cake

Butter: My preference is to use unsalted plant based butter in my cakes. Substitute with dairy butter if you prefer or are not dairy intolerant.
Self Raising Flour: to assist with the rise and consistency of this cake, I am using self raising flour. Don’t have any? Check out this handy guide to make your own (includes all purpose and gluten free options).
Cocoa Powder: I prefer to use dutch processed cocoa powder as it helps enhance the flavour of the red velvet cake. You can sub with regular cocoa powder if you can’t find dutch processed.
Golden Yellow Sugar: this adds a slightly caramel undertone to the cake. You can sub with white sugar if you prefer. I do not recommend using brown sugar in this cake.
Salt: this helps to add to the leavening and also enhances the flavours.
Eggs: for richness, this cake uses 3 large eggs (approx 50g per egg). I have not experimented with a vegan alternative for this recipe. However, based on my experience with other vegan cake recipes, I would recommend using 3 flax eggs in this recipe.
Buttermilk: I always make my own vegan buttermilk. This helps to add tang to the cake and is super easy to make. Simply add 1 tbsp white vinegar to 270 ml of your chosen milk, stir together then allow to curdle for 10 minutes.
Food Colouring: a fundamental part of red velvet cake is the food colouring. I recommend using Americolor Super Red as it is vegan and is also manufactured in a peanut and nut free facility. Substitute with natural food colouring if you prefer.
Vinegar and Baking Soda: adding this at the end of the cake batter adds extra bubbles for consistency. I have never added this to my red velvet baked goods before but was surprised at the difference it made to the final cake.
Flavouring: I always use vanilla bean paste in my cakes to add another flavour dimension. Sub with vanilla extract if you prefer.
For the Buttercream Frosting

So one of the fun things about trying out someone else’s recipe is that they don’t always turn out as you’d expect. When I was creating this recipe, I originally used Paul Hollywood’s icing recipe swapping out the dairy items for my usual dairy free substitutes and it was a complete disaster! Let’s just say it was a huge soupy mess so I’m sharing my own vegan cream cheese buttercream frosting recipe with you instead.
Icing Sugar: I highly recommend sifting your icing sugar before adding it to the recipe. This will help to remove any lumps that have formed in the bag.
Butter: I always use plant based unsalted butter in my buttercream as the cream cheese offsets the sweetness. You can use regular dairy butter if you prefer.
Water: to thin down the buttercream just enough so that it can be spread on the cake, I added some water. You can use milk if you prefer.
Flavouring: I like to add a small amount of vanilla bean paste to my buttercream frosting. You can use vanilla extract if you prefer.
Cream Cheese: for an extra tang that really compliments the cake, I added some coconut cream cheese. You can sub with regular cream cheese if you are not dairy free or vegan.
How to Make Red Velvet Layer Cake
Start by preheating your oven to 350°F / 180°C and gathering all of your supplies and ingredients for the cake. Thoroughly grease then line the base of your pans with parchment paper. Allow the butter, buttermilk, eggs to come to room temperature before you start the recipe. I advise making the frosting while the cake is cooling as it works better with cold ingredients.
Using a stand mixer, cream together 280g butter and 245g golden sugar until smooth (roughly 2-3 minutes). Add the 3 eggs one at a time. Don’t worry that the mixture will look curdled at this stage.

In a small jug, make the red velvet paste. Add 6 tbsp hot water, 25g cocoa powder, 2 tsp vanilla bean paste and 2 tsp red food colouring. Stir until combined.
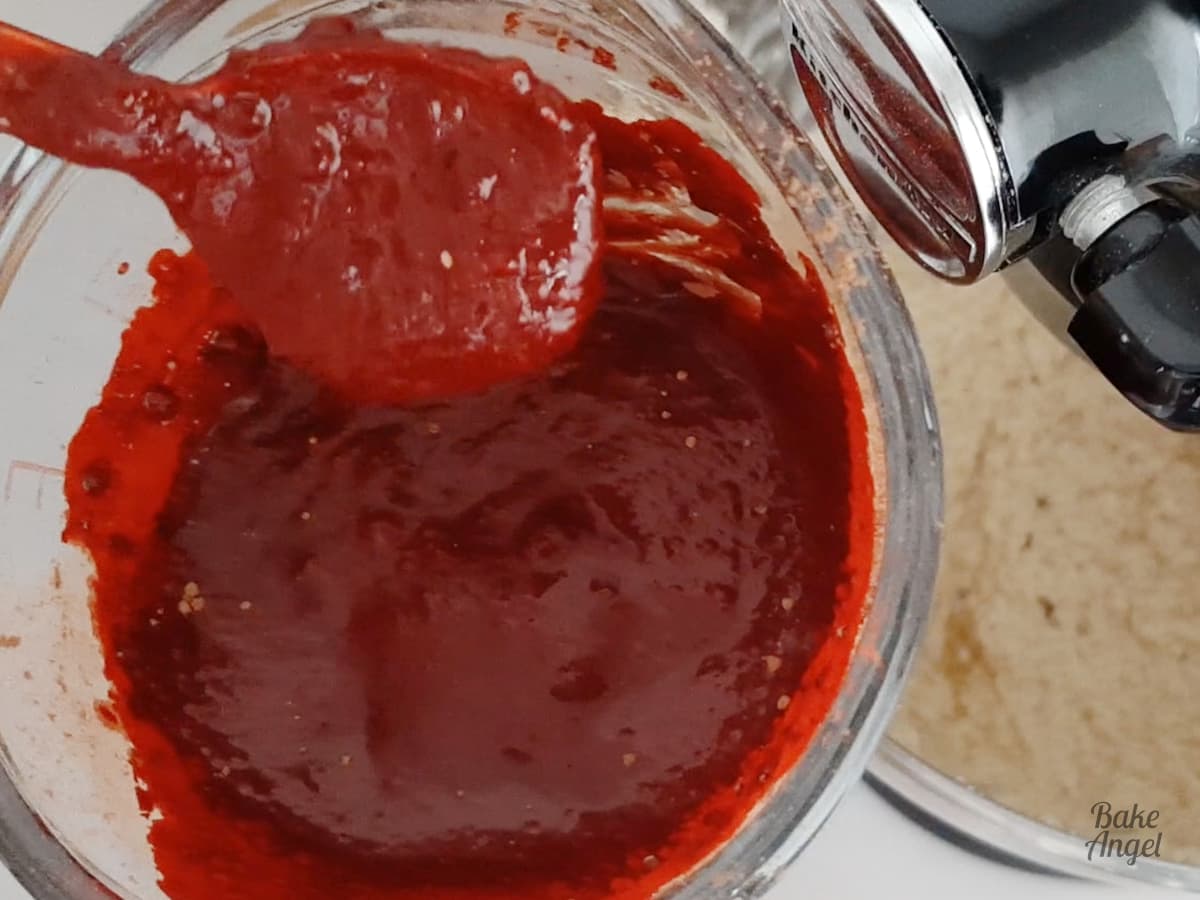
Add the paste to the stand mixer bowl and mix together. Again, it will look curdled but don’t panic. It will come together once we add the flour.

In alternating thirds, add the buttermilk and flour into the stand mixer bowl, mixing well with each addition. The mixture will start to combine into a smooth cake batter. In a small bowl, add the white vinegar to the baking soda. Stir and then add to the cake batter. It will fizz at this stage. Stir until fully combined.

On your marks, get set, Bake!
Evenly distribute the cake batter between the 3 pans. I like to use an ice cream scoop for this process and eyeball it. You can also weigh the pans as you are filling them if you prefer.
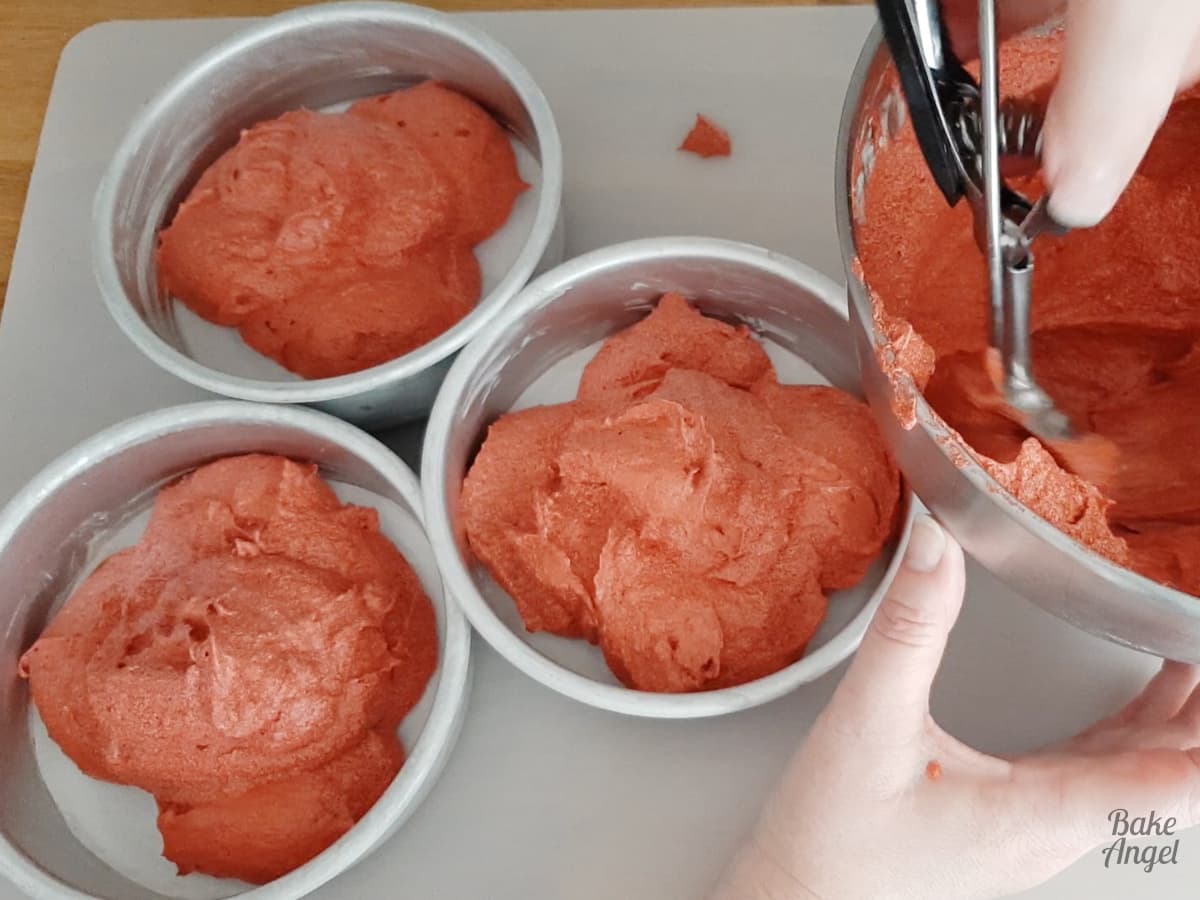
Tap the pans on the counter a few times to level out the batter.

Bake at 350°F / 180°C for 30-35 minutes. The cakes should be well risen and springy to the touch. Allow the cakes to cool completely. A quick note: take the 225g butter for the frosting out of the fridge while the cakes are baking. This will allow it to come to room temperature in time.

Buttercream Time!
While the cakes are cooling, start making the buttercream frosting. As we are using cream cheese, I recommend leaving it in the fridge until you are ready to make the frosting. The frosting comes together really quickly and I prefer to make it at the last minute before decorating so that the cream cheese doesn’t warm up too much.
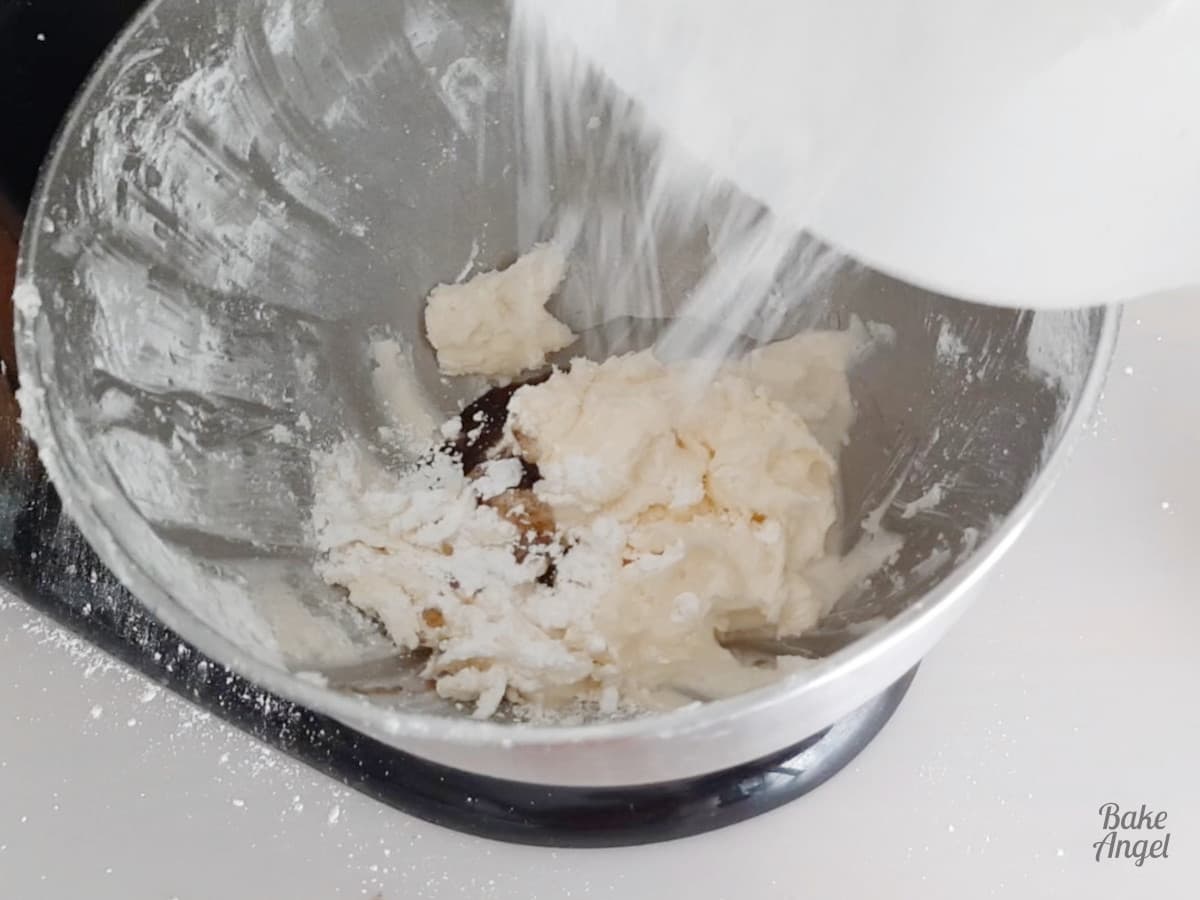
Combine 225g butter and 60g cream cheese in a mixing bowl and mix until smooth.

Add half of the icing sugar then stir to combine. Then add the remaining 250g icing sugar, 25ml water and 1 tsp vanilla bean paste and mix until smooth.
Chill the frosting in the fridge until the cakes are fully cooled. Look how silky it looks.

Time to Assemble
Split and level each cake with a cake leveller, retaining any crumbs for decoration.

You will end up with 6 thin layers in total and a decent amount of crumbs.

Use half of the buttercream frosting to fill and stack the cake layers.

Don’t worry if some of the buttercream squishes out the sides at this stage.

Let’s Decorate
Use most of the second half of the buttercream to ice the cake with an offset spatula. Clean off the spatula after each smoothing of the icing, to avoid pulling away too many crumbs. I love to use a Lazy Susan when I’m icing cakes so that I can turn the cake, rather than my wrist when I’m adding the frosting.

Smooth the top of the cake with a smaller spatula. I really like using offset spatulas to allow me to better control the buttercream.

Add some crumbs to the side of the cake. Leave a few for the top.

Piping Time!
Add the remaining icing to a piping bag which has been fitted with a 1M star tip.

Pipe 8 swirls on top of the cake by holding the piping bag slightly above the cake and squeezing slowly. You can turn the bag slightly to ruffle the swirls. Release the pressure on the bag and pull the bag up quickly once each swirl is finished.

To finish the decoration, add the cake crumbs to the top of the cake.

Doesn’t it look pretty from the top?

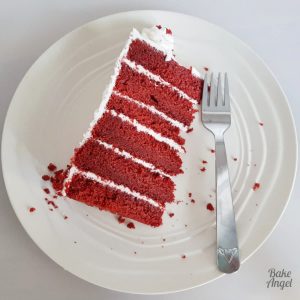
Cut yourself a slice and you’re ready to eat!
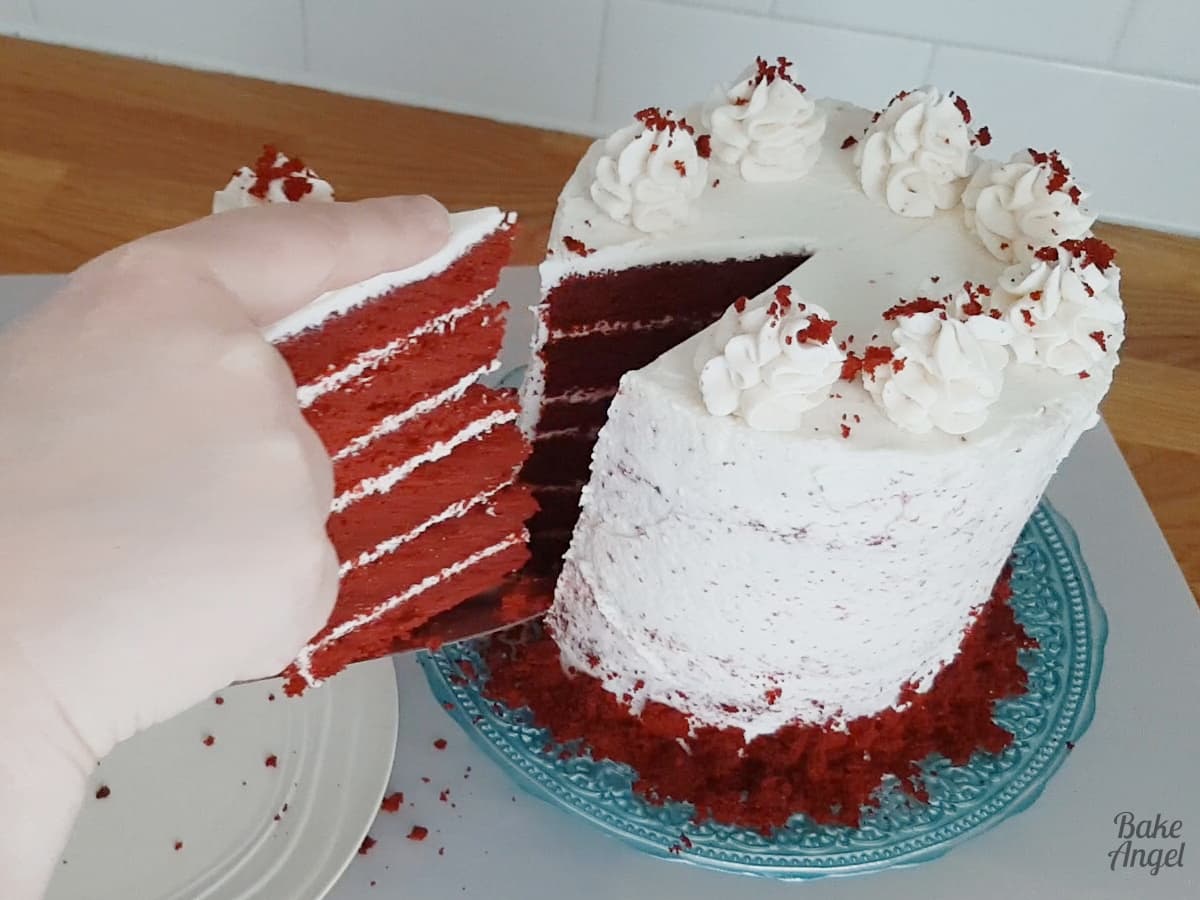
I love that first look when you cut into a layered cake.

Common Questions
This cake yields 8 generous pie shaped slices.
Absolutely. Sub the 3 eggs with 3 flax eggs. To make them, add 3 tbsp flax meal to 9 tbsp water. Mix together and allow to rest for 10 – 15 minutes.
Yes! Simply wrap individual slices in plastic wrap then store them in the freezer in an airtight container for up to 3 months. Defrost at room temperature before unwrapping.
See my handy flour hack to make your own self raising flour. All purpose and gluten free options are included.
GBBO Inspired Dairy Free Red Velvet Layer Cake
It’s so satisfying to see the contrast between the layers. We couldn’t wait to dig into this cake once it was ready and I was really pleased with how it turned out. If you love this recipe and feel inspired to bake your own, let me know in the comments below.

Love Red Velvet?
Check out these classic red velvet desserts that are firm favourites with our family :
- Quick and easy red velvet donuts (Vegan)
- Classic red velvet cupcakes (Vegan)
- Indulge in our Red Velvet Cookies – 3 ways (Vegan)
Dairy Free Red Velvet Layer Cake
Equipment
- Offset Spatula (for icing the cake)
Angela’s Top Tip
Weigh your dry ingredients in grams with a scale for best results!
Ingredients
For the Cake
- 280 grams Plant Based Butter (unsalted)
- 335 grams Self Raising Flour (see note)
- 25 grams Cocoa Powder
- 245 grams Golden Sugar (also known as golden yellow sugar)
- 1 tsp Salt
- 3 Eggs (large)
- 270 ml Vegan Buttermilk (see note)
- 2 tsp Red Food Colouring (I recommend Americolor Super Red)
- 1 tsp White Vinegar
- 1 tsp Baking Soda
- 2 tsp Vanilla Bean Paste
- Additional butter for greasing
For the Buttercream Frosting
- 500 grams Icing Sugar (sifted)
- 225 grams Plant Based Butter (unsalted)
- 50 ml Water
- 1 tsp Vanilla Bean Paste
- 60 grams Plant Based Cream Cheese
Instructions
Prep:
- Start by preheating your oven to 350°F / 180°C and gathering all of your supplies and ingredients for the cake. Allow the butter, buttermilk, eggs to come to room temperature before you start the recipe. I advise making the frosting while the cake is baking as it works better with cold ingredients.
- Thoroughly grease then line the bottoms of the baking pans with parchment paper. No need to line the sides.
To Make the Cakes:
- Using a stand mixer, cream together 280g butter and 245g golden sugar until smooth (roughly 2-3 minutes). Add the 3 eggs one at a time. Don't worry that the mixture will look curdled at this stage.
- In a small jug, make the red velvet paste. Add 6 tbsp hot water, 25g cocoa powder, 2 tsp vanilla bean paste and 2 tsp red food colouring. Stir until combined then add to the stand mixer bowl. Mix together. Again, it will look curdled but don't panic. It will come together once we add the flour.
- In alternating thirds, add the buttermilk and flour into the stand mixer bowl, mixing well with each addition. The mixture will start to combine into a smooth cake batter.
- In a small bowl, add the white vinegar to the baking soda. Stir and then add to the cake batter. It will fizz at this stage. Stir until fully combined.
- Using an ice cream scoop, divide the cake batter evenly between the 3 6inch cake pans. Tap the pans on the counter a few times to level out the batter.
- Bake for 30-35 minutes until well risen. A toothpick/skewer should come out clean when they are ready. Transfer to a cooling rack and allow to cool completely. Note: take the butter for the frosting out of the fridge while the cakes are baking. This will allow it to come to room temperature in time.
To Make the Buttercream Frosting
- Combine 225g butter and 60g cream cheese in a mixing bowl.
- Add half of the icing sugar then stir to combine.
- Add the remaining 250g icing sugar, 25ml water and 1 tsp vanilla bean paste and mix until smooth. Chill the frosting in the fridge until the cakes are fully cooled.
To Decorate the Cakes
- Split and level each cake, retaining any crumbs for decoration. You should end up with 6 thin layers in total.
- Use half of the buttercream frosting to fill and stack the cake layers.
- Use most of the second half of the buttercream to ice the cake with an offset spatula. Clean off the spatula after each smoothing of the icing, to avoid pulling away too many crumbs.
- Add the remaining icing to a piping bag which has been fitted with a 1M star tip. Pipe 8 swirls on top of the cake.
- To finish the decoration, add the cake crumbs to the sides and top of the cake.
Video
Notes
- Buttermilk: To make vegan buttermilk, add 1 tbsp white vinegar to 270ml plant based milk. Stir and allow to curdle for 10 minutes before using. Learn more about buttermilk in this recipe post.
- Flour: See my handy flour hack to make your own self raising flour. All purpose and gluten free options included.
- Yield: This cake serves 8.
- Storage: I recommend that this cake should be stored covered in the fridge for 3-4 days. You can also individually wrap and freeze any remaining slices for up to 3 months. Allow to defrost fully before unwrapping.
- Decorating: Check out the full recipe post for my step by step decorating guide.
- Nutrition: Nutritional information is based on 1 large slice per serving and nutrition information is calculated based on the ingredients in this recipe. It is an estimate only and is provided for informational purposes.
- More Red Velvet Recipes:
- Quick and easy Red Velvet Donuts (Vegan)
- Classic Red Velvet Cupcakes (Vegan)
- Indulge in our Red Velvet Cookies – 3 ways (Vegan)


wow red velvet cake, this is my favorite.
Thanks Suja!
Loved every delicious layer of this red velvet cake!
Thrilled to hear that Paula.
This is proof that plant based foods don’t have to taste bad! This cake was SO YUMMY.
So happy to hear that Justine.
This was everything a gourmet dessert should be, and then some! Turned out rich, fluffy and delicious; easily, a new favorite dessert!
Thanks Sara – glad you enjoyed the cake.
Love this recipe, will try this soon. thanks for sharing!
I’m sure you’ll love it Chara!