
Making your own marshmallows at home is much easier than you might think! These homemade dairy-free and gluten-free marshmallows are soft, springy and full of vanilla flavour, with a lovely texture that tastes better than store-bought.
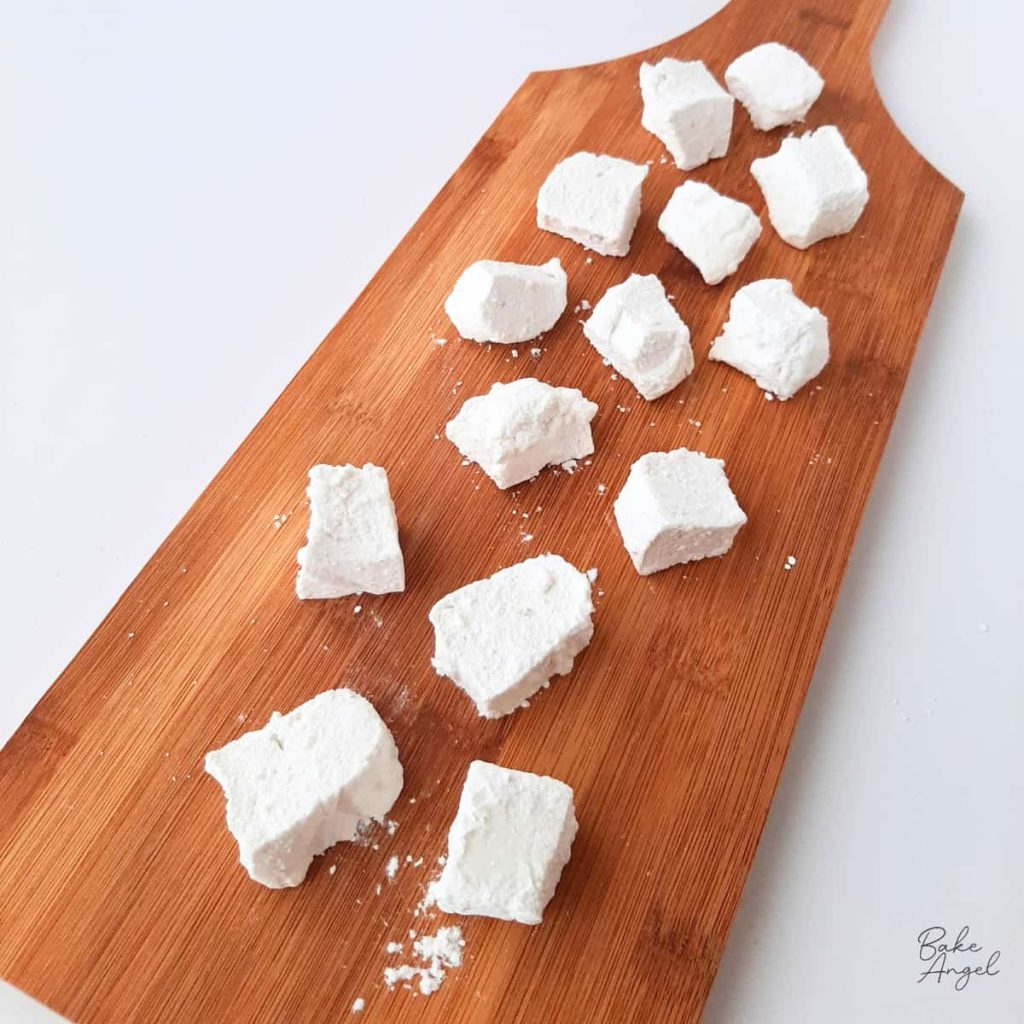
They do take a little bit of multitasking, but once you have your ingredients prepared, the process is surprisingly straightforward. There is something so satisfying about turning a few simple ingredients into fluffy homemade marshmallows!
These marshmallows are perfect for making s’mores, adding to a mug of hot chocolate, dipping in chocolate or simply enjoying as a sweet homemade treat. They also make a fun edible gift for Thanksgiving, Christmas or any time you want to share some homemade sweets.
Why I Made These Marshmallows
Marshmallows aren’t something I had ever considered making from scratch until I decided to give them a try. I was expecting them to be much more complicated than they actually are, and was genuinely impressed with how they turned out.
I tested this recipe from start to finish so I could share exactly what worked, including the easiest way to handle the sticky marshmallow mixture and how to get clean, even cuts.
The finished marshmallows have a lovely springy texture and plenty of vanilla flavour. They also hold their shape beautifully once set, making them really versatile for other desserts and treats.
I love that you can make a batch at home with everyday ingredients and then decide how you want to use them. Cut them into large rounds for s’mores, make smaller pieces for hot chocolate or coat them in chocolate for an extra special treat.
Why You’ll Love This Recipe
- Soft and springy: Homemade marshmallows have a wonderful texture that is different from store-bought marshmallows.
- Dairy-free and gluten-free: There are no dairy or gluten ingredients in this recipe. Make sure to check ingredient labels if you are making these for someone with a food allergy or celiac disease.
- Easy ingredients: You only need a handful of ingredients.
- Great for s’mores: The large marshmallow rounds are perfect for sandwiching between cookies or graham crackers.
- Perfect for gifting: Cut them into bite-sized pieces and package them in an airtight bag or container.
- So versatile: Use them for hot chocolate, chocolate-covered treats, dessert kebabs and more.
Ingredients You’ll Need
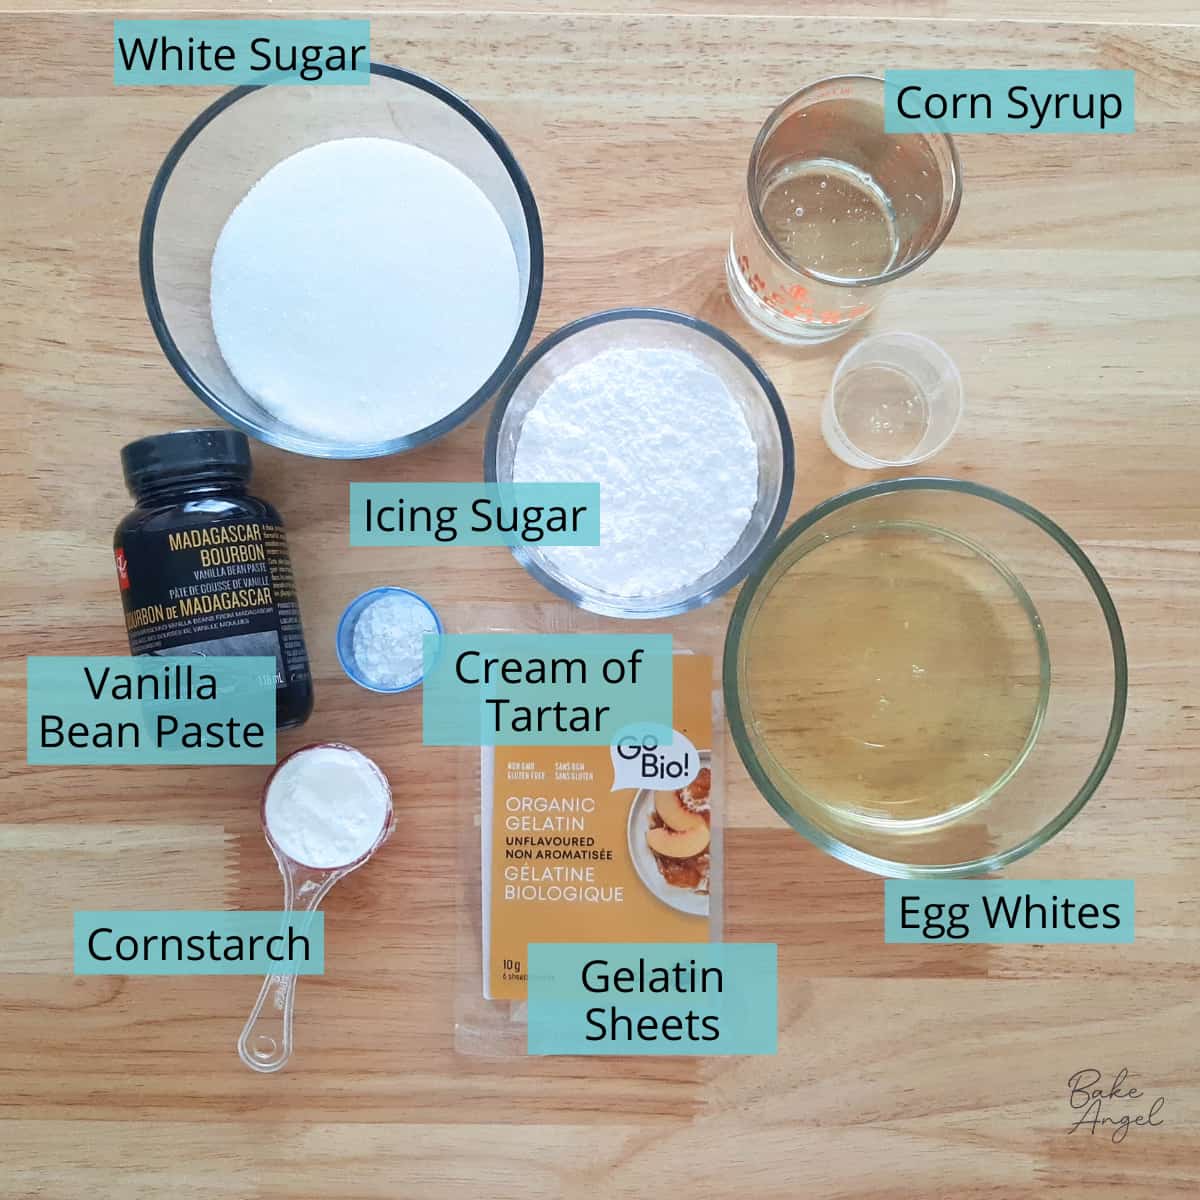
Icing sugar and cornstarch are used to coat the pan and the finished marshmallows. Marshmallow mixture is incredibly sticky, so don’t skip this step! The coating helps prevent the marshmallow from sticking to your pan, parchment paper and cookie cutter.
Angela’s Tip: Cornstarch is also called cornflour in the UK, Australia and some other Commonwealth countries. Here, you want cornstarch, not finely ground corn flour/maize flour.
Gelatin leaves give these marshmallows their structure and wonderfully springy texture. You’ll need to soften the gelatin leaves in cold water before adding them to the warm meringue. Because this recipe contains gelatin and egg-whites, these marshmallows are not vegetarian or vegan.
Egg whites are whipped to form the fluffy base of the marshmallow. I recommend using a stand mixer with a whisk attachment because there is some multitasking involved while the egg whites are whipping.
Cream of tartar – A little cream of tartar helps stabilize the whipped egg whites.
White/Castor sugar, also called superfine sugar, is added to the syrup that gives the marshmallow its sweetness and structure.
Corn syrup combined with the sugar creates the hot sugar syrup that is added to the whipped egg whites.
Vanilla bean paste adds plenty of vanilla flavour and gives the marshmallows those lovely little flecks of vanilla throughout. You can substitute vanilla extract if that’s what you have available.
How To Make Homemade Marshmallows From Scratch
1. Prepare the coating
Mix the icing sugar and cornstarch together in a small bowl.
Line an 8 x 8-inch baking pan with parchment paper, leaving some overhang to make the marshmallow easier to remove later. You can use clips to hold the parchment in place while you work.
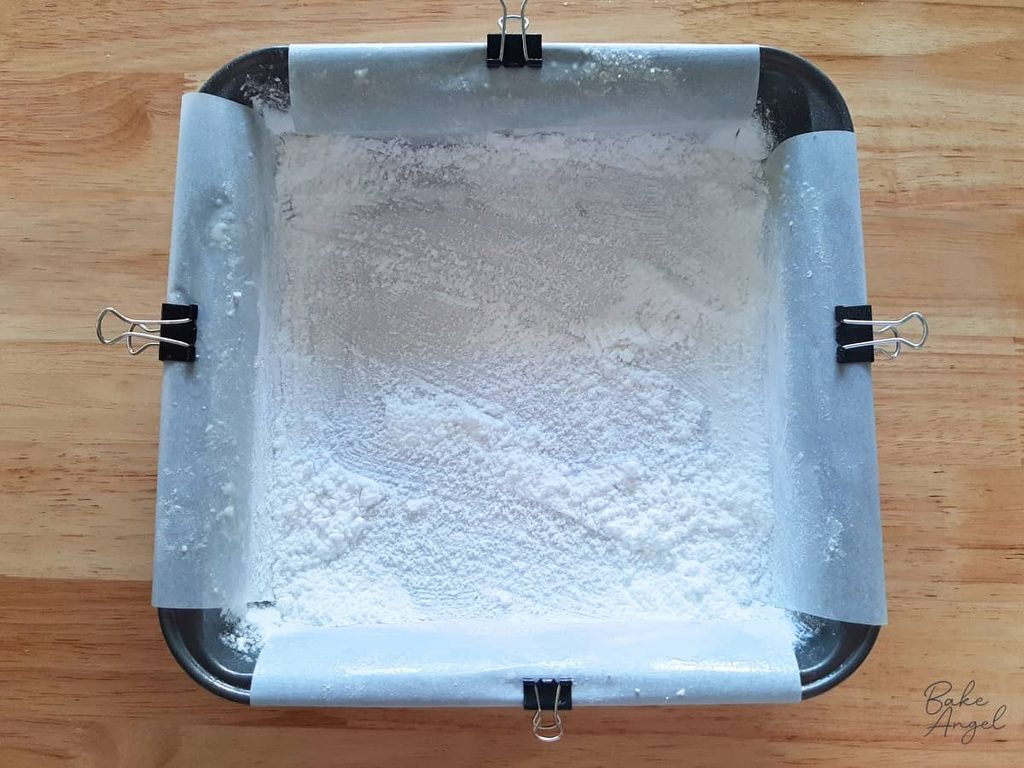
Lightly grease the parchment paper with spray oil or brush it with a little oil.
Add about half of the icing sugar mixture to the pan and coat the bottom and sides thoroughly.
2. Soften the gelatin
I used four gelatin leaves, weighing approximately 6.5 grams in total. Place the gelatin leaves in a bowl of cold water and leave them to soften for about 5 minutes.
Once softened, remove them from the water and gently squeeze out the excess moisture. I find kitchen paper helpful for removing any extra water.
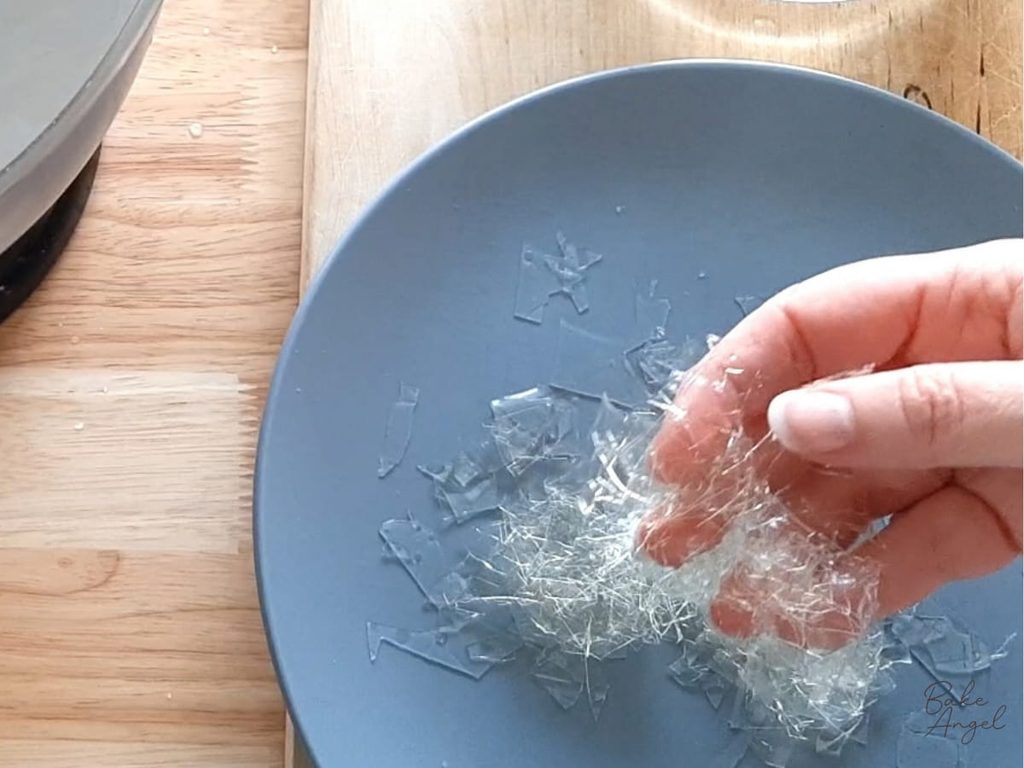
Cut the softened gelatin into small pieces. Kitchen scissors work much better than a knife for this.
3. Whip the egg whites
Add the egg whites and cream of tartar to the bowl of a stand mixer fitted with the whisk attachment.
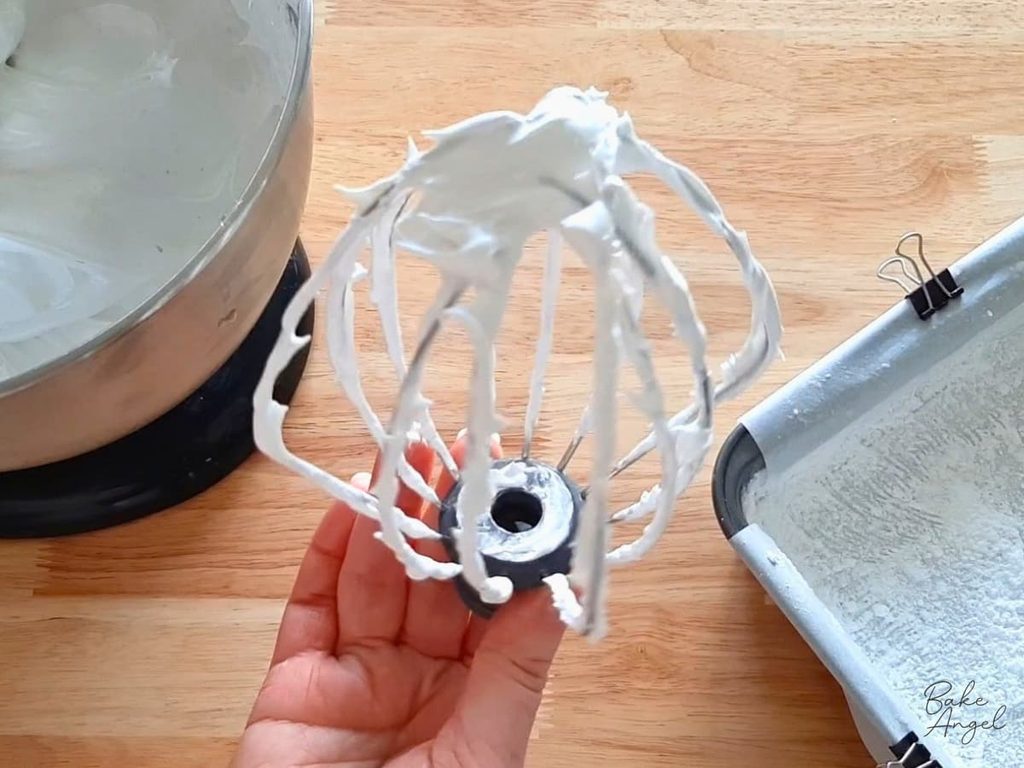
Whip until the egg whites become thick and form stiff peaks.
4. Make the sugar syrup
Add the white sugar and corn syrup to a saucepan.
Heat over medium-high heat, stirring as needed, until the mixture comes to a boil.
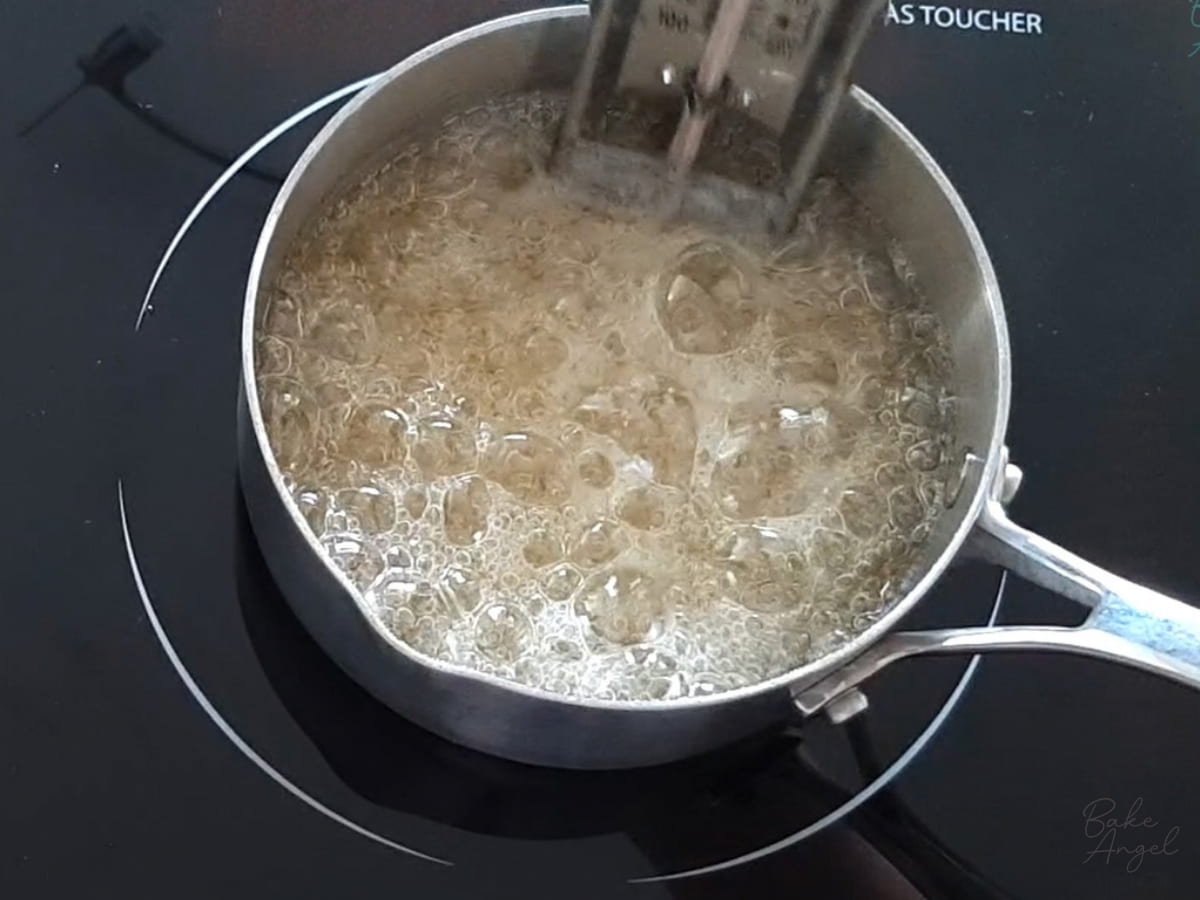
Continue cooking until the syrup reaches 239°F (115°C) on a sugar thermometer.
5. Add the syrup to the egg whites
With the mixer running on low speed, slowly pour the hot sugar syrup down the side of the mixer bowl.
Be extremely careful here because the syrup is very hot.
Once all the syrup has been added, increase the mixer speed to medium and continue whisking for about 3 minutes, until the mixture becomes thick and warm.
6. Add the gelatin
Add the softened gelatin pieces gradually while the mixer is running.
Continue mixing until all the gelatin has been incorporated and the marshmallow mixture is thick and holds its shape.
7. Add the vanilla
Add the vanilla bean paste and mix until combined.
The finished mixture should be thick, glossy and able to hold firm peaks.
8. Transfer to the pan
This is the messy part!
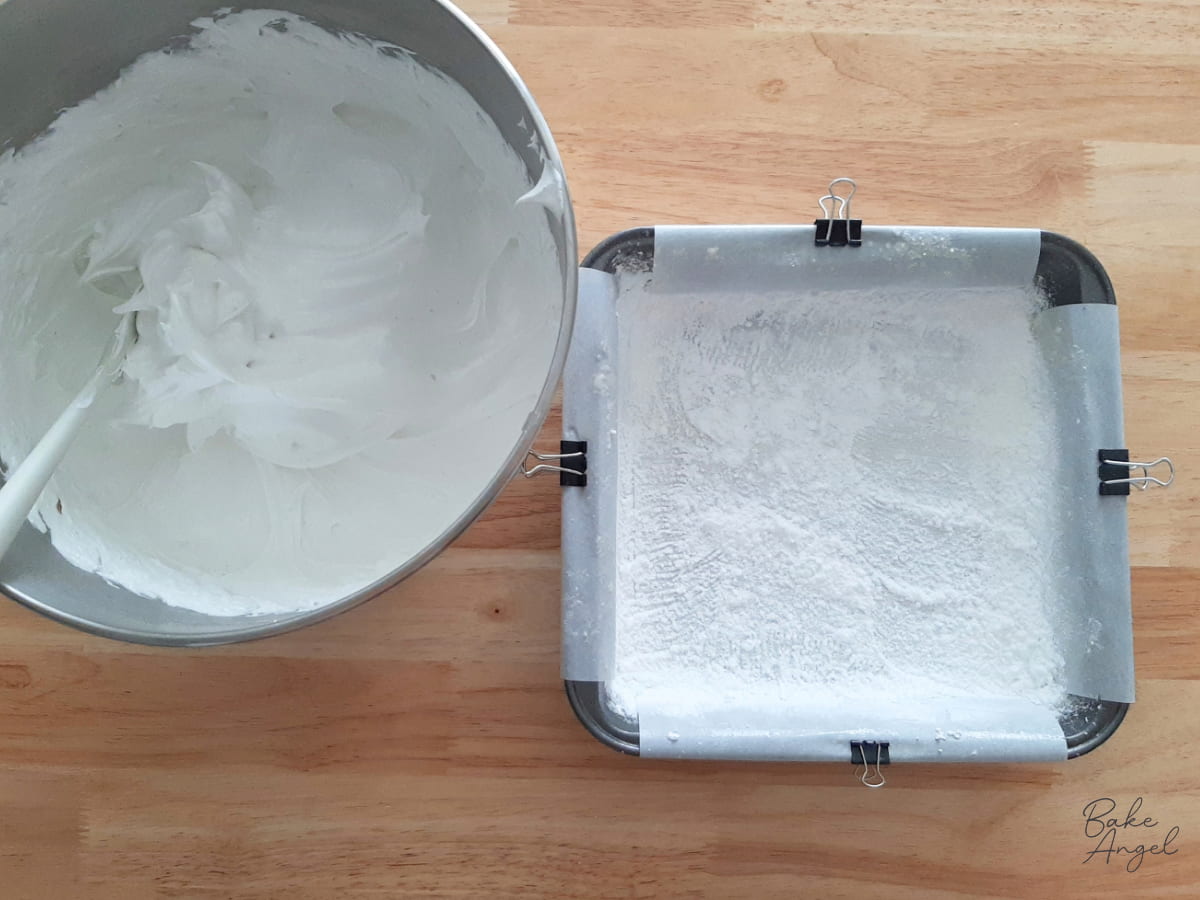
Transfer the marshmallow mixture to your prepared pan using a silicone spatula. You can lightly grease the spatula if needed to make spreading easier.
Spread the mixture into an even layer, smoothing the surface as much as possible.
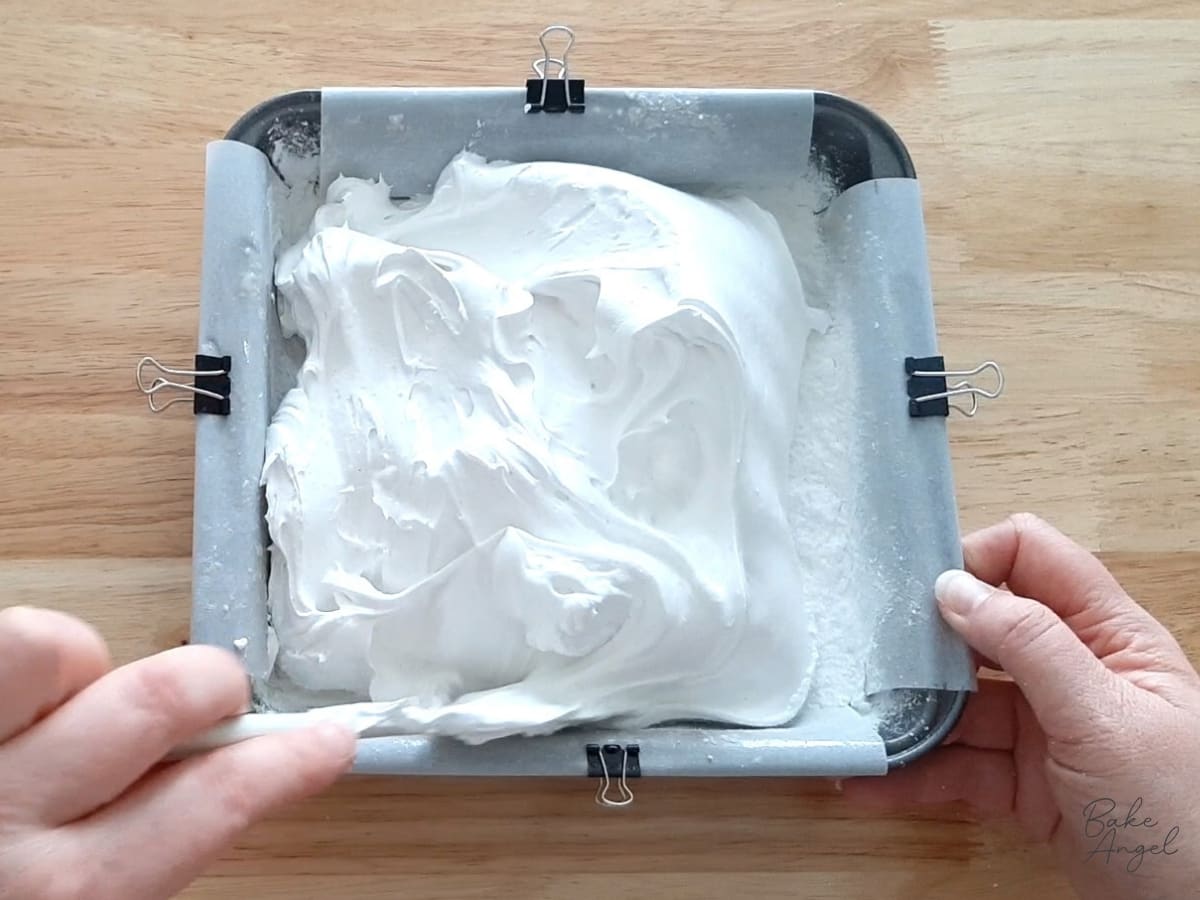
Leave the marshmallow at room temperature for about 1½ hours, or until fully set.
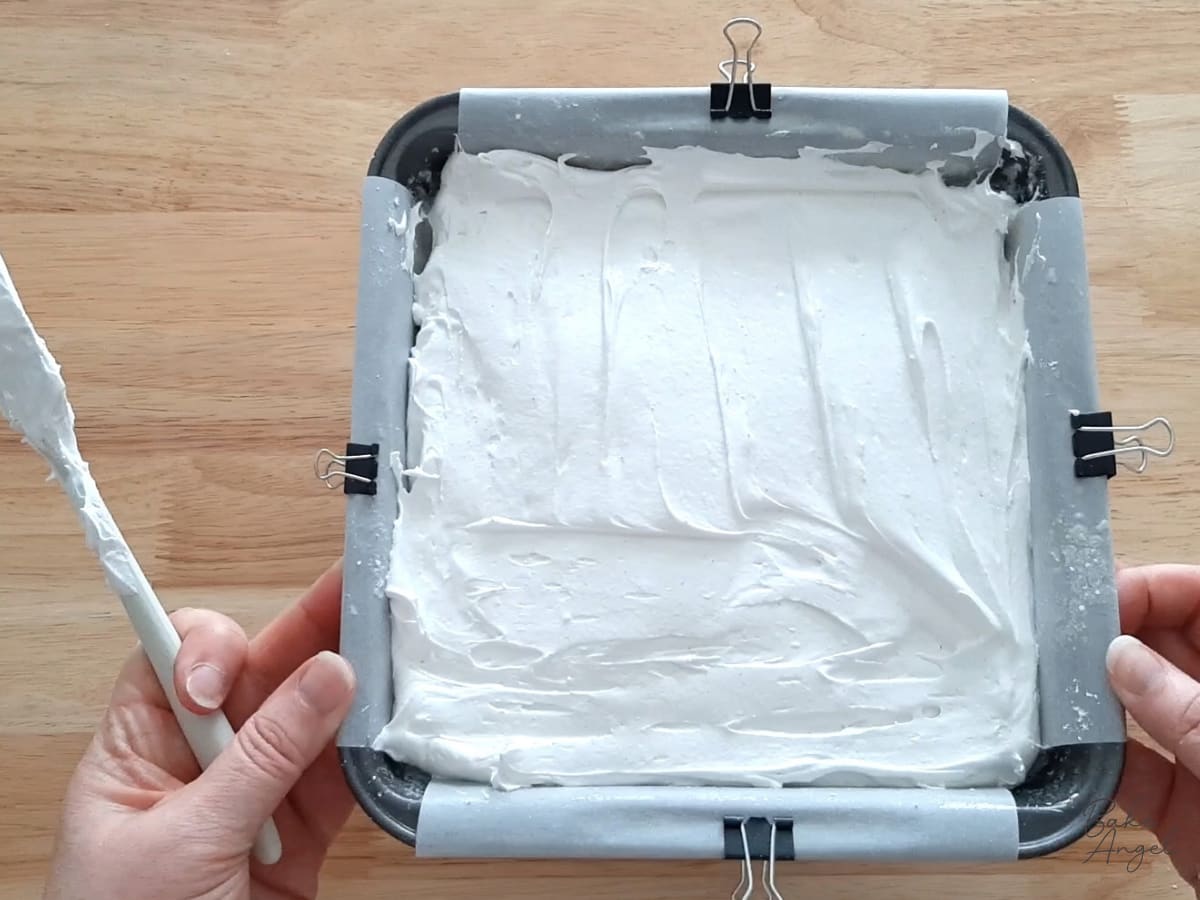
Do not place the marshmallow in the refrigerator to speed up the setting process. This can negatively affect the texture.
9. Cut the marshmallows
Once set, sprinkle some of the remaining icing sugar and cornstarch mixture over the top.
Place a sheet of parchment paper on your work surface and cover it with some of the remaining coating mixture.
Carefully turn the marshmallow out onto the prepared parchment and peel away the original parchment paper.
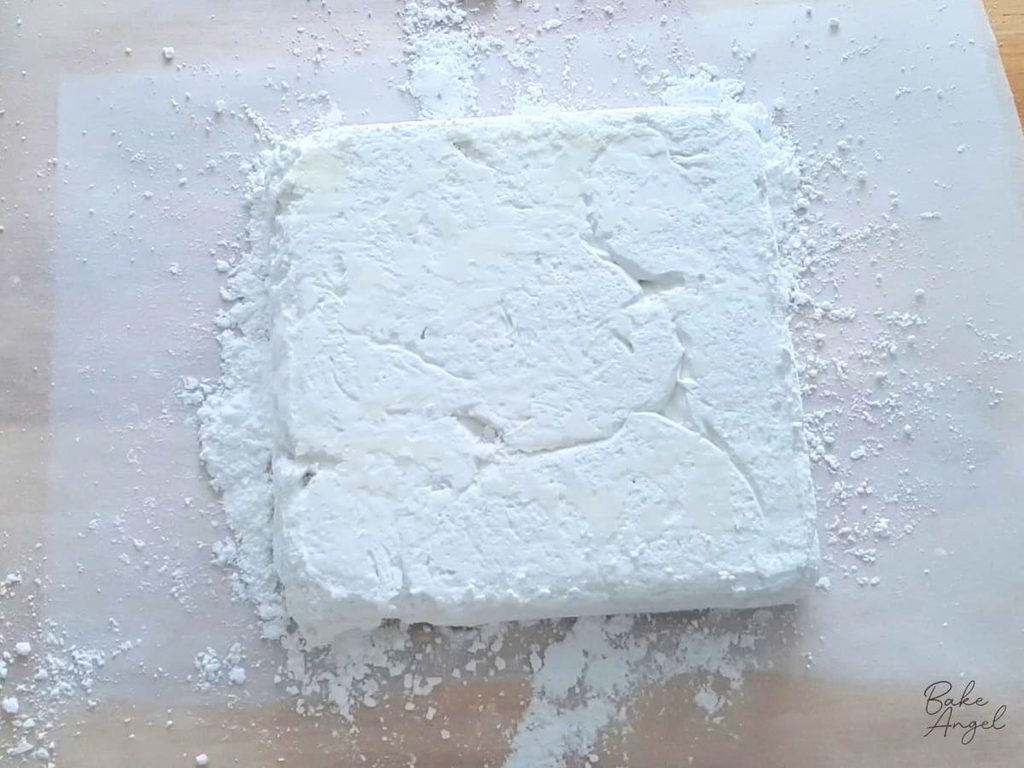
Use a 2-inch (5 cm) round cookie cutter to cut the marshmallows.
Dust the cutter with the icing sugar and cornstarch mixture as needed to prevent sticking.
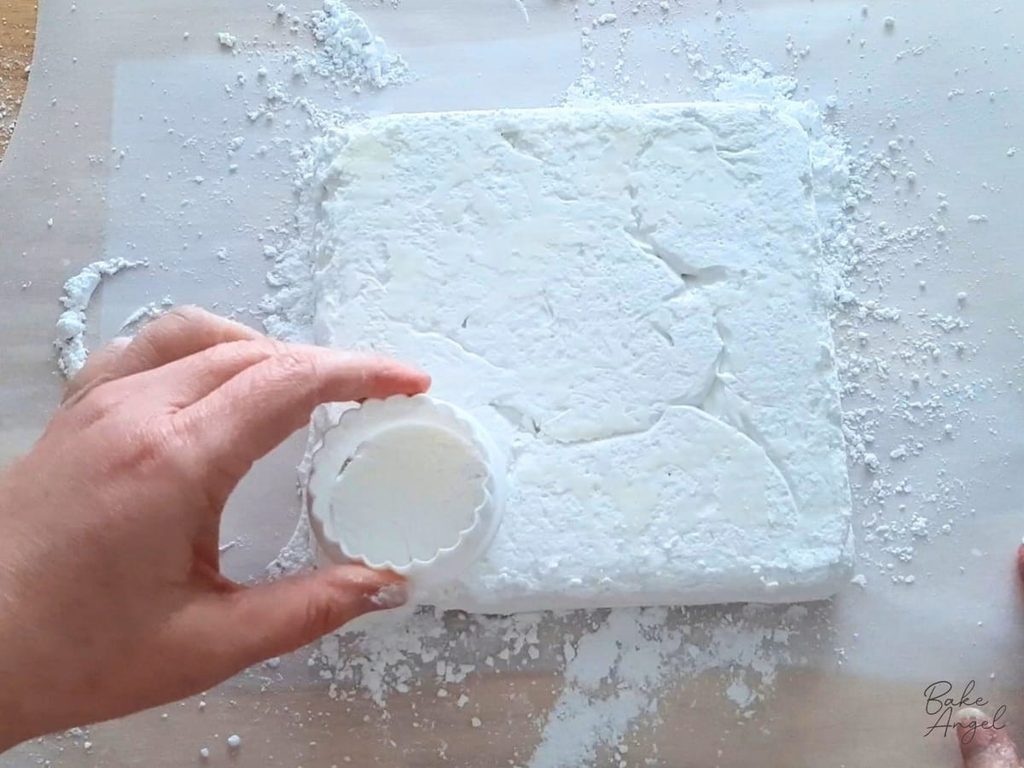
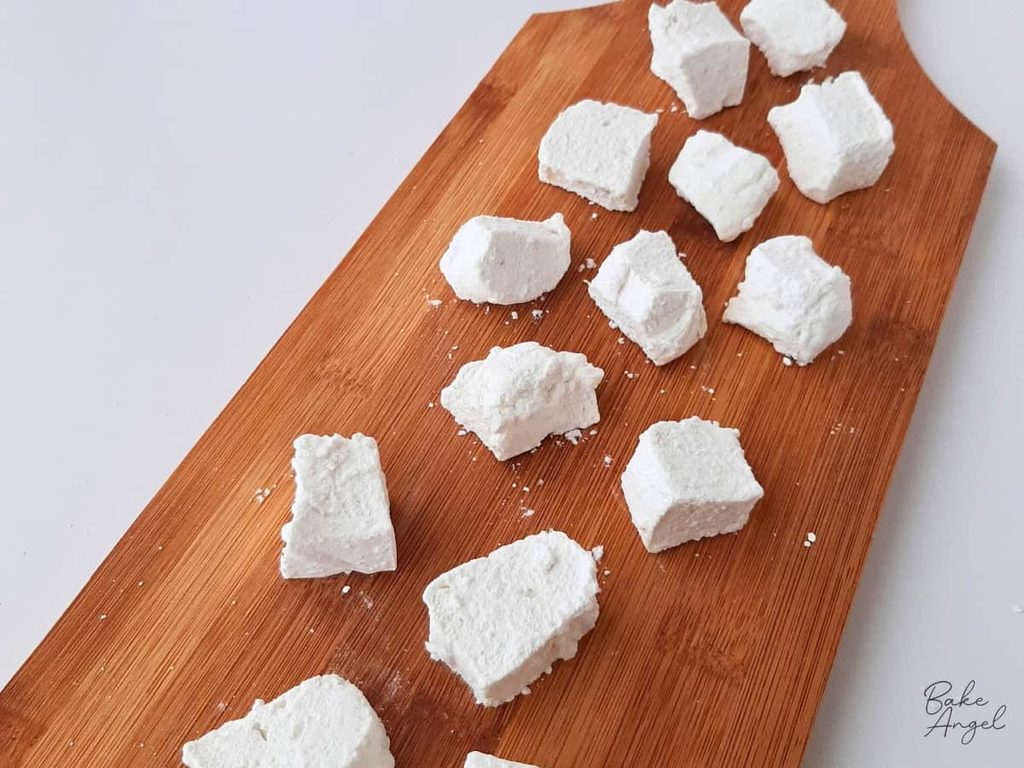
This recipe makes about 8 large marshmallow rounds, with some marshmallow left over. You can cut the remaining marshmallow into smaller bite-sized pieces.
Troubleshooting Homemade Marshmallows
My marshmallows are too soft.
The sugar syrup needs to reach 239°F/115°C. If it doesn’t reach the correct temperature, the marshmallows may not set properly. Humidity can also affect setting time.
My marshmallows are really sticky.
Dust the marshmallows, your work surface and your cutter generously with the icing sugar and cornstarch mixture. Add a little more if needed.
My marshmallows are difficult to cut.
Make sure your cutter is coated with the icing sugar and cornstarch mixture. A sharp cutter also makes things easier.
My marshmallows haven’t set after 1½ hours.
Give them more time at room temperature. Setting time can vary depending on humidity. Don’t put them in the refrigerator to speed things up, as this can affect the texture.
I don’t want such thick marshmallows.
Cut the finished marshmallows in half horizontally, or cut the mixture into smaller squares rather than making large rounds.
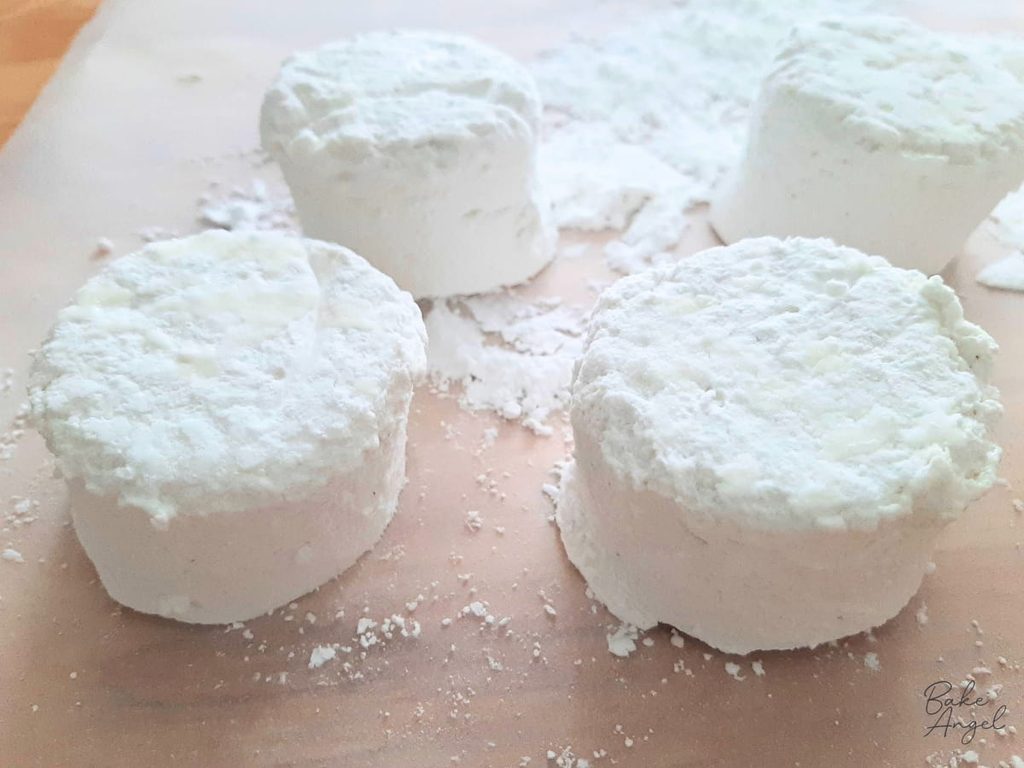
How To Use Homemade Marshmallows
There are so many ways to enjoy these homemade marshmallows!
- Make homemade s’mores
- Add them to hot chocolate
- Dip them in melted chocolate
- Make marshmallow dessert kebabs
- Cut them into bite-sized pieces for snacking
- Package them as a homemade edible gift
- Add them to a Thanksgiving or Christmas treat box
They’re particularly fun during the fall and winter when you can use them for cozy hot chocolates and s’mores.
Love S’mores?
The thick 2-inch marshmallow rounds are particularly good for s’mores. Pair them with my homemade digestive biscuits for a delicious twist on classic s’mores.
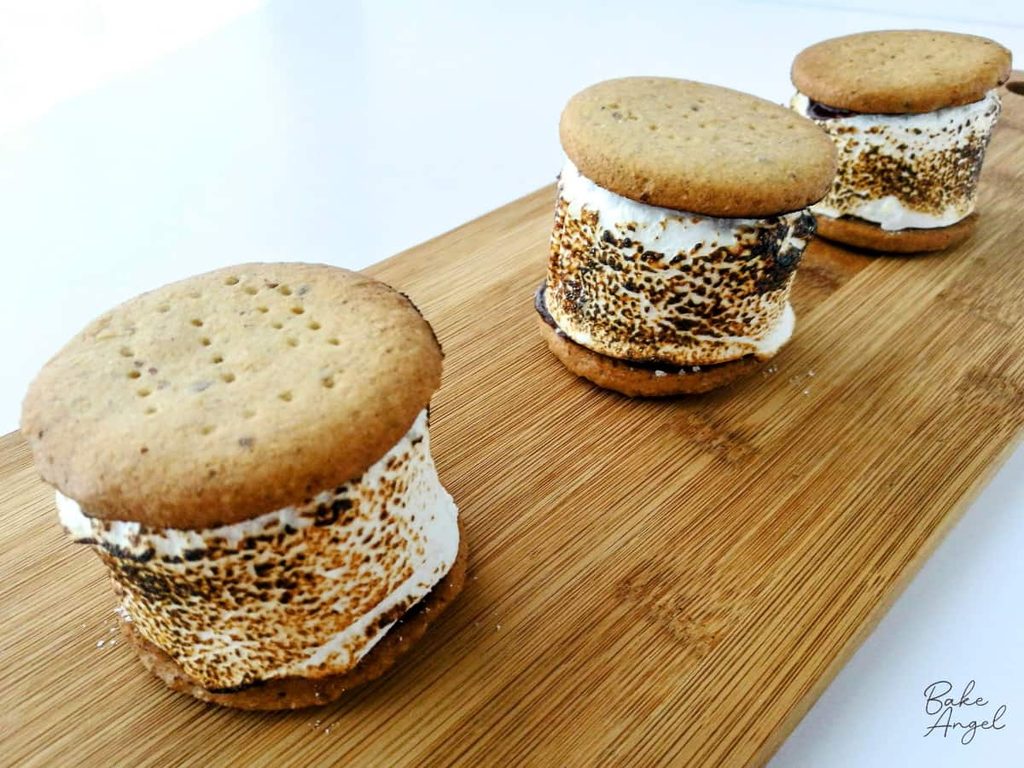
You can also cut them in half if you prefer thinner marshmallows.
How To Store Marshmallows
Store the marshmallows in an airtight container at room temperature.
They should keep well for up to 2 weeks, although they are unlikely to last that long!
Keep the pieces separated with parchment paper if they begin to stick together.
If you are making them for gifting, pack in a food-safe bag with a festive gift tag and ribbon.
Frequently Asked Questions
No. This recipe uses gelatin and egg whites, so it is not vegan or vegetarian.
Yes! The ingredients used to make these homemade marshmallows are naturally gluten-free. As always, check the labels of individual ingredients if you need to avoid gluten due to an allergy or celiac disease.
Yes. Vanilla extract can be substituted for the vanilla bean paste. The vanilla bean paste adds little flecks throughout the marshmallow, but extract will still give you lovely vanilla flavour.
I developed and tested this recipe using gelatin leaves, so I recommend using leaves for the most reliable result. Gelatin can vary in strength between brands and forms, so I haven’t tested a powdered gelatin conversion.
Absolutely! Add your favourite flavouring during the meringue stage, after the gelatin has been incorporated. This allows the flavouring to mix evenly throughout the marshmallow without needing to overmix the finished mixture.
If you want to colour the entire batch, add your food colouring during the meringue stage once the gelatin has been incorporated.
For multiple colours, divide the marshmallow mixture between separate bowls and gently fold your chosen colours into each portion. Folding helps maintain the airiness of the meringue while adding the colour.
Yes! Once the marshmallow has set, you can use cookie cutters to create different shapes. Dust the cutter generously with your icing sugar and cornstarch mixture to prevent sticking. Try ghosts for Halloween, hearts for Valentine’s Day or snowflakes for Christmas.
Homemade Marshmallows for Every Occasion
Once you make homemade marshmallows, you’ll probably start thinking of all the different ways you can use them. From cozy mugs of hot chocolate to homemade s’mores, a holiday treat box and edible gifts, they’re such a fun addition to your recipe collection. You can even use cookie cutters to cut fun shapes, like little ghosts for Halloween or snowflakes for winter.
If you make these marshmallows, I’d love to see how they turn out. Tag me in your photo on IG @itsbakeangel and leave a comment below. I hope you have as much fun making them as I did!
Enjoy,

Homemade Dairy-Free Marshmallows
Equipment
- Small Saucepan
- Cookie Cutters
Angela’s Top Tip
Weigh your dry ingredients in grams with a scale for best results!
Ingredients
For the Coating
- 50 grams Icing Sugar
- 1 tbsp Cornstarch
For the Marshmallow
- 4 Gelatin Leaves (approx 6.5 grams – see note)
- 3 Egg Whites
- ¾ tsp Cream of Tartar
- 125 grams White Sugar
- 175 grams Corn Syrup
- 2 tsp Vanilla Bean Paste
For Preparing the Pan
- Spray oil or neutral oil (for greasing)
Instructions
- Mix the icing sugar and cornstarch together in a small bowl.
- Line an 8 x 8-inch baking pan with parchment paper, leaving some overhang. Lightly grease the parchment with spray oil or brush with oil.
- Add about half of the icing sugar and cornstarch mixture to the pan and coat the bottom and sides thoroughly. Set the remaining mixture aside for later.
- Place the gelatin leaves in a bowl of cold water and soak for about 5 minutes, until softened.
- Add the egg whites and cream of tartar to the bowl of a stand mixer fitted with the whisk attachment. Whip until stiff peaks form.
- Meanwhile, add the white sugar and corn syrup to a saucepan. Heat over medium-high heat until boiling. Continue cooking until the syrup reaches 239°F (115°C) on a sugar thermometer.
- With the mixer running on low speed, slowly pour the hot syrup down the side of the mixer bowl. Increase the mixer to medium speed and whisk for about 3 minutes, until the mixture is thick and warm.
- Remove the softened gelatin from the water, squeeze out the excess moisture and cut into small pieces. Add gradually to the marshmallow mixture while mixing.
- Add the vanilla bean paste and mix until incorporated. The mixture should be thick and hold firm peaks.
- Transfer the marshmallow mixture to the prepared pan using a silicone spatula. Smooth into an even layer. Leave uncovered at room temperature for about 1½ hours, or until fully set. Do not refrigerate to speed up the setting process.
- Sprinkle some of the remaining icing sugar and cornstarch mixture over the top of the marshmallow.
- Cover a sheet of parchment paper with more of the coating mixture. Carefully turn the marshmallow out onto the parchment and peel away the original parchment.
- Use a 2-inch (5 cm) round cookie cutter to cut 8 marshmallow rounds, dusting the cutter with the coating mixture as needed. Cut the remaining marshmallow into smaller pieces if desired.
Video
Notes
- A stand mixer with a whisk attachment makes this recipe much easier because the egg whites can whip while you prepare the sugar syrup.
- Use a sugar thermometer to make sure the syrup reaches 239°F (115°C).
- Take extra care when handling the hot sugar syrup.
- The marshmallow mixture is extremely sticky, so generously coating your pan, work surface and cutter will make cutting much easier.
- I used 4 gelatin leaves from a pack of 6 weighing 10 grams.
- This recipe makes thick 2-inch marshmallow rounds. For thinner marshmallows, cut each round in half horizontally or use a smaller cutter.
- These marshmallows contain gelatin and egg whites, so they are dairy-free but not vegan or vegetarian.
- Store in an airtight container at room temperature for up to 2 weeks.




Leave a Reply