
Celebrate any occasion with these adorable mini Victoria sponge cakes. Delicate fluffy sponge layers filled with raspberry jam and the silkiest buttercream that just screams comfort eating. Here’s my dairy free mini version of this British classic, with gluten free and vegan options available.

The History of the Victoria Sponge
The Victoria Sponge is a basic layer cake that dates back to Queen Victoria’s time but there really is nothing plain about it. Traditionally filled with jam and either whipped cream or buttercream, it is a staple in many British households and often the first cake that people learn to bake. With Queen Elizabeth celebrating her Platinum Jubilee this week, I wanted to pay homage to our British heritage and make a mini version of this classic recipe.
The Victoria sponge recipe, as with all British recipes, is written by weight to ensure consistent results. This particular recipe uses a 1:1:1:1 ratio for the flour, sugar, eggs and butter which also means that you can easily scale up the recipe as required.
Why You Should Make This
My mini Victoria sponge cakes are soft and fluffy, filled with silky buttercream and a tart jam that will just wake up your tastebuds. If you are a fan of individual desserts, you will love these. If you are new to baking, this is the PERFECT recipe to start off with as there really is nothing that can go wrong with it. Simple to make with less than 10 minutes of prep time and a handful of regular pantry items. No need for a fancy cake pan either as we will be making them in a cupcake pan.
Got questions? Check out my FAQ section.
Ingredients and Substitutions
This is a dairy free recipe but with two simple tweaks, you can easily make it vegan and gluten free. It is naturally soy free and nut free and perfect for kids. Read on for my substitution recommendations.
For the Cake Batter
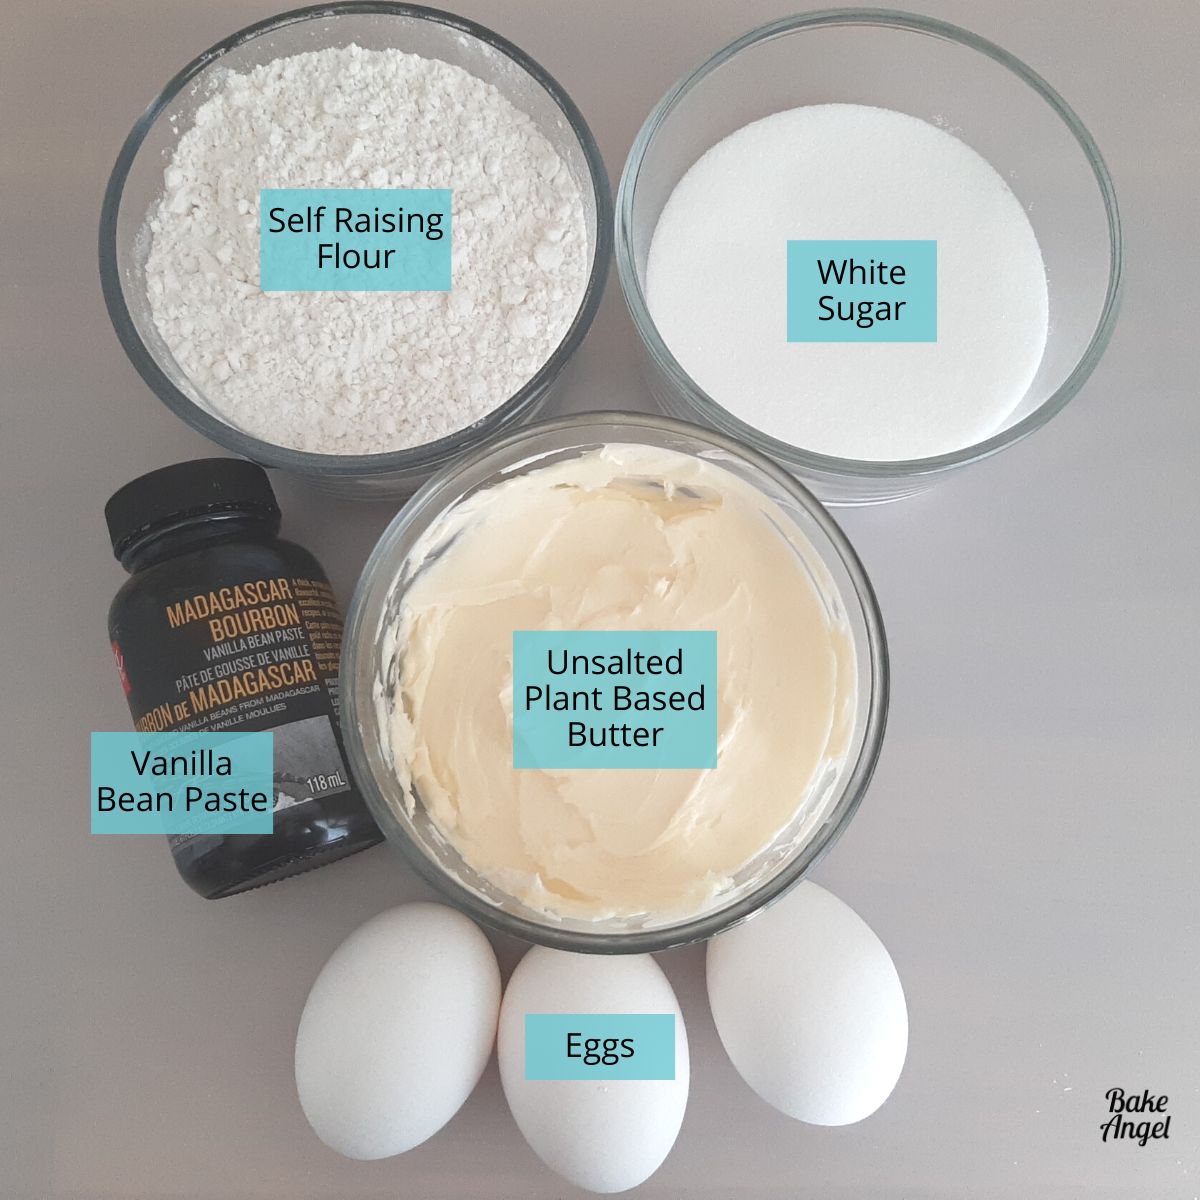
Flour: The star of this recipe is self-raising flour. The addition of baking powder and salt in self raising flour helps to create a soft and fluffy consistency in baked goods. Can’t find SR flour in the store? It’s really easy to make your own by using plain flour and adding some baking powder and salt. For this particular recipe, sift together 175 grams of all purpose (plain) flour, 8 grams of baking powder and 1.4 grams of salt. For gluten-free self-raising flour, use Bob’s Red Mill 1-to-1 flour substitute and use the same quantities as listed above. You can read more about self raising flour in this post.
White Sugar: to add sweetness to the cake, we are using white sugar. I do not recommend subbing with an alternative sugar as it will affect the taste, colour and texture of the cake.
Butter: My go-to fat for richness in cake batter is unsalted plant based butter. Not dairy free? Sub with regular dairy butter. Ensure that your butter is at room temperature before you start making the mini cakes. It will be quicker to incorporate.
Flavouring: Traditional Victoria sponge recipes do not include vanilla but I adore the extra dimension it adds to this cake. My preference is vanilla bean paste but you can sub with vanilla extract if you prefer.
Egg: to bind our ingredients together and help the cake rise, I am using 3 beaten eggs (at room temperature). I usually use large eggs but medium sized ones will also work well with this recipe. If you want to work by weight, a large egg usually weighs around 50 grams once the shell is removed. Replace with a flax egg if you are vegan. To make a flax egg, add 1 tablespoon of flax meal (ground flaxseed) to 3 tablespoons of water (triple the quantities for this recipe). Allow to rest for 15 minutes then use as directed in the recipe.
For the Buttercream
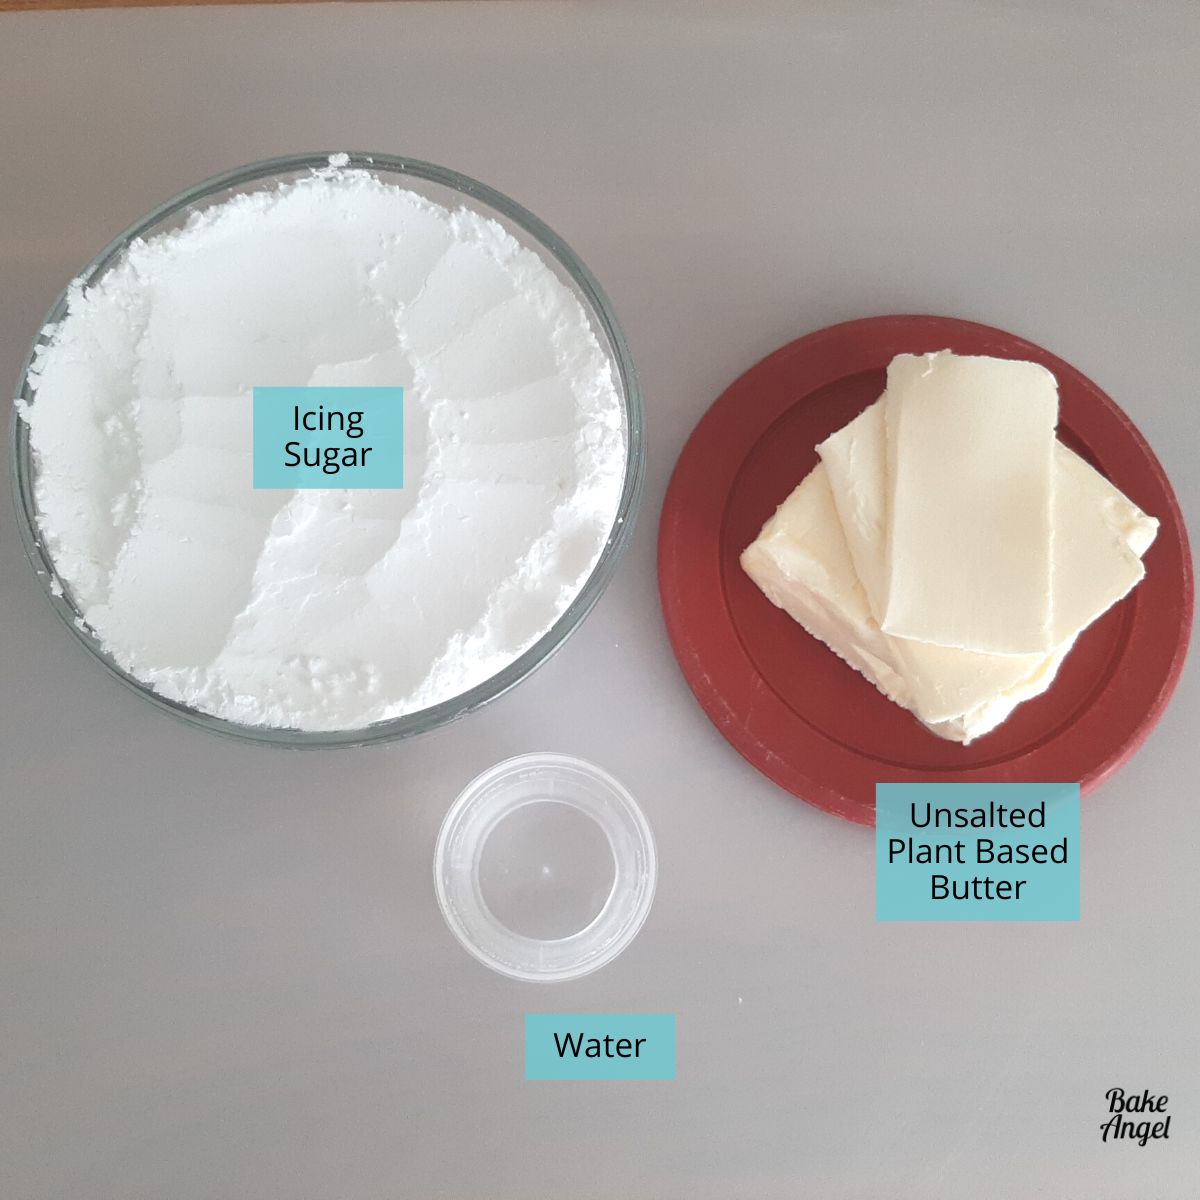
This cake uses a simple buttercream with softened butter and icing sugar, and a dash of water to loosen it enough so that we can spread it on the cakes. The great benefit of this recipe is that it is naturally gluten free and vegan. You could also sub with vegan whipped cream if you prefer. Use dairy butter if you are not DF or vegan.
How to make Mini Victoria Sponge Cakes
Preheat your oven to 320°F / 160°C. Gather all ingredients and supplies, ensuring that the butter and eggs are at room temperature.
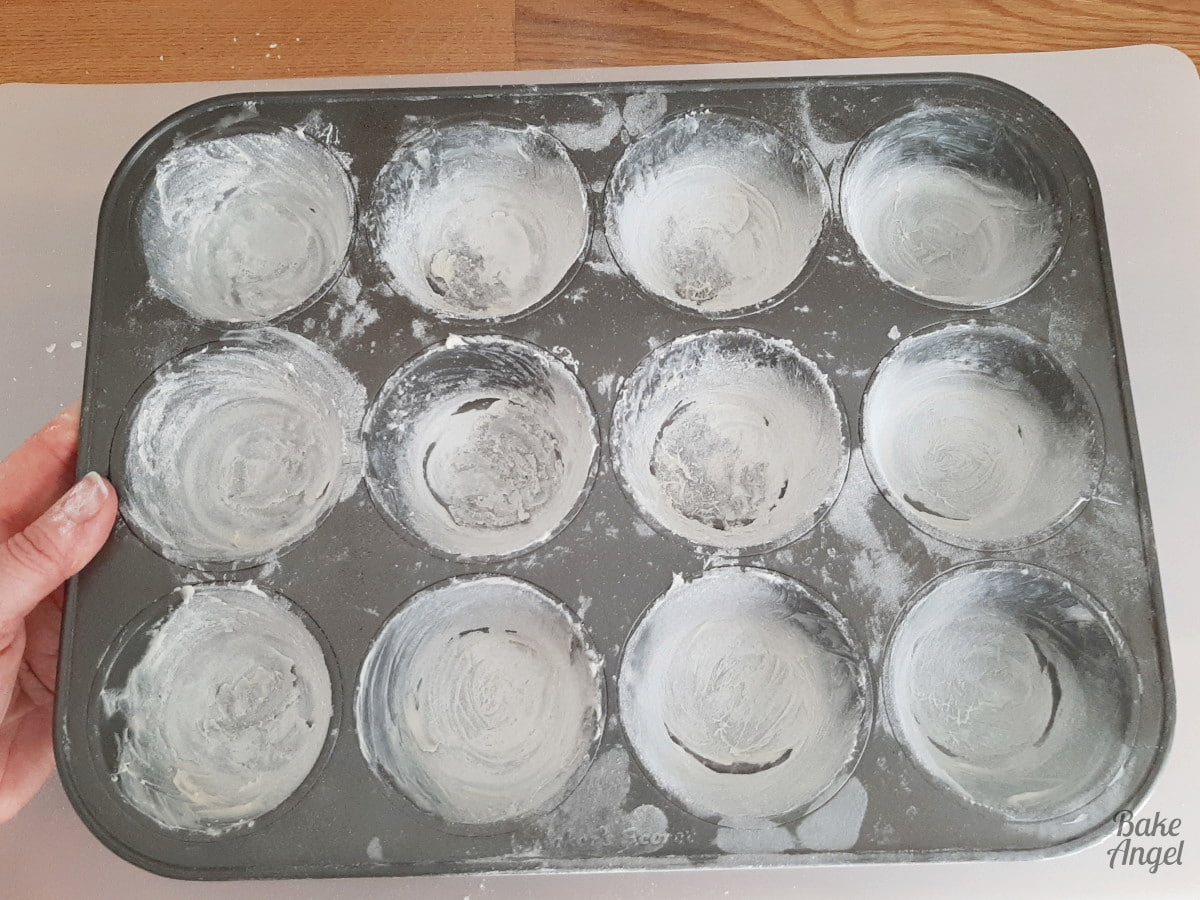
Prepping the cupcake pan
I love the idea of not using cupcake liners for the mini cakes as we want to retain perfectly straight sides. So we’re going to start by liberally greasing each cavity in the cupcake pan.

Ensure the pan is fully coated and then add some all purpose flour. I used approximately 1 tsp of flour for each cake cavity.
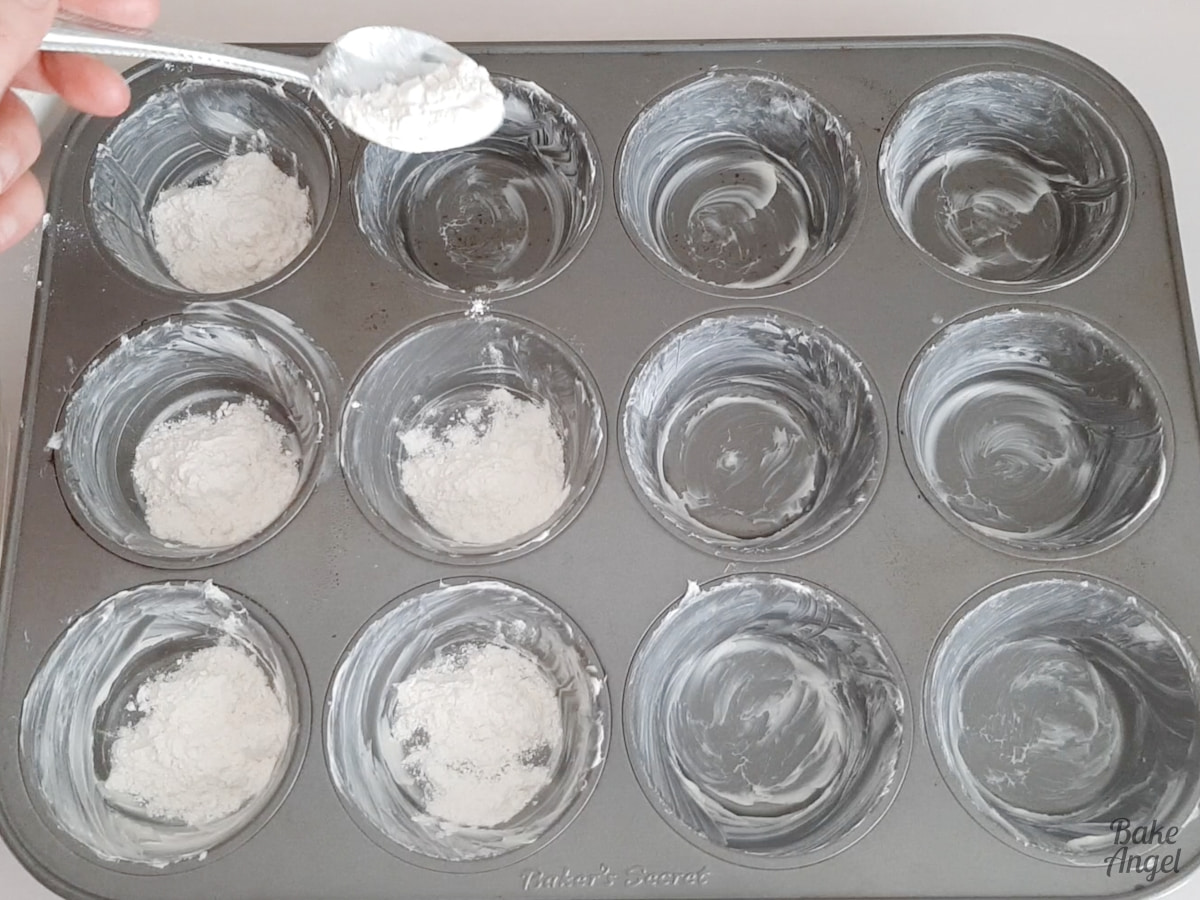
Give the pan a good shake around to move the flour around. You want to ensure that everything is fully coated. Shake off any excess flour and that’s it. Nice and easy and our cakes will be so easy to remove once they are baked.
Making the Cake Batter
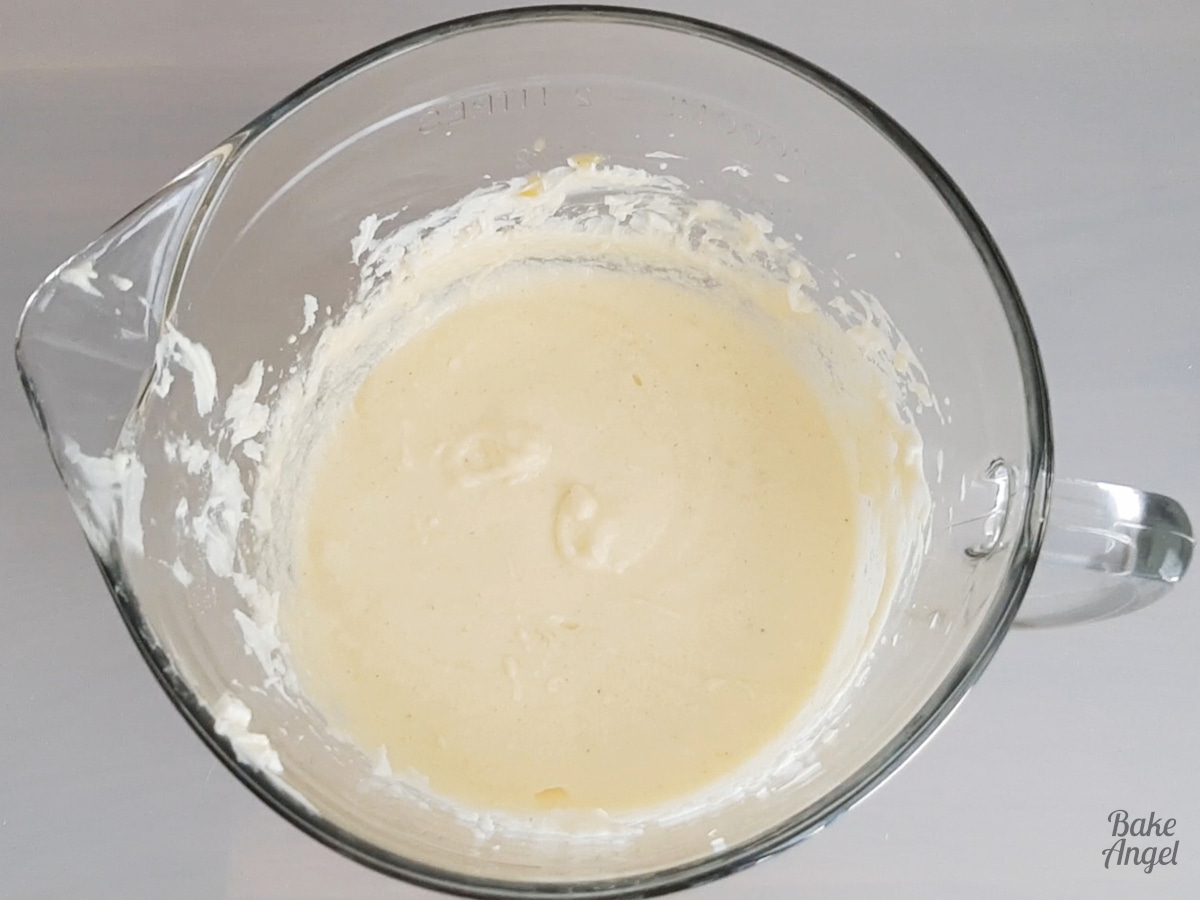
Add 175 grams of white sugar and 175 grams of unsalted plant based butter to a mixing bowl and mix until light and fluffy (about 30 seconds).

In a separate bowl, add 3 eggs and 1 tsp of vanilla bean paste.

Stir together then slowly add to the butter/sugar mixture, whisking between each addition. * Note do not add all at once as this will curdle the mixture.

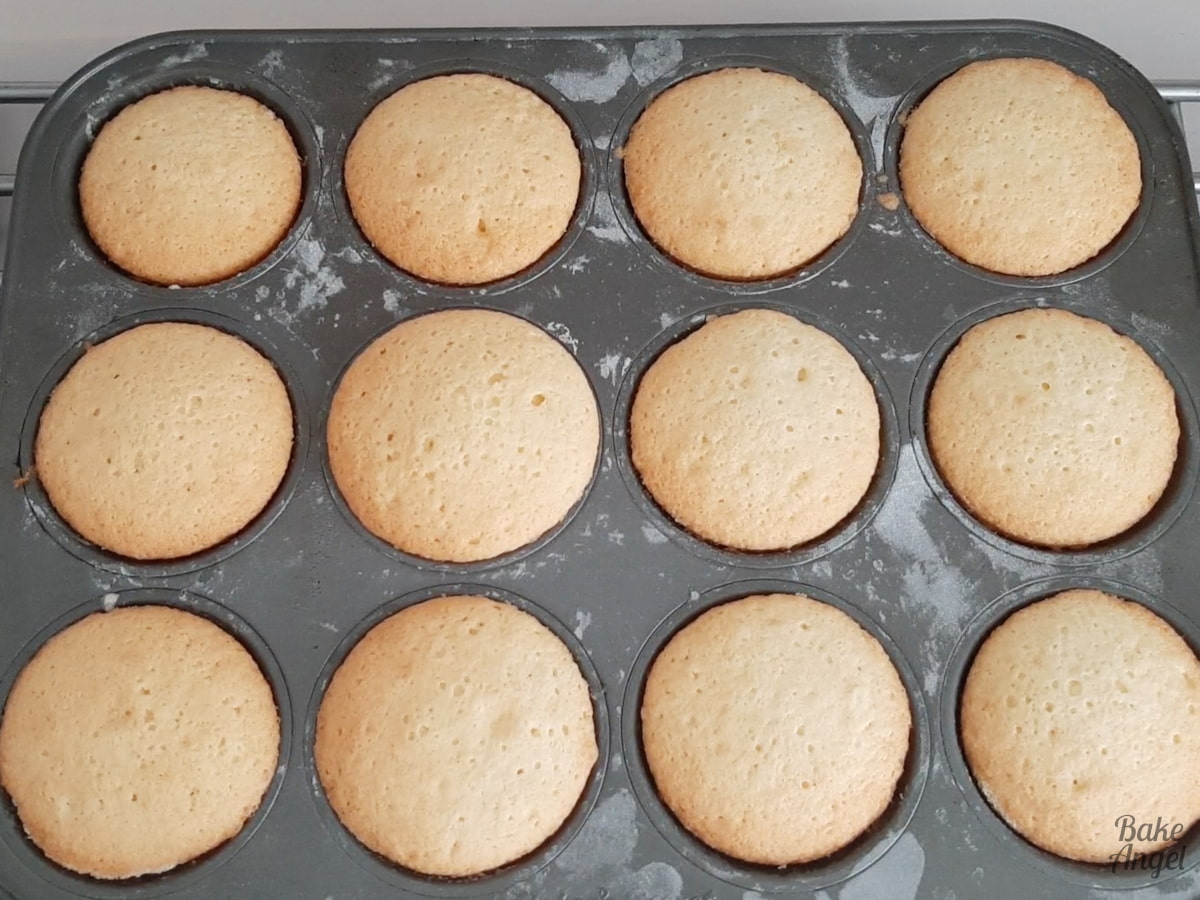
This is looking great already. Look how pale it is in colour. Victoria sponge cakes are usually light in colour and consistency.
Add 175 grams of self raising flour and gently fold in with a spatula. I do not recommend mixing in the flour with the hand whisk as it will overwork the batter.
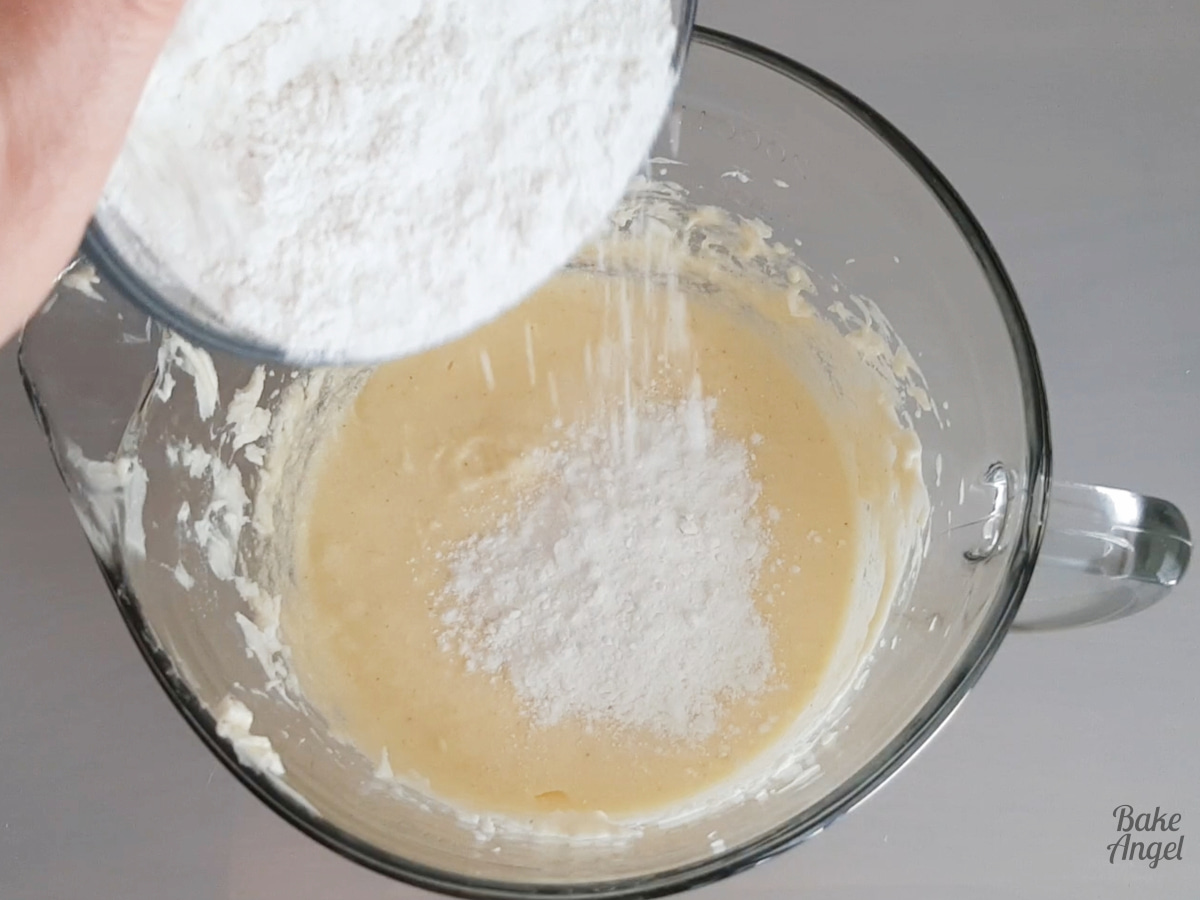
Folding helps to retain air in the batter and also ensures that the ingredients are fully combined.
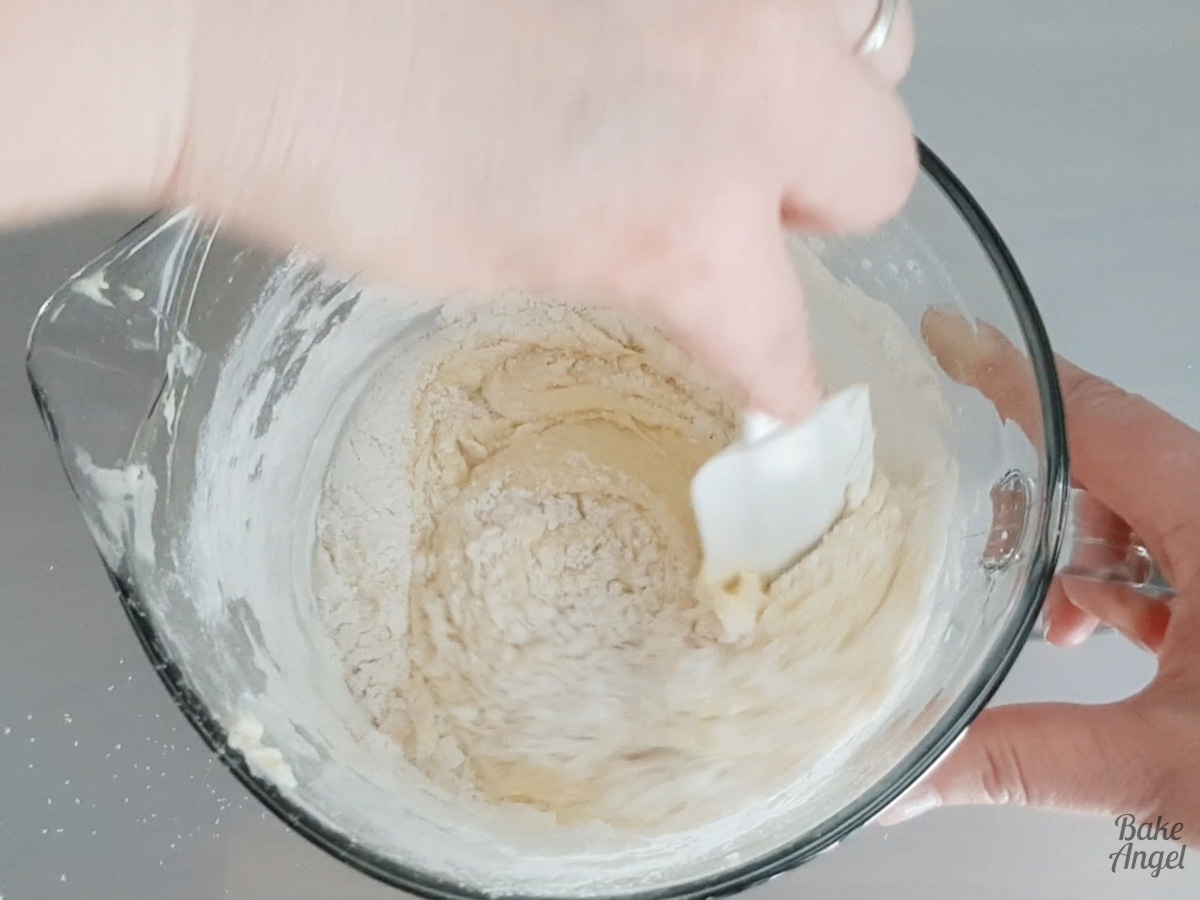
And that’s it. Our cake batter is ready.

Ready for Baking
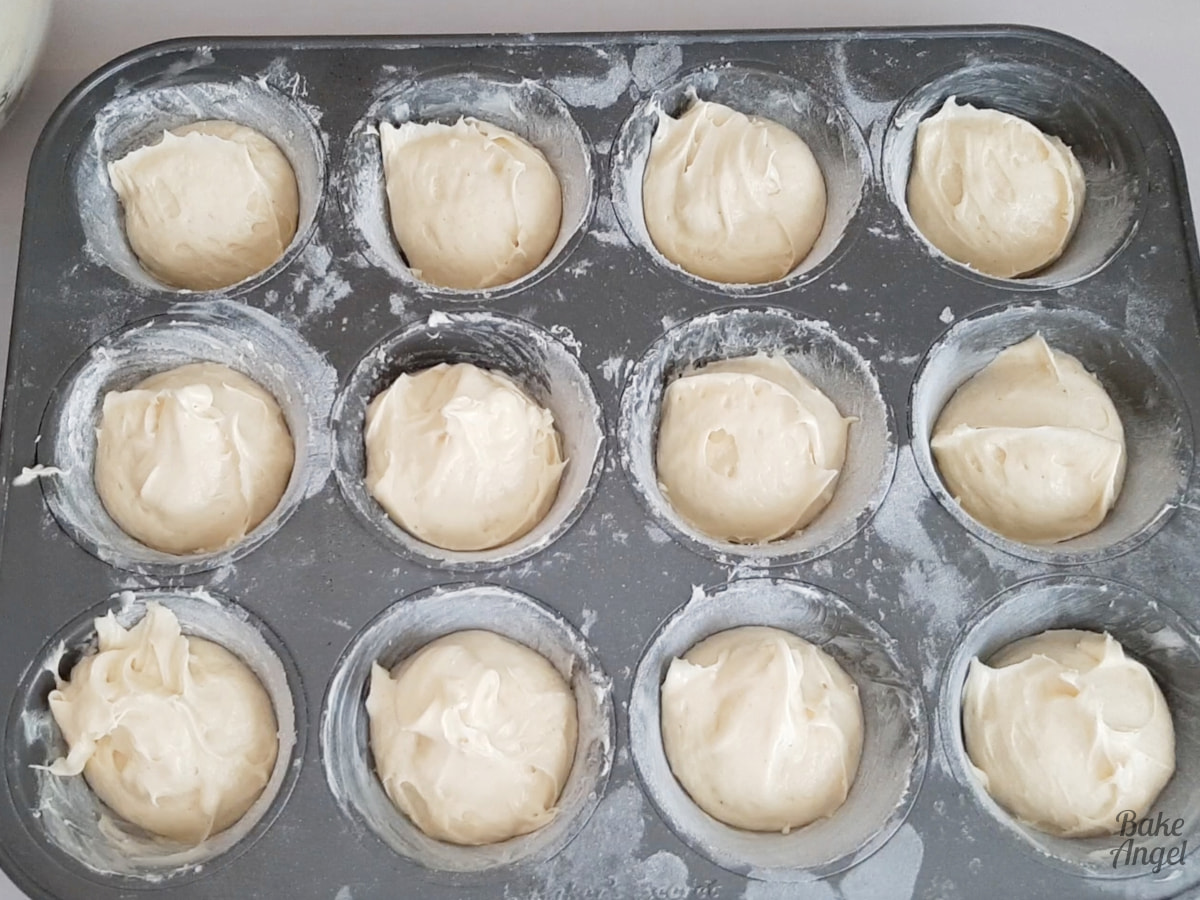
Using an ice cream scoop, add 1 scoop to each cupcake cavity. I love using my large ice cream scoop to fill cupcake pans as there’s no mess and you can easily control the amount of batter you are adding.

Divide up any remaining batter to ensure each cake has a similar amount of batter. Give the pan a couple of taps on the counter to remove any air bubbles and level the batter.
Bake at 320°F / 160°C for 20 minutes until well risen and lightly golden. Allow to cool completely. Do not remove the cakes from the pan at this stage.
Making the Buttercream
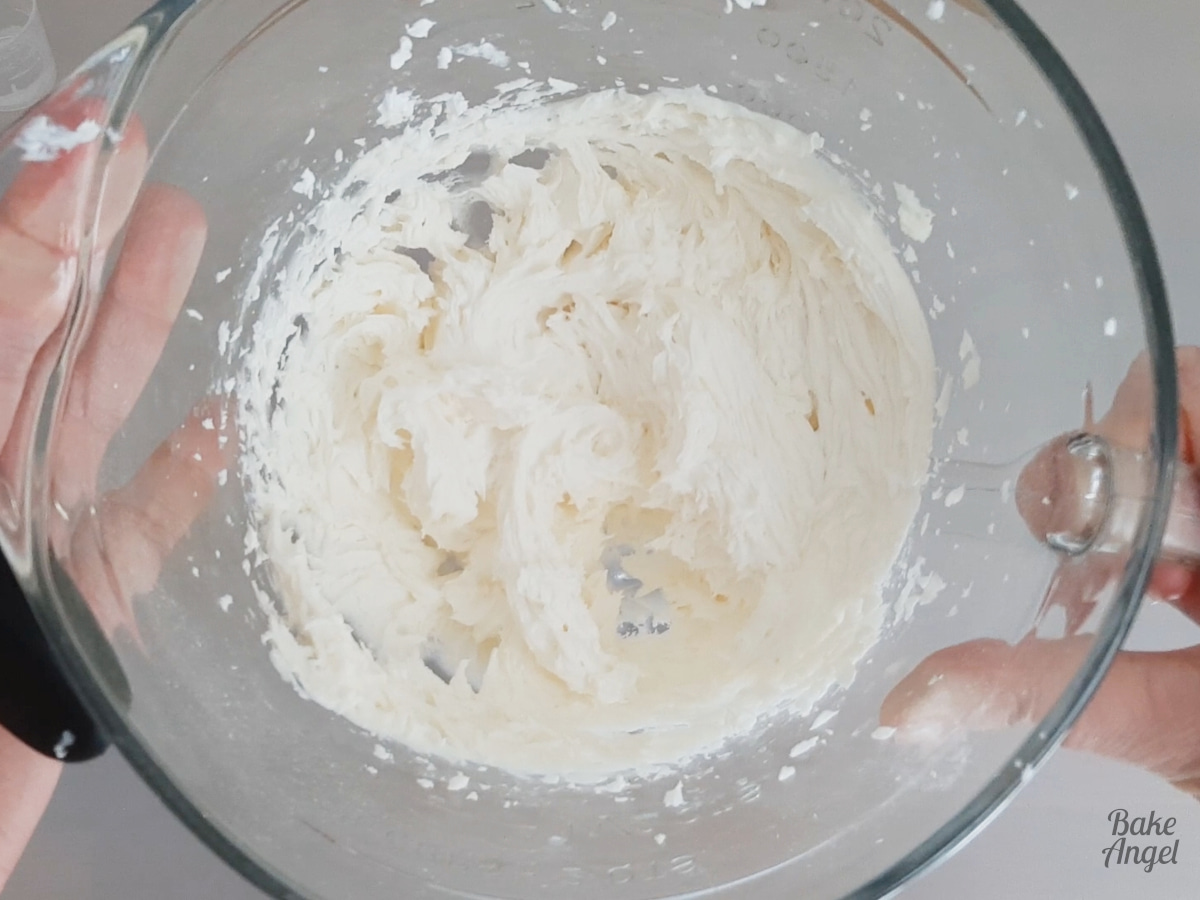
Cream together 113g of butter and 227g of icing sugar together in a bowl.

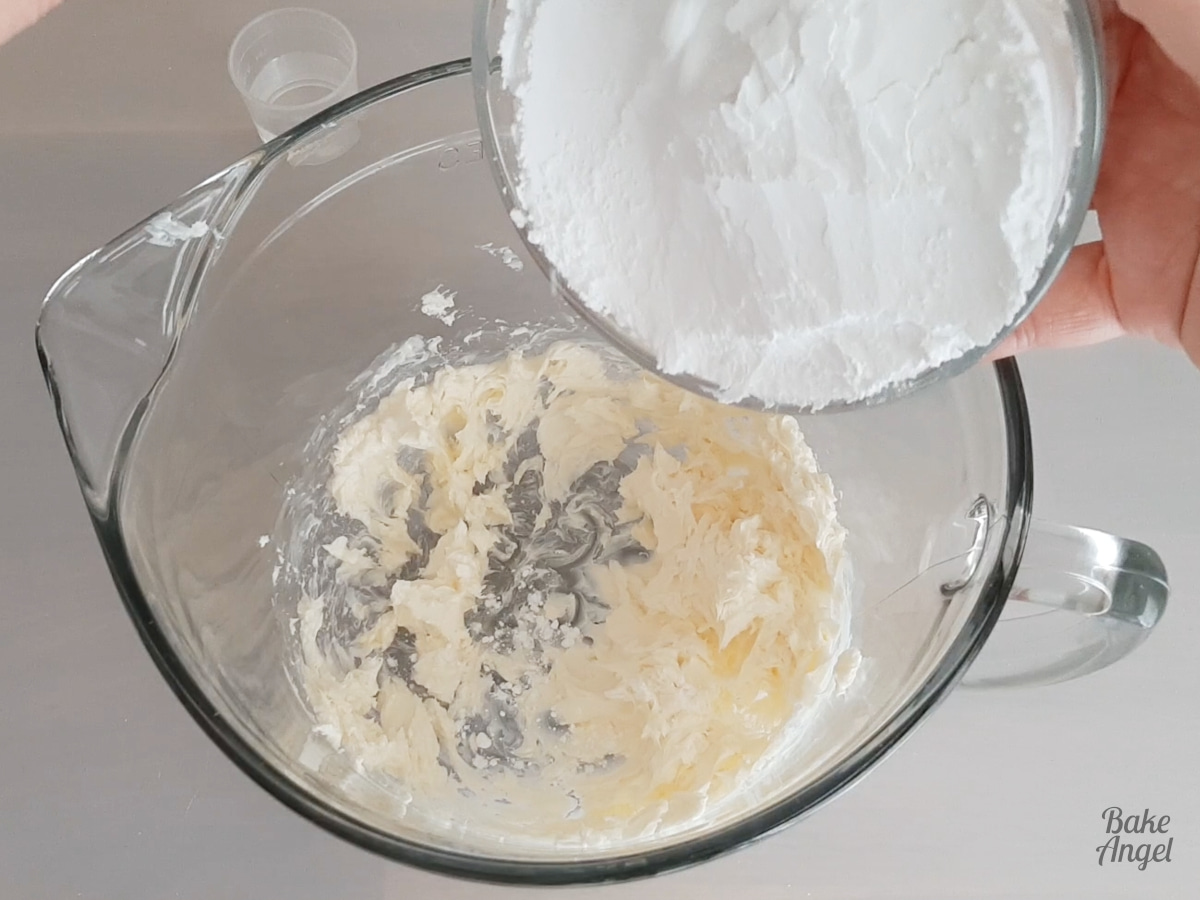
Add water as required. I usually use between 2-3 tsp depending on the humidity when I am making the buttercream. You want to create a soft, spreadable consistency.

Filling the Mini Victoria Sponge Cakes
Using a rounded spatula, loosen each mini cake from the cupcake pan and set aside.


Split each mini cake in half with a straight-edged knife.


Using a tapered spatula, spread a generous amount of buttercream on the bottom layer, kind of like spreading cream on a scone.

Add approx 1/2 tsp of jam to the middle of the buttercream and place the top layer on top.

All Finished
To finish the Victoria sponge cakes, dust them with icing sugar. Look how cute they are together. All ready for eating.
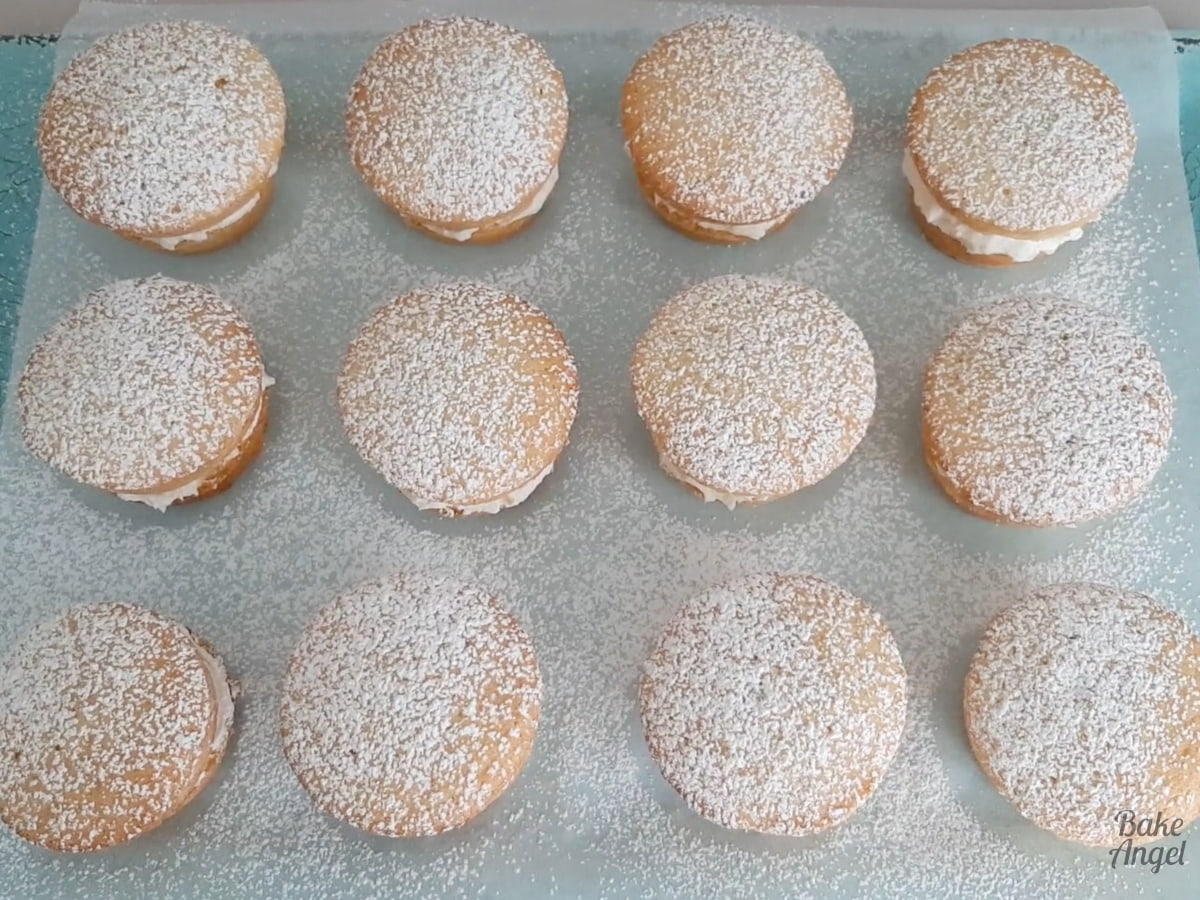
And a nice side view so you can see the buttercream just peeking out. I can’t wait to dig into these.

We have the perfect ratio of tart raspberry jam to silky buttercream that perfectly compliments the delicate sponge cake. Have I tempted you to try making them? If you try this recipe, don’t forget to leave a star rating and share your comments below. I’d love to hear what you think of these gorgeous morsels of fluffiness.
Enjoy with a nice cup of afternoon tea.

Common Questions
Yes, this recipe will make an 8 inch round cake and enough buttercream to fill it. Bake in two pans for 25 minutes at 320F.
Store in an airtight container at room temperature for 3-4 days. You can also freeze them, either before splitting and filling or once they are filled. To freeze, wrap individual cakes in plastic (cling) wrap then place in an airtight container. Allow to defrost to room temperature before unwrapping.
Absolutely. The buttercream is already vegan so just swap out the eggs for 3 flax eggs in the cake batter recipe.
With a simple substitution in the cake batter, you can easily turn these in to gluten free delights. I recommend using Bob’s Red Mill 1-to-1 flour and creating your own GF self raising flour. It takes seconds. Check out the details here.

Craving More Mini Desserts?
Check out these desserts which perfectly complement these Victoria sponge cakes, especially if you are planning a tea party or celebration.
- Indulge with some amazing Red Velvet Donuts
- Stay classic with my Mini Bakewell Tarts
- Be a crowd pleaser with some Rocky Road muffins
And you can find more cake recipes here.

Mini Victoria Sponge Cakes
Ingredients
For the Cake Batter
- 175 grams Plant Based Butter (unsalted)
- 175 grams White Sugar
- 3 Eggs (large – see note)
- 1 tsp Vanilla Bean Paste
- 175 grams Self Raising Flour (see note)
For the Buttercream
- 113 grams Plant Based Butter (unsalted)
- 225 grams Icing Sugar
- 1 tbsp Water (see note)
Additional Ingredients
- Raspberry Jam
- Additional butter for greasing
- Additional flour for cupcake pan
- Additional icing sugar for dusting
Instructions
Prep
- Preheat your oven to 320°F / 160°C. Gather all ingredients and supplies, ensuring that the butter and eggs are at room temperature.
- Grease and flour each cavity in the cupcake pan. Ensure the pan is fully coated and shake off any excess flour.
To Make the Mini Cakes
- Add 175 grams of white sugar and 175 grams of unsalted plant based butter to a mixing bowl and mix until light and fluffy (about 30 seconds).
- In a separate bowl, add 3 eggs and 1 tsp of vanilla bean paste. Stir together then slowly add to the butter/sugar mixture, whisking between each addition. * Note do not add all at once as this will curdle the mixture.
- Add 175 grams of self raising flour and gently fold in with a spatula. I do not recommend mixing in the flour with the hand whisk as it will overwork the batter.
- Using an ice cream scoop, add 1 scoop to each cupcake cavity. Divide up any remaining batter to ensure each cake has a similar amount of batter.
- Bake at 320°F / 160°C for 20 minutes until well risen and lightly golden. Allow to cool completely.
To Make the Buttercream
- Cream together 113g of butter and 227g of icing sugar together in a bowl.
- Add water as required. I usually use between 2-3 tsp depending on the humidity when I am making the buttercream. You want to create a soft, spreadable consistency.
Completing the Mini Cakes
- Using a rounded spatula, loosen each mini cake from the cupcake pan and set aside.
- Split each mini cake in half and spread a generous amount of buttercream on the bottom layer.
- Add approx 1/2 tsp of jam to the middle of the buttercream and place the top layer on top. Dust the mini cakes with icing sugar.
- Enjoy with a nice cup of afternoon tea.
Video
Notes
- Ensure that your butter and eggs are at room temperature before starting this recipe. That will ensure that your cake batter combines quickly without needing to overmix everything.
- I usually use large eggs but medium sized ones will also work well with this recipe. If you want to work by weight, a large egg usually weighs around 50 grams once the shell is removed. You can sub with flax eggs if you are egg-free or vegan.
- This recipe can also be used to make an 8 inch round layer cake. Bake for 25 minutes.
- Store leftover cakes in an airtight container on the counter for 3-4 days. Spare buttercream can be stored in the fridge for up to 2 weeks. To freeze any leftover, store in an airtight container and defrost to room temperature before plating up.
- Check out the full recipe post for gluten free and vegan substitution recommendations.


I love this recipe. I am just collecting my ingredients. You don’t say what size eggs to use. My only hesitation too get started.
Hi Margaret. Thanks for your question. I generally use large eggs, which weigh around 50g each when removed from their shell. Medium eggs will also work well with this recipe. I will add the size to my recipe. Let me know how your mini cakes work out. Happy baking!
These were so fun to make and really good. Love the size of them for when we have company, because they are so easy to serve. Thanks for a great recipe!
Absolutely! They are perfect to serve as individual desserts.
Been ages, I made these…will be trying your version. Recipe is simple and easy …
Thanks Lubna – they’re definitely a classic.
These little cakes came out perfectly! I appreciated the dairy free ingredients as I am supposed to limit dairy and most sweets have some. I’ll make this again and again.
So happy to hear this Lauren. You can’t go wrong with victoria sponge.
These are absolutely adorable!
The cutest little dessert!
A lovely dairy-free dessert, they are so quick to whip up and taste wonderful!
So glad you enjoyed them Heather!
This is my absolute favourite cake and I love this mini version. So yummy!