
These easy homemade digestive biscuits are crisp, lightly sweet and perfect for dunking into a cup of tea or coffee. If you’re struggling to find dairy-free digestive biscuits in your local shops, this simple recipe lets you make your own at home. They’re vegan as written, with a gluten-free adaptation to try too.
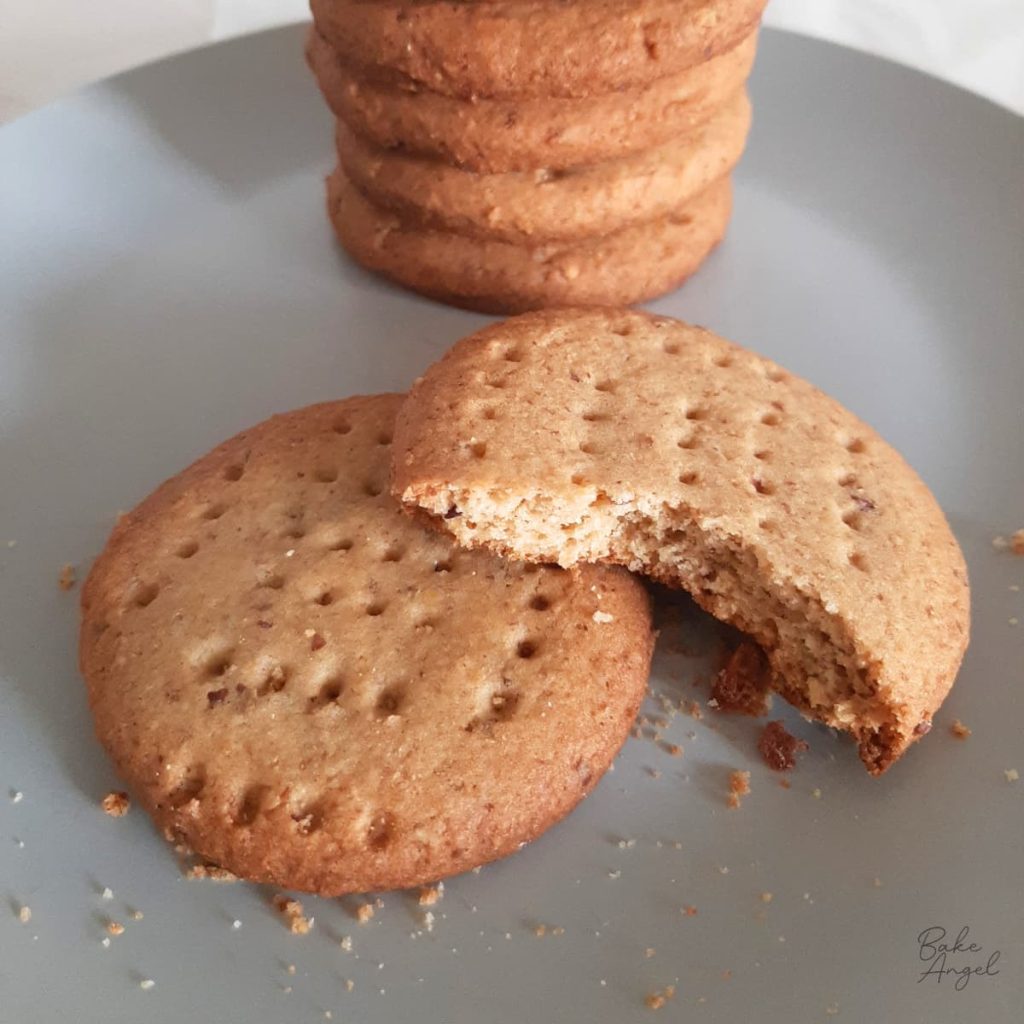
Digestive biscuits have always been one of my favourite cookies. There’s something so nostalgic about a simple, slightly crumbly biscuit that you can dunk into your tea and enjoy with very little fuss. And while you can buy them pretty cheaply, finding dairy-free digestive biscuits isn’t always quite so easy.
That’s why I decided to make my own!
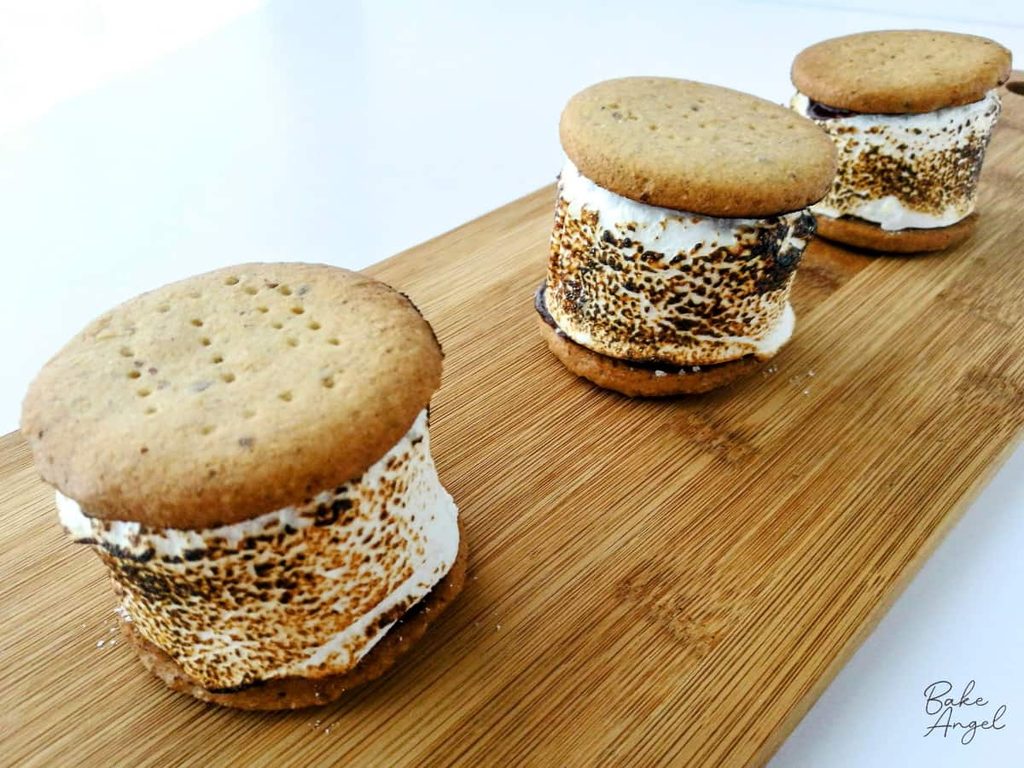
This recipe makes a small batch of 16 biscuits, so it’s perfect when you want homemade biscuits without ending up with a huge container full. They’re delicious just as they are, but they’re also surprisingly good with marshmallows for homemade s’mores.
Why I Made These Digestive Biscuits
Digestive biscuits are a classic British biscuit, and they’re something I grew up eating. When I started looking for dairy-free versions, I quickly discovered that they aren’t always easy to find in stores.
Making them at home means you know exactly what’s going into them, and this recipe uses simple ingredients you may already have in your pantry.
They’re also:
- Dairy-free
- Vegan
- Easy to make
- Made with whole wheat flour
- Easily adapted to be gluten-free
- Perfect for dunking
- Great for homemade s’mores
What Are Digestive Biscuits?
Digestive biscuits are a classic British biscuit traditionally made with whole wheat flour and wheat germ. They have a lightly sweet, slightly nutty flavour and a crisp, crumbly texture.
Despite the name, there’s nothing particularly digestive about them! They’re simply a much-loved British biscuit that has been enjoyed for generations.
Why Use Flax Instead of Wheat Germ?
Traditional digestive biscuits are often made with wheat germ, but I couldn’t find any at my local grocery store when developing this recipe.
Ground flax seed is a great alternative that adds a slightly nutty flavour and little flecks of texture throughout the biscuits.
Make sure you use ground flax seed, rather than whole flax seeds, so that it incorporates evenly into the dough.
Ingredients and Substitutions
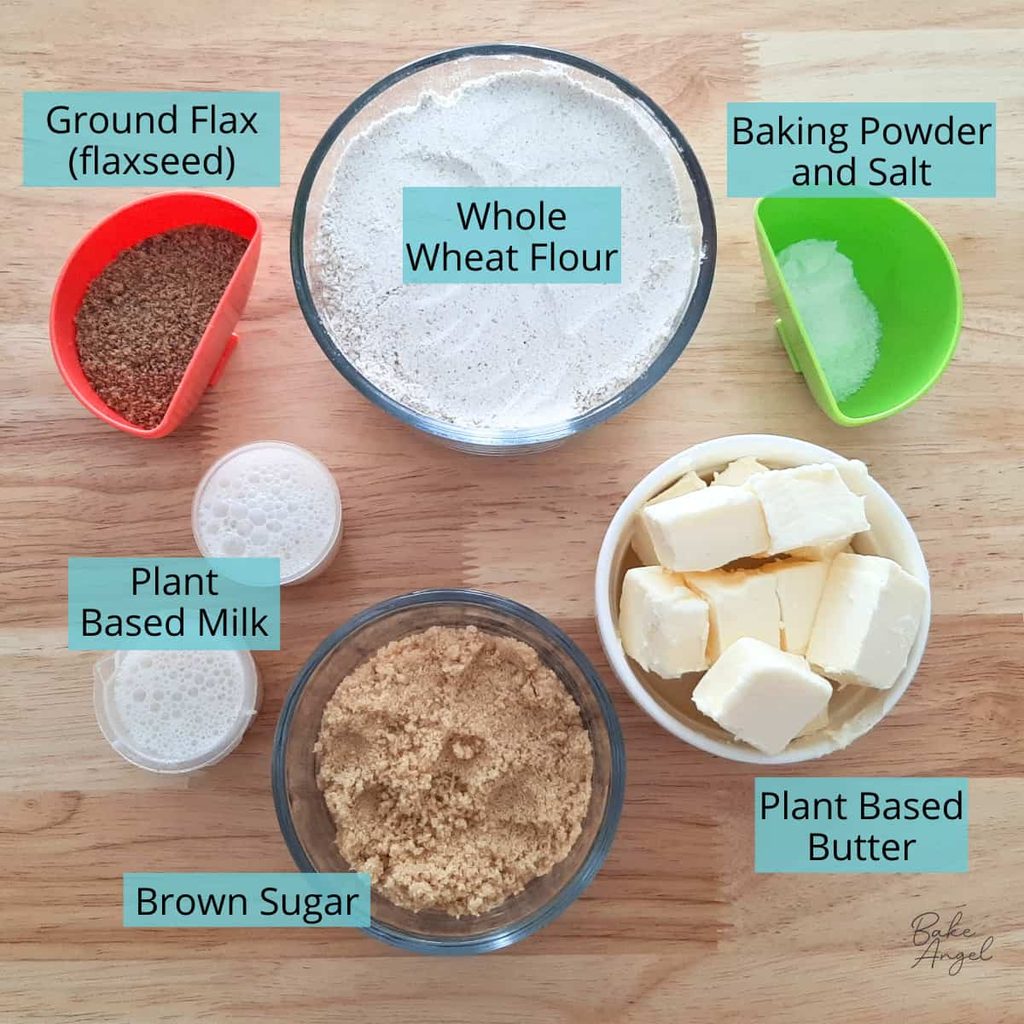
Whole Wheat Flour
Whole wheat flour gives these digestive biscuits their classic flavour and texture. If you’re making the gluten-free version, use your favourite gluten-free flour blend that is suitable for baking.
Baking Powder and Salt
The baking powder gives the biscuits a little lift, while the salt balances the sweetness and enhances the overall flavour.
Ground Flax Seed
Ground flax replaces the wheat germ traditionally used in digestive biscuits. It also adds a lovely little bit of texture throughout the finished biscuits.
Plant-Based Butter
Use a firm plant-based butter or baking block rather than a soft spread if possible. This helps give the biscuits their crisp, crumbly texture.
Brown Sugar
Brown sugar adds sweetness while also giving the biscuits their lovely golden colour and slightly caramelised flavour.
Plant-Based Milk
You’ll only need a small amount of plant-based milk to bring the dough together. Start with less and add more as needed because the exact amount can vary depending on your flour and the type of plant-based butter you’re using.
How To Make Dairy-Free Digestive Biscuits
1. Make the biscuit dough
Add the whole wheat flour and ground flax seed to a large mixing bowl.
Add the plant-based butter, brown sugar, baking powder and salt.
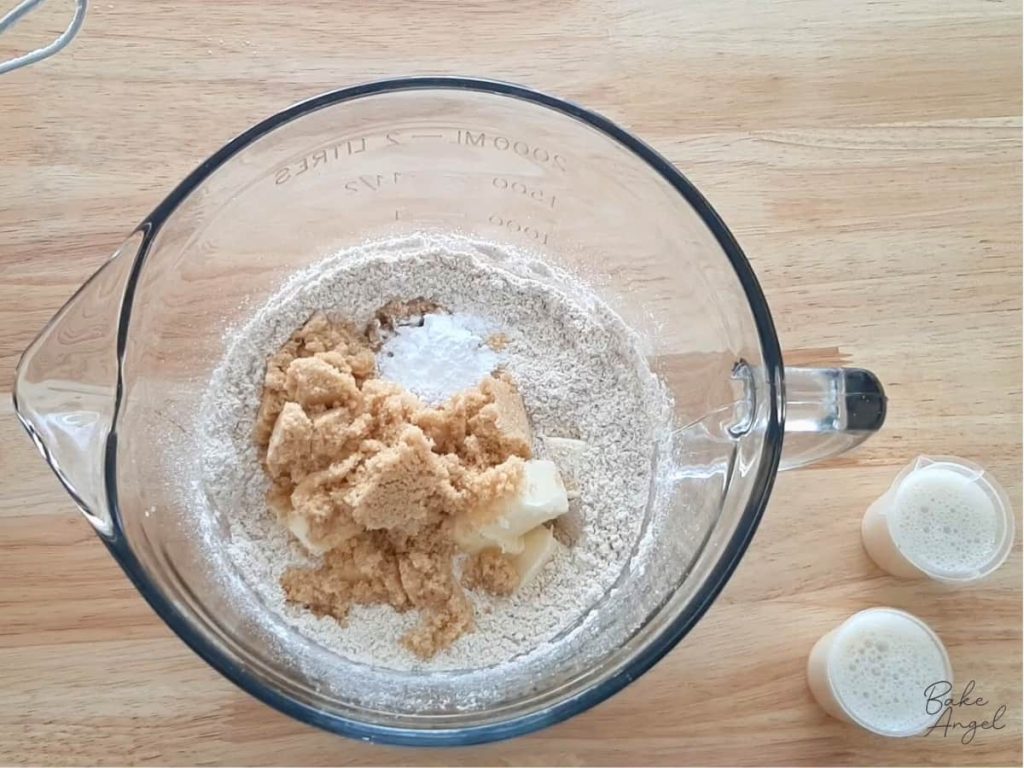
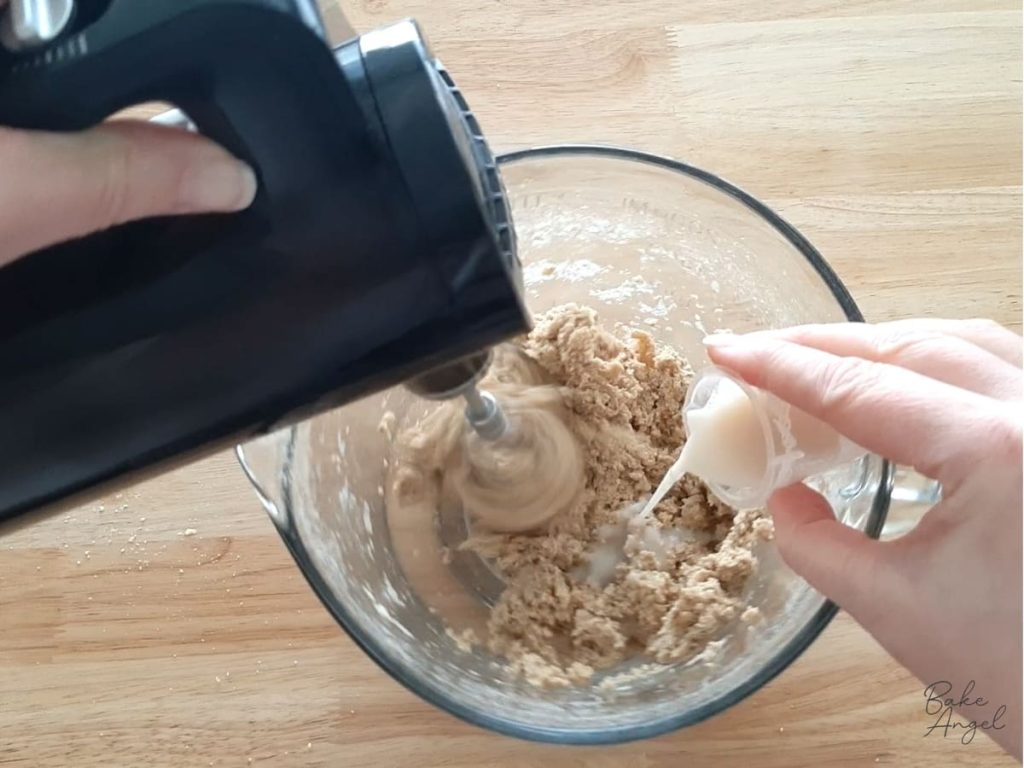
Using a hand mixer or stand mixer, mix everything together until it resembles fine breadcrumbs.
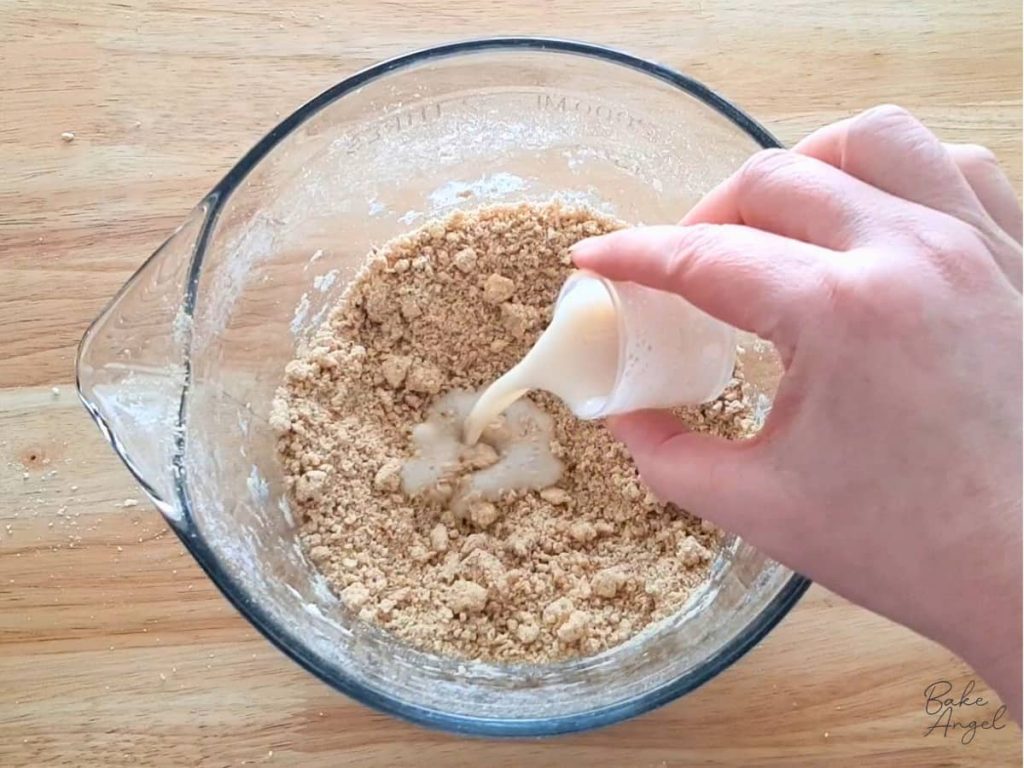
Add the plant-based milk gradually, mixing until the dough comes together and you can form it into a workable ball.
2. Chill the dough
Turn the dough out onto a lightly floured surface and knead it very briefly, just until it comes together.
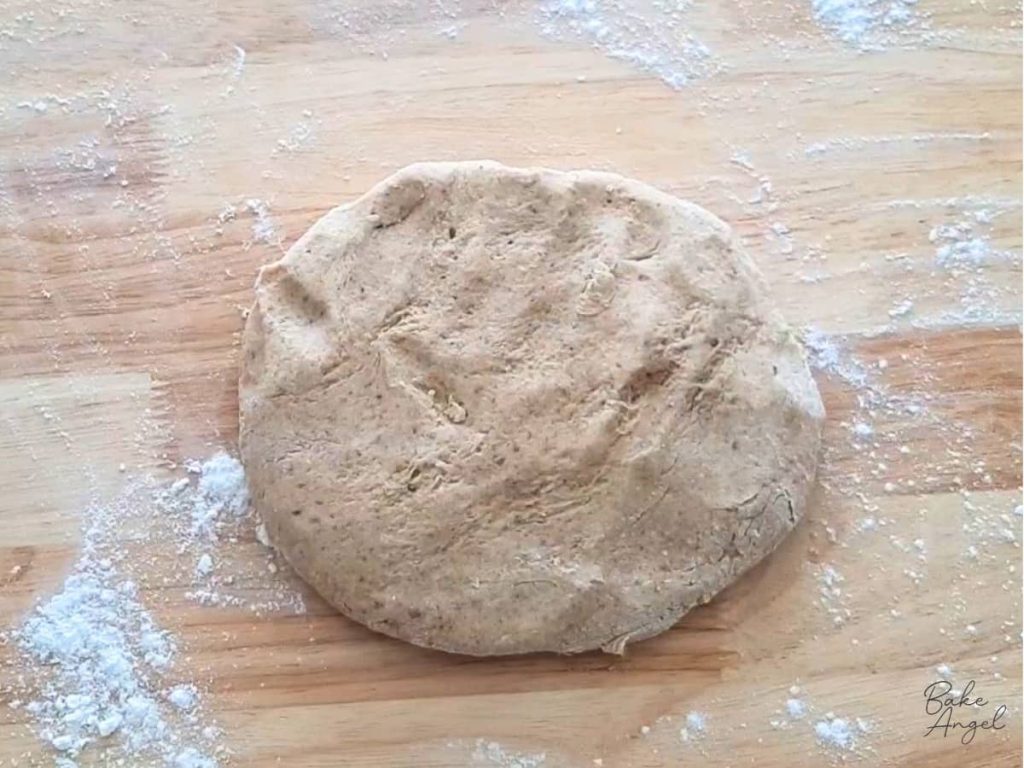
Shape it into a flat disc, wrap it in plastic wrap and place it in the fridge to chill for 20 minutes.
This short chill helps make the dough easier to roll and also helps prevent the biscuits from spreading in the oven.
3. Roll and cut the biscuits
I recommend rolling the dough between two sheets of parchment paper. This makes it much easier to work with and prevents the dough from sticking to your rolling pin or work surface.
Roll the dough to an even thickness. I use two paint stirrers as simple rolling guides to make sure my dough is the same depth all the way across.
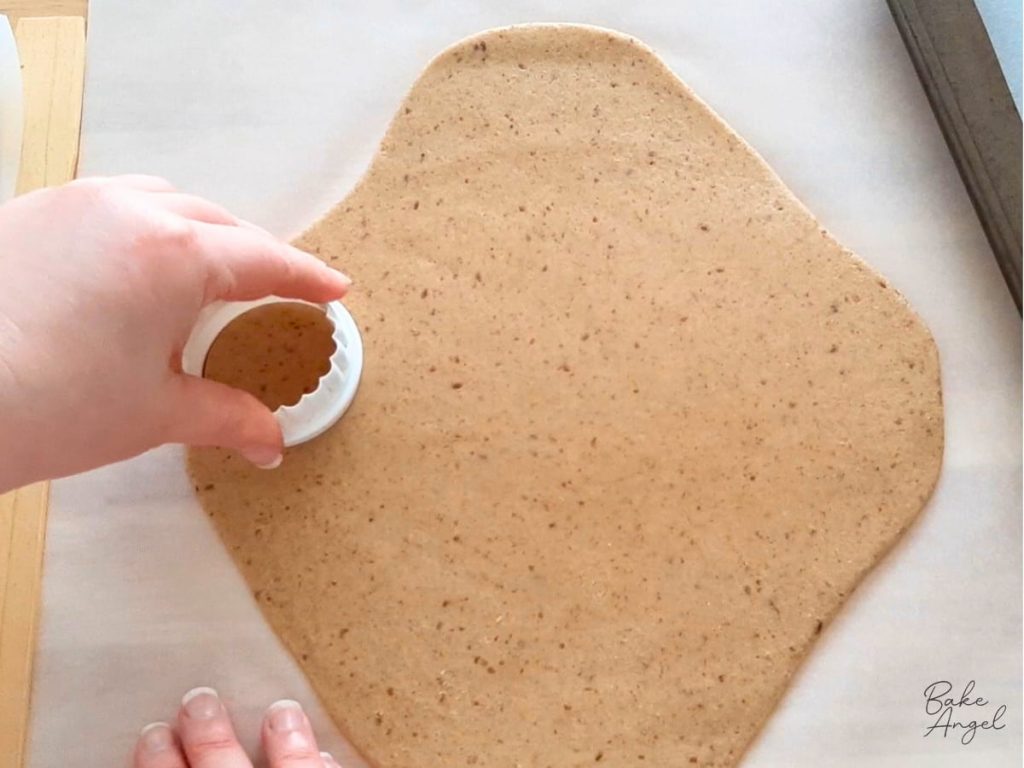
Use a round cookie cutter approximately 5 cm (2 inches) in diameter to cut out the biscuits.
Transfer the biscuits to a lined baking tray, then gather the leftover dough, roll it out again and continue cutting until you’ve used all of the dough.
You should get approximately 16 digestive biscuits.
Place the tray back in the fridge and chill the cut biscuits for another 20 minutes.
4. Add the classic digestive biscuit pattern
Preheat your oven to 375°F / 170°C fan.
Once the biscuits have chilled, use a fork to prick holes across the surface of each one.
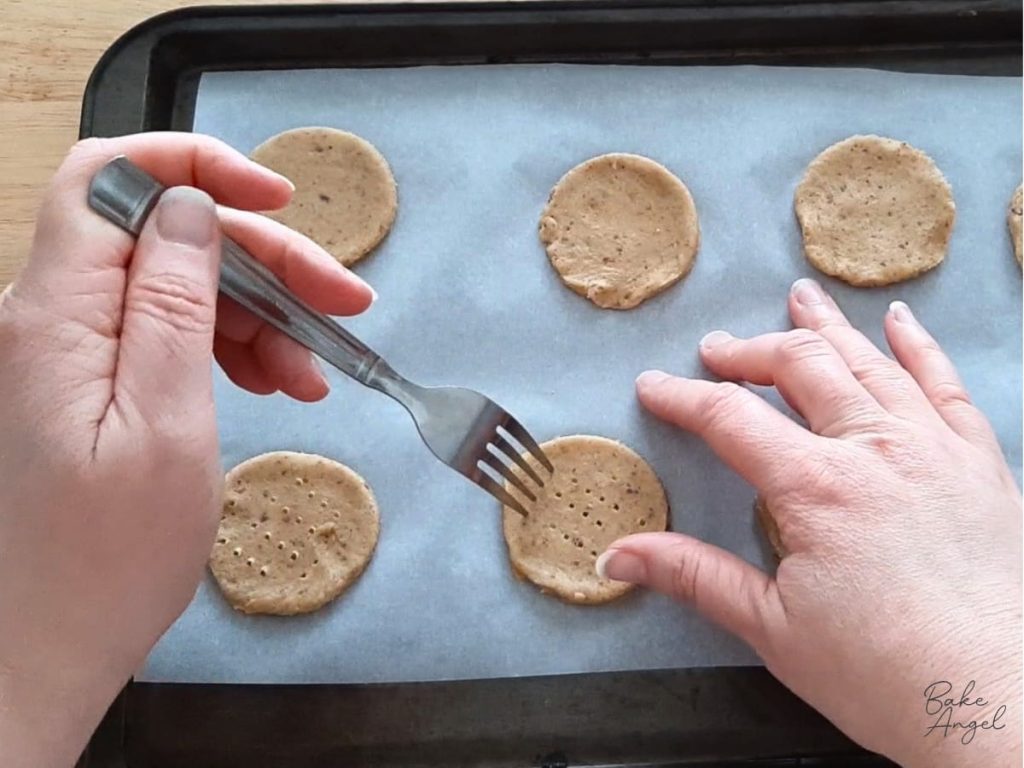
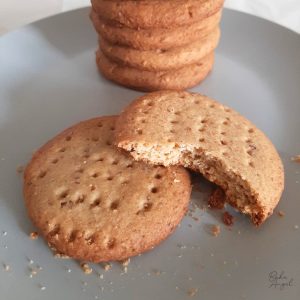
Traditionally, digestive biscuits have a more decorative pattern on top, and you can absolutely use a biscuit press if you have one. But honestly, a fork works perfectly well, and there’s no need to buy a special tool just for this recipe.
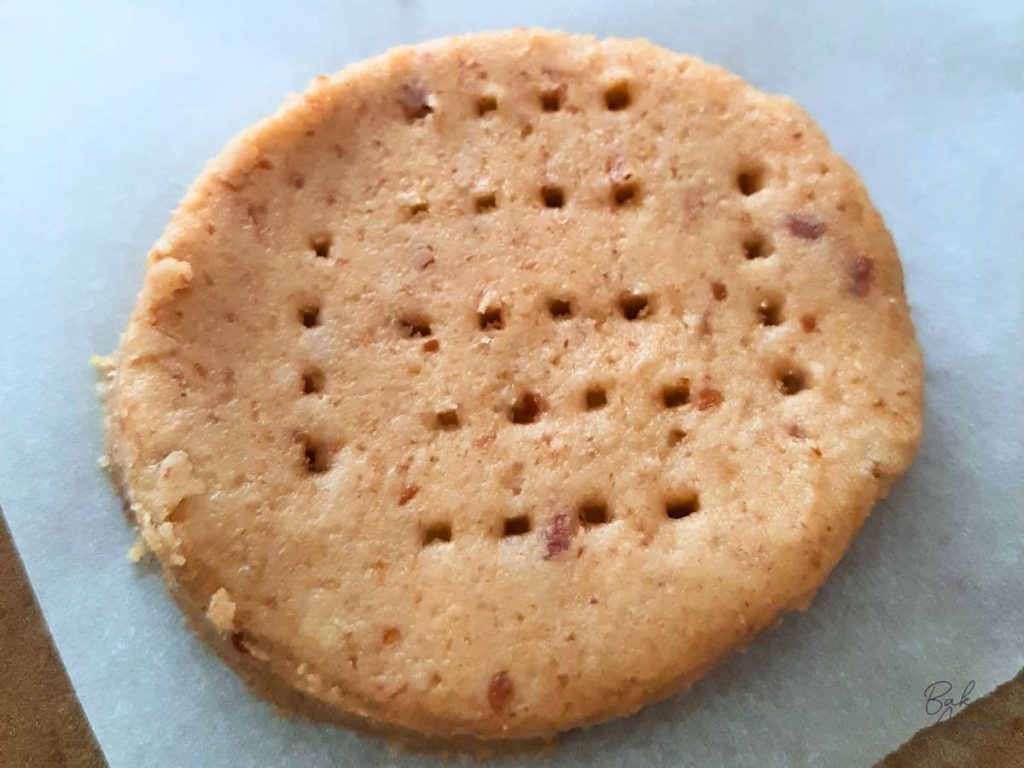
The holes also help prevent the biscuits from spreading too much while they bake.
5. Bake
Bake the chilled biscuits for approximately 15-20 minutes, until they’re lightly golden.
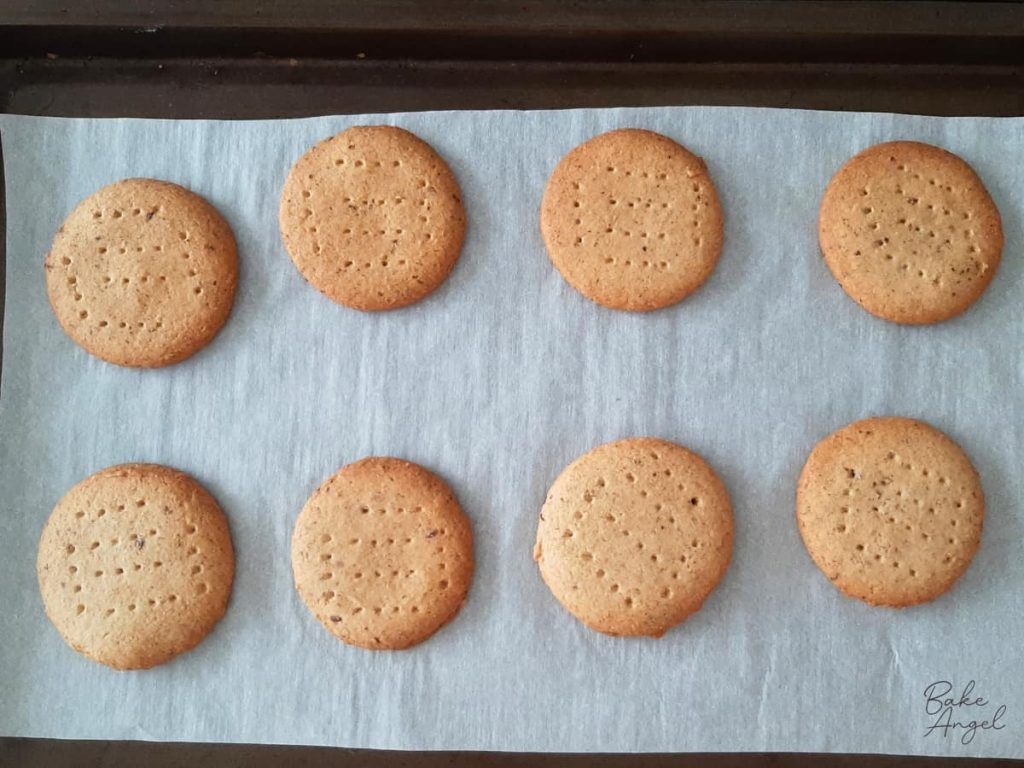
Leave them on the baking tray for about 5 minutes, then transfer them to a cooling rack to cool completely.
They’ll firm up as they cool, so don’t worry if they seem slightly soft when they first come out of the oven.
Tips for Making Digestive Biscuits
Roll the dough evenly.
Using rolling guides makes this much easier and means your biscuits will bake at the same rate.
Don’t skip the chilling time.
There are two short chilling stages in this recipe. They help make the dough easier to handle and help the biscuits retain their shape while baking.
Add the milk gradually.
You may not need exactly the same amount every time. Add enough to bring the dough together without making it sticky.
Use ground flax seed.
Whole flax seeds won’t give you the same result, so make sure you’re using the ground version.
Don’t overbake them.
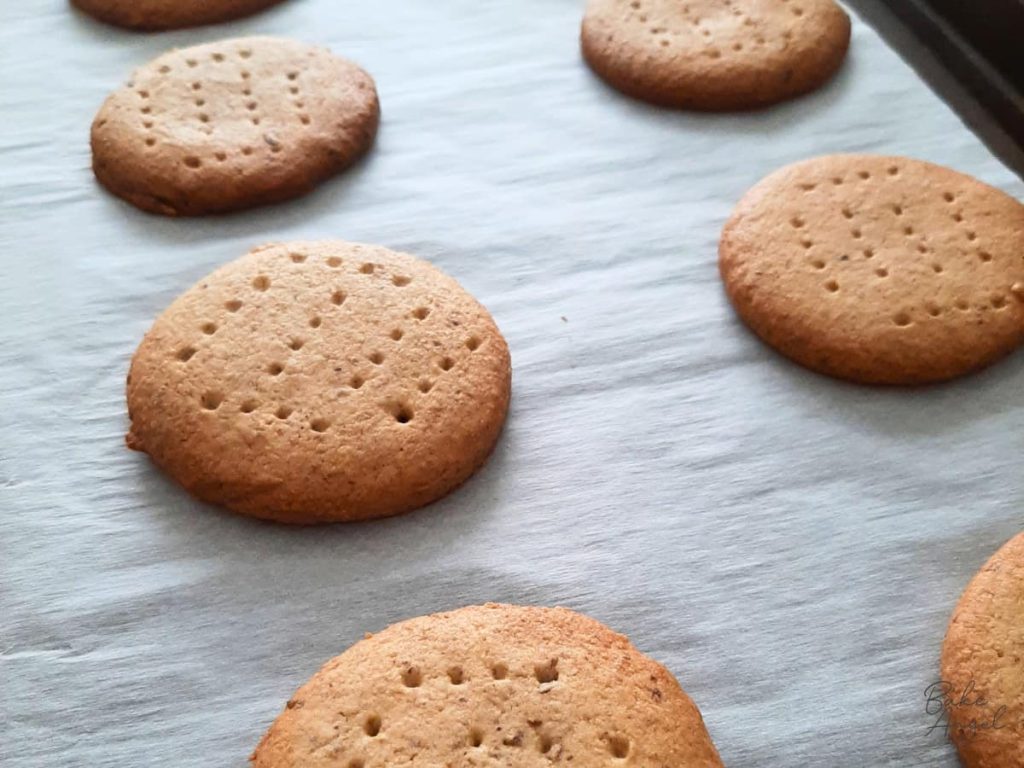
You’re looking for a lovely light golden colour. The biscuits will continue to firm up as they cool.
How To Store Digestive Biscuits
Once completely cool, store your digestive biscuits in an airtight container at room temperature.
They’ll keep well for approximately 1 week.
You can also freeze them to save some for later. Let them cool completely before freezing, then thaw at room temperature when you’re ready to enjoy them.
Can I Make These Digestive Biscuits Gluten-Free?
Yes! You can adapt this recipe using a gluten-free flour blend suitable for baking. As gluten-free flours vary in how they absorb liquid, add the plant-based milk gradually until you have a workable dough.
The texture may differ slightly from the whole wheat version. If you’re baking for someone with coeliac disease, check that all ingredients are suitable and avoid cross-contact with gluten-containing ingredients and equipment.
What Can I Use Digestive Biscuits For?
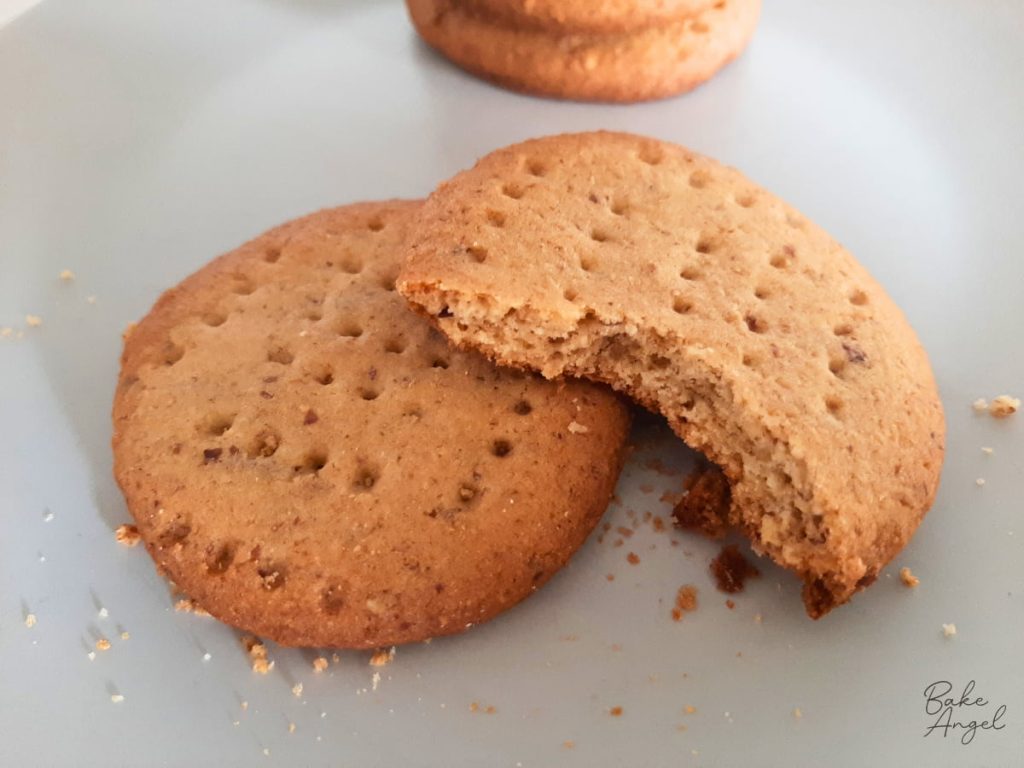
Of course, my favourite way to eat these is simply with a cup of tea or coffee. They’re made for dunking!
But you can also use them in other desserts and treats. They work particularly well for:
- Homemade s’mores
- Biscuit bases for cheesecakes and other desserts
- Dessert crumbs and toppings
- Enjoying with hot chocolate
- An easy afternoon tea biscuit
And yes, I know using digestive biscuits for s’mores might be a little controversial, but trust me. They work really well with homemade marshmallows!
Digestive Biscuit Questions
Traditional digestive biscuits aren’t necessarily dairy-free, so always check the ingredients if you’re buying them from the store. This homemade version uses plant-based butter and plant-based milk, making it completely dairy-free.
Yes. This recipe is vegan as written and doesn’t contain any eggs or dairy.
I recommend using ground flax seed for this recipe. Ground flax incorporates much more easily into the dough and gives you a better texture.
Yes. Any unsweetened plant-based milk should work well in this recipe. You’ll only need a small amount, so use whatever you already have available.
Yes. You can prepare the dough and keep it chilled until you’re ready to roll and bake. Just make sure it is well wrapped so that it doesn’t dry out.
This recipe makes approximately 16 digestive biscuits when using a 5 cm (2 inch) round cookie cutter.
Yes. Once completely cooled, the baked biscuits can be frozen and thawed at room temperature when you’re ready to enjoy them.
More British Classic Recipes
If you’re looking for more classic British recipes to add to your home baking collection, take a look at these favourites:
- Victoria Sponge Cake – a classic British sandwich cake filled with strawberry jam and silky coconut cream
- Mini Victoria Sponge Cakes – individual versions of this much-loved British classic
- Cherry Bakewell Tarts – a delicious twist on the classic British bake
- Garibaldi Biscuits – a classic British biscuit made with sweet currants
- Welsh Cakes – a traditional Welsh favourite, perfect with a cup of tea
- Coconut Ice – a nostalgic British sweet that’s simple to make
Or check out my full recipe collection where you’ll find plenty of everyday baking recipes made with simple ingredients, including dairy-free, egg-free, vegan and gluten-free options.
Enjoy!

Dairy-Free Digestive Biscuits
Angela’s Top Tip
Weigh your dry ingredients in grams with a scale for best results!
Ingredients
- 2 tbsp Ground Flax Seed
- 170 grams Whole Wheat Flour
- 110 gramps Plant Based Butter (unsalted)
- 75 grams Brown Sugar
- ½ tsp Baking Powder
- 1 tsp Salt
- 4 tbsp Plant Based Milk
Instructions
- Make the dough: Add the ground flax seed, whole wheat flour, plant-based butter, brown sugar, baking powder and salt to a large mixing bowl. Using a hand mixer or stand mixer, mix until the mixture resembles fine breadcrumbs.
- Gradually add the plant-based milk, mixing until a workable dough forms. You may not need the full amount.
- Turn the dough out onto a lightly floured surface and knead briefly until it comes together. Shape into a flat disc. Wrap the dough in plastic wrap and chill in the fridge for 20 minutes.
- Roll the dough: Place the chilled dough between two sheets of parchment paper and roll it out evenly. Use a round cookie cutter approximately 5 cm (2 inches) in diameter to cut out the biscuits. Transfer them to a lined baking tray.
- Gather the remaining dough, roll it out again and continue cutting until all the dough has been used. You should get approximately 16 biscuits.
- Place the cut biscuits back in the fridge to chill for another 20 minutes.
- Bake: Preheat your oven to 375°F / 170°C fan. Use a fork to prick holes across the top of each biscuit. This gives them their classic digestive biscuit appearance and helps prevent spreading.
- Bake for 15-20 minutes, until the biscuits are lightly golden.
- Leave the biscuits on the baking tray for 5 minutes, then transfer them to a cooling rack to cool completely. They will firm up as they cool.
Video
Notes
- Flax seed: Traditional digestive biscuits are made with wheat germ. Ground flax seed makes an easy substitute and is readily available in most grocery stores. Make sure you use ground flax rather than whole flax seeds.
- Gluten-free: Replace the whole wheat flour with a suitable gluten-free flour blend. Check that all other ingredients are certified gluten-free if required.
- Plant-based milk: Any unsweetened plant-based milk should work. Add it gradually because the exact amount needed can vary.
- Rolling: I recommend rolling the dough between parchment paper to prevent sticking. Using rolling guides will also help you achieve an even thickness.
- Storage: Store completely cooled biscuits in an airtight container at room temperature for up to 1 week. They can also be frozen.




Leave a Reply